Canon S9000 Photo Application Guide(Mac) - Page 105
Details, Detailed Setting, Special Effects, Vivid Photo, Photo Optimizer PRO, box, click
 |
View all Canon S9000 manuals
Add to My Manuals
Save this manual to your list of manuals |
Page 105 highlights
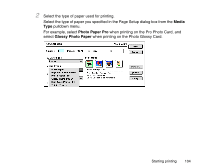
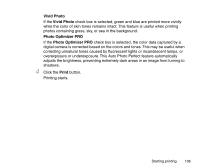
3 Specify a print mode. Normally, you should choose the Photo option when printing photos. If you click the Manual button, the Details button becomes active as shown below: Click the Details button to display the Detailed Setting dialog box. In this dialog box, click the Special Effects button on the left side to activate photo color correction features such as Vivid Photo and Photo Optimizer PRO. Starting printing 105
-
 1
1 -
2
-
3
-
4
-
5
-
6
-
7
-
8
-
9
-
10
-
11
-
12
-
13
-
14
-
15
-
16
-
17
-
18
-
19
-
20
-
21
-
22
-
23
-
24
-
25
-
26
-
27
-
28
-
29
-
30
-
31
-
32
-
33
-
34
-
35
-
36
-
37
-
38
-
39
-
40
-
41
-
42
-
43
-
44
-
45
-
46
-
47
-
48
-
49
-
50
-
51
-
52
-
53
-
54
-
55
-
56
-
57
-
58
-
59
-
60
-
61
-
62
-
63
-
64
-
65
-
66
-
67
-
68
-
69
-
70
-
71
-
72
-
73
-
74
-
75
-
76
-
77
-
78
-
79
-
80
-
81
-
82
-
83
-
84
-
85
-
86
-
87
-
88
-
89
-
90
-
91
-
92
-
93
-
94
-
95
-
96
-
97
-
98
-
99
-
 100
100 -
 101
101 -
 102
102 -
 103
103 -
 104
104 -
 105
105 -
 106
106 -
 107
107 -
 108
108 -
 109
109 -
 110
110 -
111
-
112
-
113
-
114
-
115
-
116
-
117
-
118
-
119
-
120
-
121
-
122
-
123
-
124
-
125
-
126
-
127
-
128
-
129
-
130
-
131
-
132
-
133
-
134
-
135
-
136
-
137
-
138
-
139
-
140
 |
 |
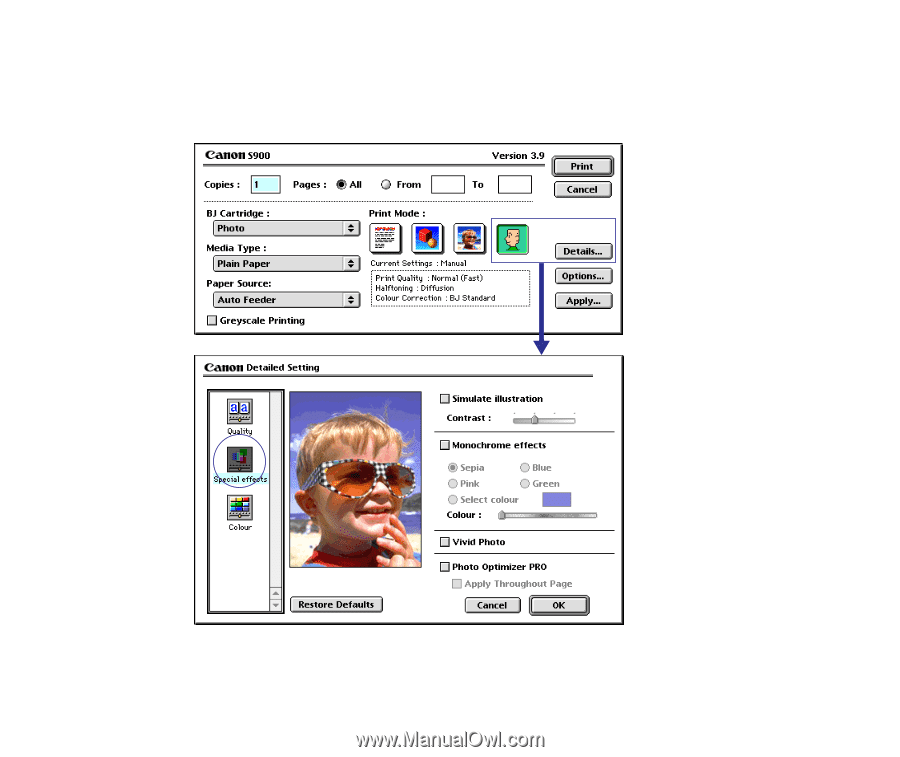
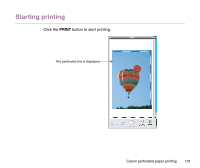
Starting printing
105
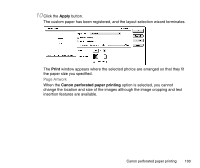
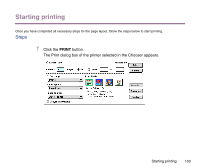
3
Specify a print mode.
Normally, you should choose the Photo option when printing photos.
If you click the Manual button, the
Details
button becomes active as shown below:
Click the
Details
button to display the
Detailed Setting
dialog box. In this dialog
box, click the
Special Effects
button on the left side to activate photo color
correction features such as
Vivid Photo
and
Photo Optimizer PRO
.