Canon S9000 Photo Application Guide(Mac) - Page 94
Print, Tiled photo printing, PRINT - driver windows 7
 |
View all Canon S9000 manuals
Add to My Manuals
Save this manual to your list of manuals |
Page 94 highlights
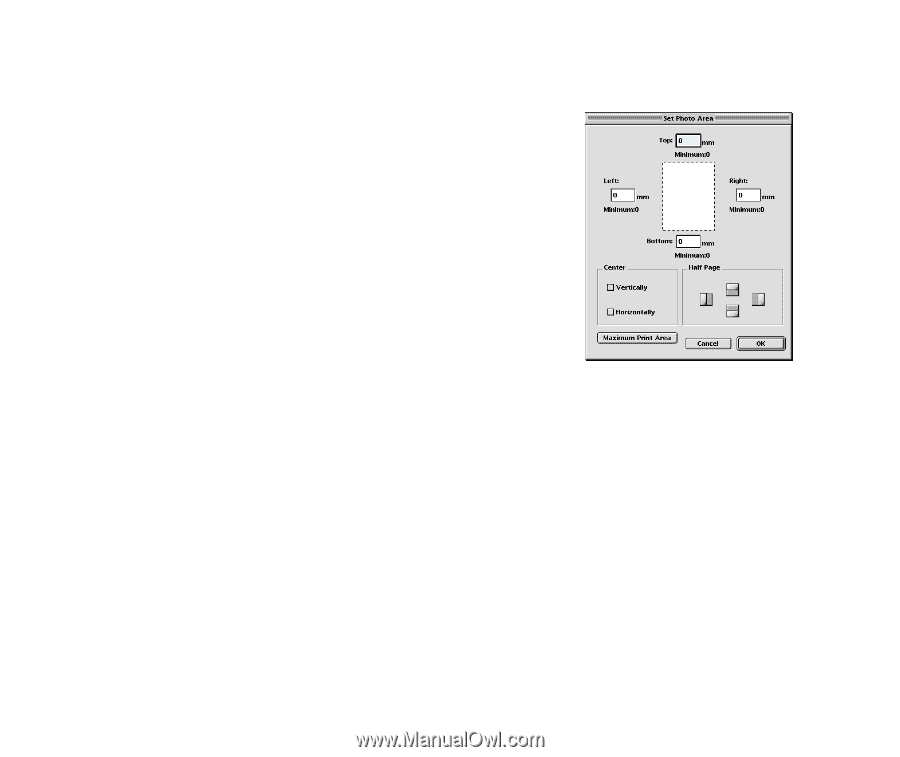
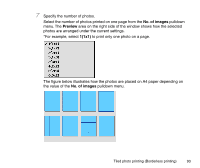
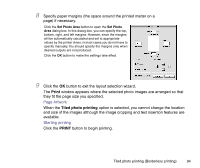
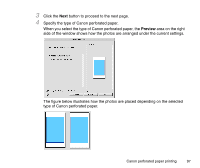
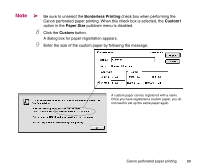
8 Specify paper margins (the space around the printed matter on a page) if necessary. Click the Set Photo Area button to open the Set Photo Area dialog box. In this dialog box, you can specify the top, bottom, right, and left margins. However, since the margins will be automatically calculated and set to appropriate values by the printer driver, in most cases you do not have to specify manually. You should specify the margins only when desired outputs are not produced. Click the OK button to make the settings take effect. 9 Click the OK button to exit the layout selection wizard. The Print window appears where the selected photo images are arranged so that they fit the page size you specified. Page Artwork When the Tiled photo printing option is selected, you cannot change the location and size of the images although the image cropping and text insertion features are available. Starting printing Click the PRINT button to begin printing. Tiled photo printing (Borderless printing) 94
-
 1
1 -
2
-
3
-
4
-
5
-
6
-
7
-
8
-
9
-
10
-
11
-
12
-
13
-
14
-
15
-
16
-
17
-
18
-
19
-
20
-
21
-
22
-
23
-
24
-
25
-
26
-
27
-
28
-
29
-
30
-
31
-
32
-
33
-
34
-
35
-
36
-
37
-
38
-
39
-
40
-
41
-
42
-
43
-
44
-
45
-
46
-
47
-
48
-
49
-
50
-
51
-
52
-
53
-
54
-
55
-
56
-
57
-
58
-
59
-
60
-
61
-
62
-
63
-
64
-
65
-
66
-
67
-
68
-
69
-
70
-
71
-
72
-
73
-
74
-
75
-
76
-
77
-
78
-
79
-
80
-
81
-
82
-
83
-
84
-
85
-
86
-
87
-
88
-
 89
89 -
 90
90 -
 91
91 -
 92
92 -
 93
93 -
 94
94 -
 95
95 -
 96
96 -
 97
97 -
 98
98 -
 99
99 -
100
-
101
-
102
-
103
-
104
-
105
-
106
-
107
-
108
-
109
-
110
-
111
-
112
-
113
-
114
-
115
-
116
-
117
-
118
-
119
-
120
-
121
-
122
-
123
-
124
-
125
-
126
-
127
-
128
-
129
-
130
-
131
-
132
-
133
-
134
-
135
-
136
-
137
-
138
-
139
-
140
 |
 |