Epson PhotoPC 3000Z User Manual - Page 106
Next, Image Expert starts the QuickTime Player, Image Expert starts the Adobe Acrobat Reader
 |
View all Epson PhotoPC 3000Z manuals
Add to My Manuals
Save this manual to your list of manuals |
Page 106 highlights
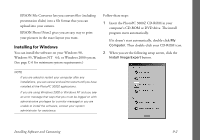
3 Follow the instructions on the screen to install Image Expert. NOTE Make sure you check Install the Adobe Acrobat Reader if you don't already have it on your system. You use this program to read your electronic Image Expert User's Guide. 4 If you checked Install the Adobe Acrobat Reader, Image Expert starts the Adobe Acrobat Reader installation. Follow the steps on the screen. 5 Next, Image Expert starts the QuickTime Player installation. Follow the steps on the screen. When you see a screen asking you for a registration number, leave the space blank and click Next. After installation is complete, you return to the Setup screen. 6 Click the Install EPSON Photo!3 button. Follow the instructions on the screen to install EPSON Photo!3. 7 When you return to the Setup screen, click the Install EPSON File Converter button. Follow the instructions on the screen to install EPSON File Converter. 8 When you return to the Setup screen, click the Install EPSON Photo! Print2 button. Follow the instructions on the screen to install EPSON Photo! Print2. 9 When installation is complete, click the Register Image Expert Software button and follow the steps on the screen to fill out and send or print the registration form. When you are finished, you return to the Setup screen. 10 Click the Register EPSON PhotoPC 3000Z Digital Camera button and follow the instructions on the screen to register your camera. 11 When you are finished installing your software and registering, click Exit. 12 Restart your computer. Installing Software and Connecting 9-3
-
 1
1 -
2
-
3
-
4
-
5
-
6
-
7
-
8
-
9
-
10
-
11
-
12
-
13
-
14
-
15
-
16
-
17
-
18
-
19
-
20
-
21
-
22
-
23
-
24
-
25
-
26
-
27
-
28
-
29
-
30
-
31
-
32
-
33
-
34
-
35
-
36
-
37
-
38
-
39
-
40
-
41
-
42
-
43
-
44
-
45
-
46
-
47
-
48
-
49
-
50
-
51
-
52
-
53
-
54
-
55
-
56
-
57
-
58
-
59
-
60
-
61
-
62
-
63
-
64
-
65
-
66
-
67
-
68
-
69
-
70
-
71
-
72
-
73
-
74
-
75
-
76
-
77
-
78
-
79
-
80
-
81
-
82
-
83
-
84
-
85
-
86
-
87
-
88
-
89
-
90
-
91
-
92
-
93
-
94
-
95
-
96
-
97
-
98
-
99
-
100
-
 101
101 -
 102
102 -
 103
103 -
 104
104 -
 105
105 -
 106
106 -
 107
107 -
 108
108 -
 109
109 -
 110
110 -
 111
111 -
112
-
113
-
114
-
115
-
116
-
117
-
118
-
119
-
120
-
121
-
122
-
123
-
124
-
125
-
126
-
127
-
128
-
129
-
130
-
131
-
132
-
133
-
134
-
135
-
136
-
137
-
138
-
139
-
140
-
141
-
142
-
143
-
144
-
145
-
146
-
147
-
148
-
149
-
150
-
151
-
152
-
153
-
154
-
155
-
156
-
157
-
158
-
159
-
160
-
161
-
162
-
163
-
164
-
165
-
166
-
167
-
168
-
169
-
170
-
171
-
172
-
173
-
174
-
175
-
176
-
177
-
178
-
179
-
180
-
181
-
182
-
183
-
184
-
185
-
186
-
187
-
188
-
189
-
190
-
191
-
192
-
193
-
194
-
195
-
196
-
197
-
198
-
199
-
200
-
201
-
202
-
203
-
204
-
205
-
206
-
207
-
208
-
209
-
210
-
211
-
212
-
213
-
214
-
215
-
216
-
217
-
218
-
219
-
220
-
221
-
222
-
223
-
224
 |
 |
