Epson T3270 User Manual - Page 54
Taking Up the Paper Printable Side In, Setup Guide
 |
View all Epson T3270 manuals
Add to My Manuals
Save this manual to your list of manuals |
Page 54 highlights
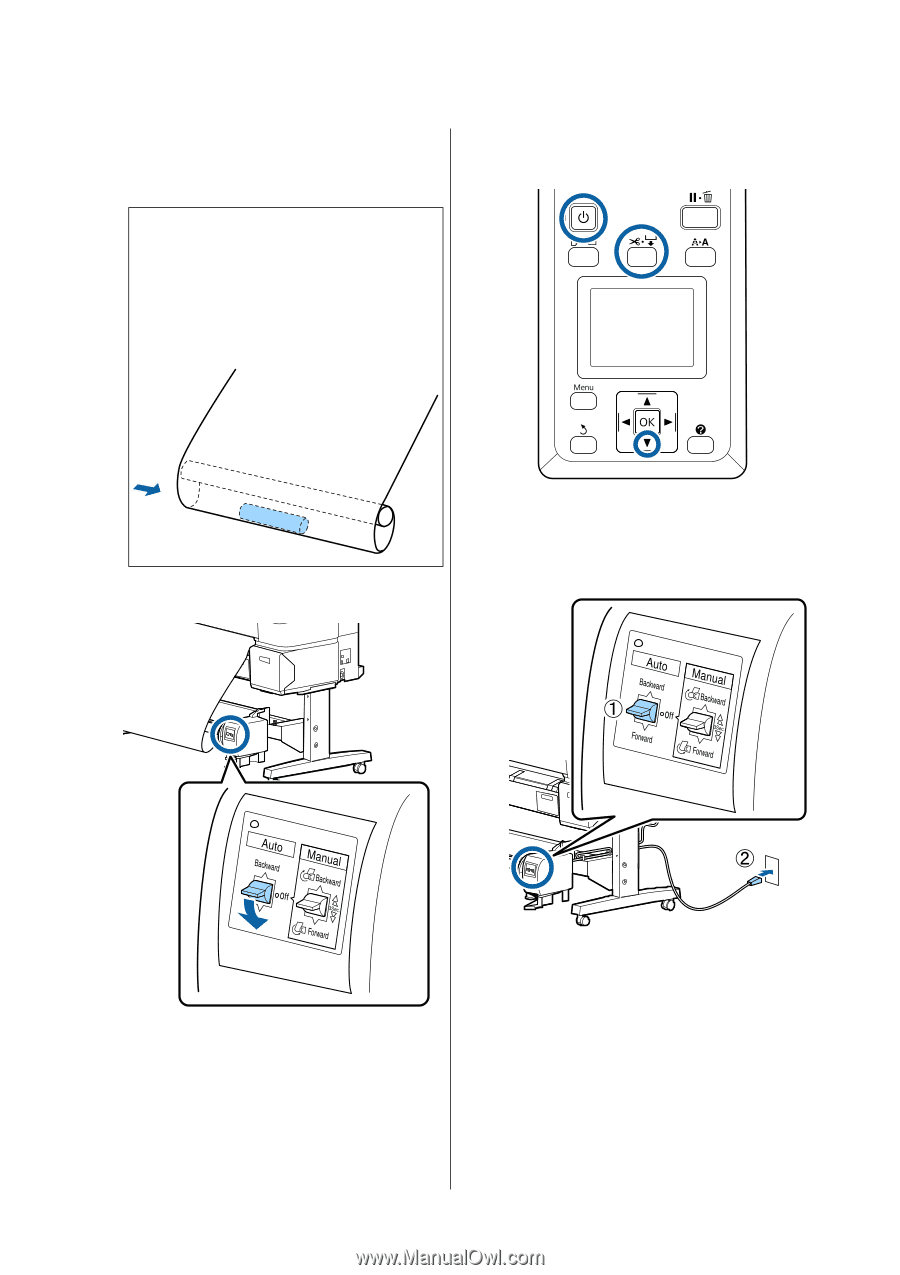
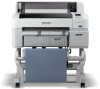
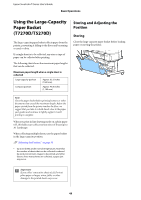
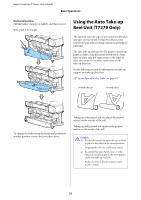
Epson SureColor T-Series User's Guide Basic Operations After wrapping the paper around the core, ensure that paper around the core is sufficiently loose. Buttons that are used in the following settings Note: The tensioner supplied with the auto take-up reel unit is used with some types of paper. Slacken the paper and insert the tensioner near the center of the paper as shown. See the following section for information on paper that requires the tensioner. U"Epson Special Media Table" on page 187 8 Set the Auto switch to Forward. 1 Set the auto take-up reel unit Auto switch to Off. Plug the power cord into an outlet and confirm that the power lamp lights. Taking Up the Paper Printable Side In For information on installing the roll core, see the Setup Guide for the optional auto take-up reel unit. 2 Turn on the printer by pressing the P button. 3 Check that the roll paper is correctly loaded in the printer. 4 Press the ) button on the control panel. Keep the d button pressed until the end of the roll reaches the roll core. 5 Tape the end to the roll core. 54
-
 1
1 -
2
-
3
-
4
-
5
-
6
-
7
-
8
-
9
-
10
-
11
-
12
-
13
-
14
-
15
-
16
-
17
-
18
-
19
-
20
-
21
-
22
-
23
-
24
-
25
-
26
-
27
-
28
-
29
-
30
-
31
-
32
-
33
-
34
-
35
-
36
-
37
-
38
-
39
-
40
-
41
-
42
-
43
-
44
-
45
-
46
-
47
-
48
-
 49
49 -
 50
50 -
 51
51 -
 52
52 -
 53
53 -
 54
54 -
 55
55 -
 56
56 -
 57
57 -
 58
58 -
 59
59 -
60
-
61
-
62
-
63
-
64
-
65
-
66
-
67
-
68
-
69
-
70
-
71
-
72
-
73
-
74
-
75
-
76
-
77
-
78
-
79
-
80
-
81
-
82
-
83
-
84
-
85
-
86
-
87
-
88
-
89
-
90
-
91
-
92
-
93
-
94
-
95
-
96
-
97
-
98
-
99
-
100
-
101
-
102
-
103
-
104
-
105
-
106
-
107
-
108
-
109
-
110
-
111
-
112
-
113
-
114
-
115
-
116
-
117
-
118
-
119
-
120
-
121
-
122
-
123
-
124
-
125
-
126
-
127
-
128
-
129
-
130
-
131
-
132
-
133
-
134
-
135
-
136
-
137
-
138
-
139
-
140
-
141
-
142
-
143
-
144
-
145
-
146
-
147
-
148
-
149
-
150
-
151
-
152
-
153
-
154
-
155
-
156
-
157
-
158
-
159
-
160
-
161
-
162
-
163
-
164
-
165
-
166
-
167
-
168
-
169
-
170
-
171
-
172
-
173
-
174
-
175
-
176
-
177
-
178
-
179
-
180
-
181
-
182
-
183
-
184
-
185
-
186
-
187
-
188
-
189
-
190
-
191
-
192
-
193
-
194
-
195
-
196
-
197
-
198
-
199
-
200
-
201
-
202
-
203
-
204
-
205
-
206
-
207
-
208
-
209
-
210
-
211
-
212
-
213
 |
 |