HP Integrity rx2800 rx2800 i2 User Service Guide - Page 107
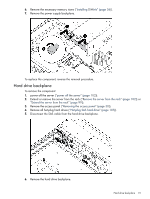
Access panel, Optical drive filler, Extend or remove the server from the rack.
 |
View all HP Integrity rx2800 manuals
Add to My Manuals
Save this manual to your list of manuals |
Page 107 highlights
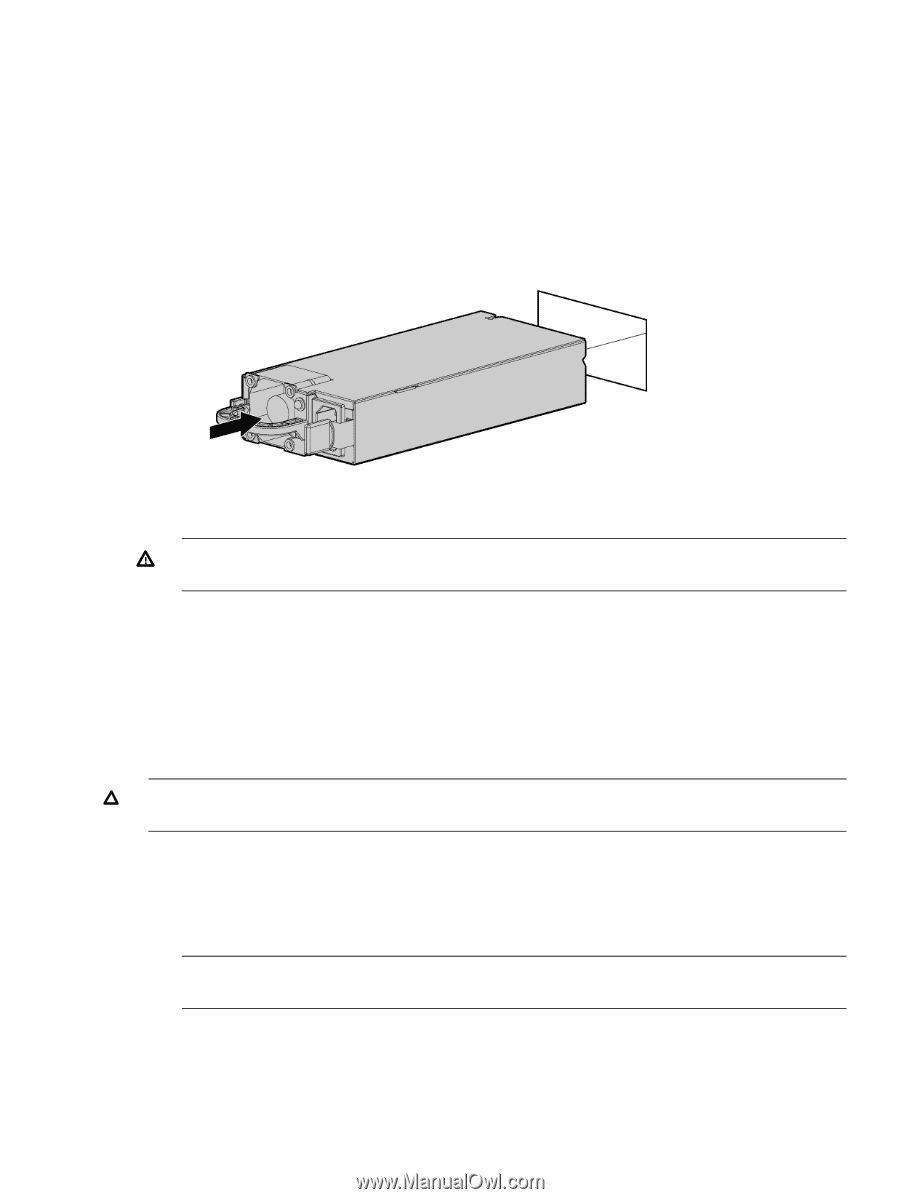
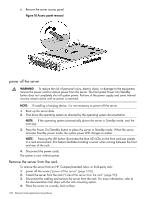
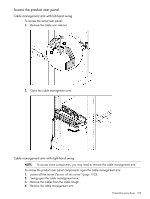
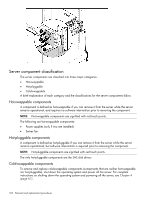
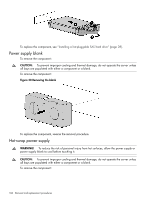
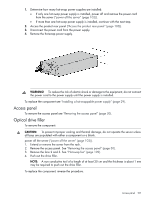
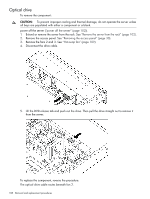
1. Determine how many hot-swap power supplies are installed: • If only one hot-swap power supply is installed, power off and remove the power cord from the server ("power off the server" (page 102)). • If more than one hot-swap power supply is installed, continue with the next step. 2. Access the product rear panel ("Access the product rear panel" (page 103)). 3. Disconnect the power cord from the power supply. 4. Remove the hot-swap power supply. WARNING! To reduce the risk of electric shock or damage to the equipment, do not connect the power cord to the power supply until the power supply is installed. To replace the component see "Installing a hot-swappable power supply" (page 29). Access panel To remove the access panel see "Removing the access panel" (page 30). Optical drive filler To remove the component: CAUTION: To prevent improper cooling and thermal damage, do not operate the server unless all bays are populated with either a component or a blank. power off the server ("power off the server" (page 102)). 1. Extend or remove the server from the rack. 2. Remove the access panel. See "Removing the access panel" (page 30). 3. Remove the fans 2 and 3. See "Hot-swap fan" (page 109). 4. Push out the drive filler. NOTE: A non conductive tool of a length of at least 20 cm and the thickness is about 1 mm may be required to push out the drive filler. To replace the component, reverse the procedure. Access panel 107
-
 1
1 -
2
-
3
-
4
-
5
-
6
-
7
-
8
-
9
-
10
-
11
-
12
-
13
-
14
-
15
-
16
-
17
-
18
-
19
-
20
-
21
-
22
-
23
-
24
-
25
-
26
-
27
-
28
-
29
-
30
-
31
-
32
-
33
-
34
-
35
-
36
-
37
-
38
-
39
-
40
-
41
-
42
-
43
-
44
-
45
-
46
-
47
-
48
-
49
-
50
-
51
-
52
-
53
-
54
-
55
-
56
-
57
-
58
-
59
-
60
-
61
-
62
-
63
-
64
-
65
-
66
-
67
-
68
-
69
-
70
-
71
-
72
-
73
-
74
-
75
-
76
-
77
-
78
-
79
-
80
-
81
-
82
-
83
-
84
-
85
-
86
-
87
-
88
-
89
-
90
-
91
-
92
-
93
-
94
-
95
-
96
-
97
-
98
-
99
-
100
-
101
-
 102
102 -
 103
103 -
 104
104 -
 105
105 -
 106
106 -
 107
107 -
 108
108 -
 109
109 -
 110
110 -
 111
111 -
 112
112 -
113
-
114
-
115
-
116
-
117
-
118
-
119
-
120
-
121
-
122
-
123
-
124
-
125
-
126
-
127
-
128
-
129
-
130
-
131
-
132
-
133
-
134
-
135
-
136
-
137
-
138
-
139
-
140
-
141
-
142
-
143
-
144
-
145
-
146
-
147
-
148
-
149
-
150
-
151
 |
 |