HP Integrity rx2800 rx2800 i2 User Service Guide - Page 61
Installing, booting and shutting down the operating system
 |
View all HP Integrity rx2800 manuals
Add to My Manuals
Save this manual to your list of manuals |
Page 61 highlights
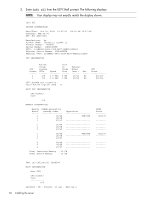
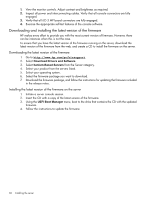
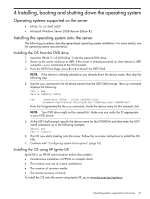
4 Installing, booting and shutting down the operating system Operating systems supported on the server • HP-UX 11i v3 HWE 1009 • Microsoft Windows Server 2008 Itanium Edition R2 Installing the operating system onto the server The following procedures describe generalized operating system installation. For more details, see the operating system documentation. Installing the OS from the DVD drive 1. Insert the HP-UX 11i v3 DVD (Disk 1) into the external DVD drive. 2. Power on the server and boot to UEFI. If the server is already powered on, then reboot to UEFI using the reset command at the UEFI prompt. 3. From the UEFI Front Page, press S or s to launch the UEFI Shell. NOTE: If the device is already selected or you already know the device name, then skip the following step. 4. Use the map command to list all device names from the UEFI Shell prompt. The map command displays the following: fs2:\> map Device mapping table fs6 :Removable CDRom - Alias cd66d0a blk6 PcieRoot(0x30304352)/Pci(0x1D,0x7)/USB(0x3,0x0)/CDROM(0x0) From the list generated by the map command, locate the device name (in this example, fs6) NOTE: Your DVD drive might not be named fs6. Make sure you verify the ID appropriate to your DVD device. 5. At the UEFI shell prompt, specify the device name for the DVD-ROM and then enter the UEFI install command, as in the following example: Shell> fs0: fs6:\> install 6. The OS now starts loading onto the server. Follow the on-screen instructions to install the OS fully. 7. Continue with "Configuring system boot options" (page 62) Installing the OS using HP Ignite-UX Ignite-UX is an HP-UX administration toolset that enables: • Simultaneous installation of HP-UX on multiple clients • The creation and use of custom installations • The creation of recovery media • The remote recovery of clients To install the OS onto the server using Ignite-UX, go to www.hp.com/go/ignite-ux. Operating systems supported on the server 61
-
 1
1 -
2
-
3
-
4
-
5
-
6
-
7
-
8
-
9
-
10
-
11
-
12
-
13
-
14
-
15
-
16
-
17
-
18
-
19
-
20
-
21
-
22
-
23
-
24
-
25
-
26
-
27
-
28
-
29
-
30
-
31
-
32
-
33
-
34
-
35
-
36
-
37
-
38
-
39
-
40
-
41
-
42
-
43
-
44
-
45
-
46
-
47
-
48
-
49
-
50
-
51
-
52
-
53
-
54
-
55
-
 56
56 -
 57
57 -
 58
58 -
 59
59 -
 60
60 -
 61
61 -
 62
62 -
 63
63 -
 64
64 -
 65
65 -
 66
66 -
67
-
68
-
69
-
70
-
71
-
72
-
73
-
74
-
75
-
76
-
77
-
78
-
79
-
80
-
81
-
82
-
83
-
84
-
85
-
86
-
87
-
88
-
89
-
90
-
91
-
92
-
93
-
94
-
95
-
96
-
97
-
98
-
99
-
100
-
101
-
102
-
103
-
104
-
105
-
106
-
107
-
108
-
109
-
110
-
111
-
112
-
113
-
114
-
115
-
116
-
117
-
118
-
119
-
120
-
121
-
122
-
123
-
124
-
125
-
126
-
127
-
128
-
129
-
130
-
131
-
132
-
133
-
134
-
135
-
136
-
137
-
138
-
139
-
140
-
141
-
142
-
143
-
144
-
145
-
146
-
147
-
148
-
149
-
150
-
151
 |
 |