HP Integrity rx2800 rx2800 i2 User Service Guide - Page 31
Removing the PCI riser cage, To replace the component, reverse the removal procedure.
 |
View all HP Integrity rx2800 manuals
Add to My Manuals
Save this manual to your list of manuals |
Page 31 highlights
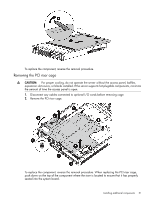
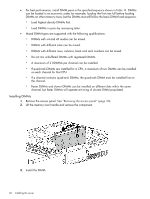
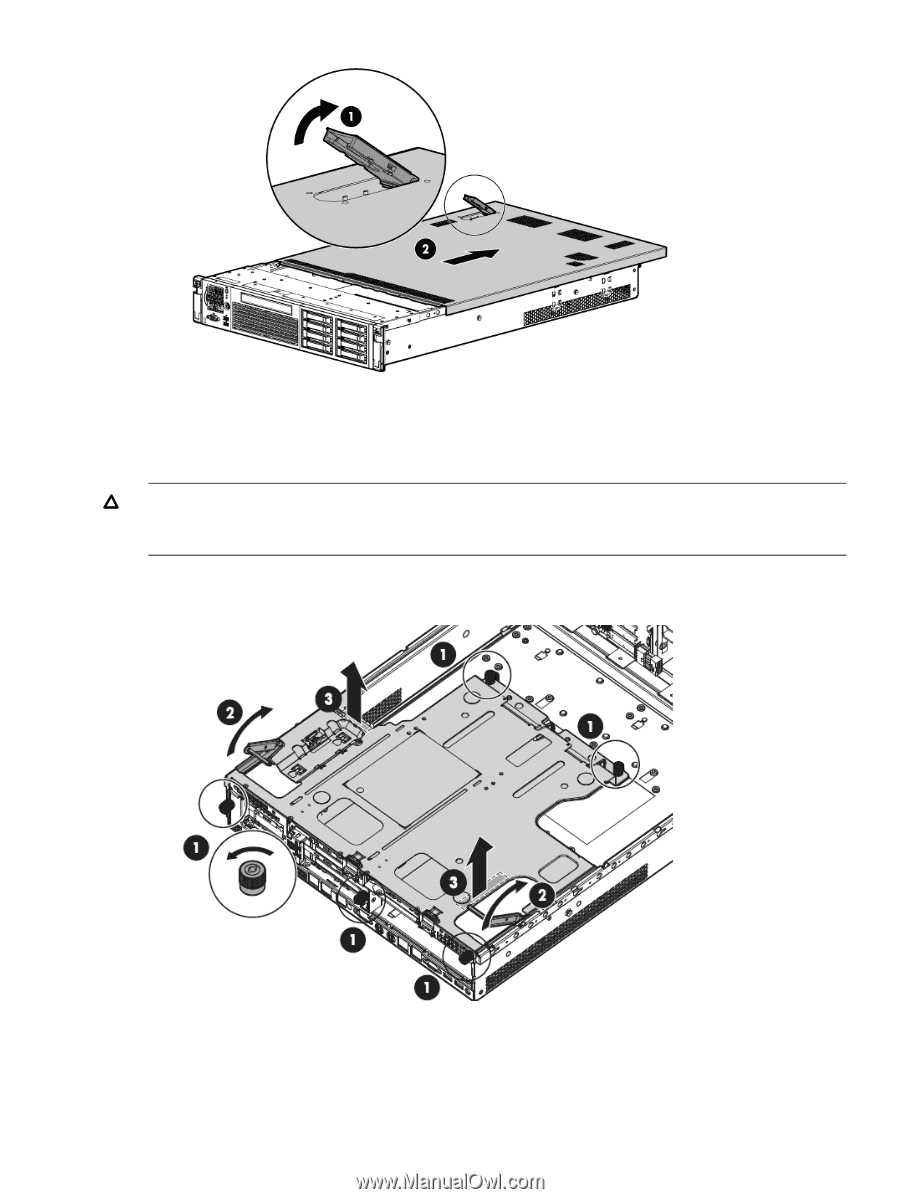
To replace the component, reverse the removal procedure. Removing the PCI riser cage CAUTION: For proper cooling, do not operate the server without the access panel, baffles, expansion slot covers, or blanks installed. If the server supports hot-plugable components, minimize the amount of time the access panel is open. 1. Disconnect any cables connected to optional I/O cards before removing cage. 2. Remove the PCI riser cage. To replace the component, reverse the removal procedure. When replacing the PCI riser cage, push down on the top of the component where the riser is located to ensure that it has properly seated into the system board. Installing additional components 31
-
 1
1 -
2
-
3
-
4
-
5
-
6
-
7
-
8
-
9
-
10
-
11
-
12
-
13
-
14
-
15
-
16
-
17
-
18
-
19
-
20
-
21
-
22
-
23
-
24
-
25
-
 26
26 -
 27
27 -
 28
28 -
 29
29 -
 30
30 -
 31
31 -
 32
32 -
 33
33 -
 34
34 -
 35
35 -
 36
36 -
37
-
38
-
39
-
40
-
41
-
42
-
43
-
44
-
45
-
46
-
47
-
48
-
49
-
50
-
51
-
52
-
53
-
54
-
55
-
56
-
57
-
58
-
59
-
60
-
61
-
62
-
63
-
64
-
65
-
66
-
67
-
68
-
69
-
70
-
71
-
72
-
73
-
74
-
75
-
76
-
77
-
78
-
79
-
80
-
81
-
82
-
83
-
84
-
85
-
86
-
87
-
88
-
89
-
90
-
91
-
92
-
93
-
94
-
95
-
96
-
97
-
98
-
99
-
100
-
101
-
102
-
103
-
104
-
105
-
106
-
107
-
108
-
109
-
110
-
111
-
112
-
113
-
114
-
115
-
116
-
117
-
118
-
119
-
120
-
121
-
122
-
123
-
124
-
125
-
126
-
127
-
128
-
129
-
130
-
131
-
132
-
133
-
134
-
135
-
136
-
137
-
138
-
139
-
140
-
141
-
142
-
143
-
144
-
145
-
146
-
147
-
148
-
149
-
150
-
151
 |
 |
To replace the component, reverse the removal procedure.
Removing the PCI riser cage
CAUTION:
For proper cooling, do not operate the server without the access panel, baffles,
expansion slot covers, or blanks installed. If the server supports hot-plugable components, minimize
the amount of time the access panel is open.
1.
Disconnect any cables connected to optional I/O cards before removing cage.
2.
Remove the PCI riser cage.
To replace the component, reverse the removal procedure. When replacing the PCI riser cage,
push down on the top of the component where the riser is located to ensure that it has properly
seated into the system board.
Installing additional components
31