HP Integrity rx2800 rx2800 i2 User Service Guide - Page 36
Installing DIMMs
 |
View all HP Integrity rx2800 manuals
Add to My Manuals
Save this manual to your list of manuals |
Page 36 highlights
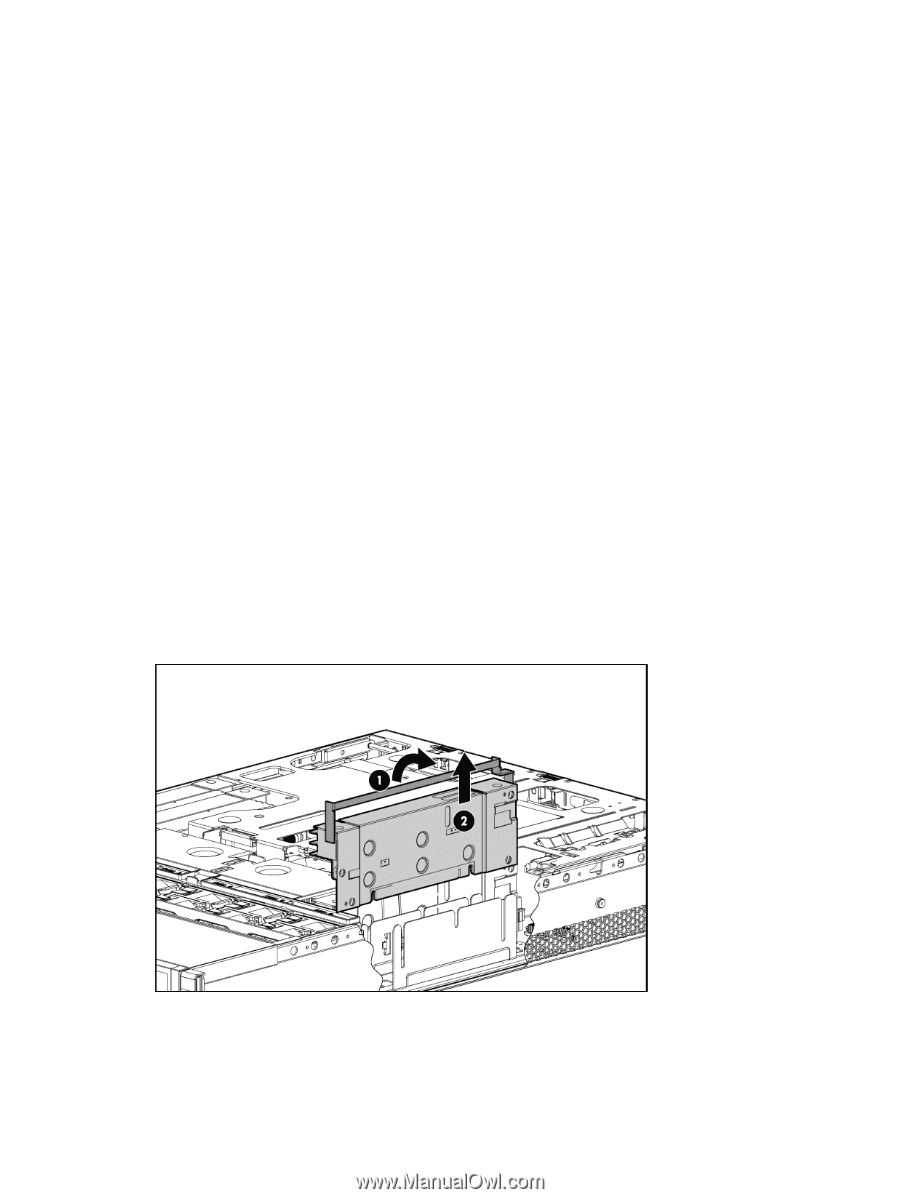
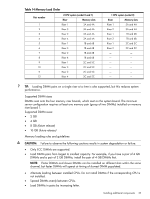
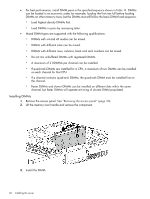
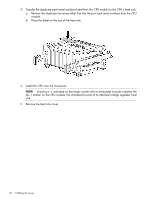
• For best performance, install DIMM pairs in the specified sequence shown in Table 14. DIMMs can be loaded in an economic order, for example, loading the first riser full before loading DIMMs on other memory risers, but the DIMMs must still follow the basic DIMM load sequence. ◦ Load highest density DIMMs first. ◦ Load DIMMs in pairs by increasing letter. • Mixed DIMM types are supported with the following qualifications: ◦ DIMMs with x4 and x8 modes can be mixed. ◦ DIMMs with different sizes can be mixed. ◦ DIMMs with different rows, columns, bank and rank numbers can be mixed. ◦ Do not mix unbuffered DIMMs with registered DIMMs. ◦ A maximum of 2 UDIMMs per channel can be installed. ◦ If quad-rank DIMMs are installed for a CPU, a maximum of two DIMMs can be installed on each channel for that CPU. ◦ If a channel contains quad-rank DIMMs, the quad-rank DIMM must be installed first on the channel. ◦ Faster DIMMs and slower DIMMs can be installed on different slots within the same channel, but faster DIMMs will operate at timing of slowest DIMM populated. Installing DIMMs 1. Remove the access panel. See "Removing the access panel" (page 30). 2. Lift the memory riser handle and remove the component. 3. Install the DIMM. 36 Installing the server
-
 1
1 -
2
-
3
-
4
-
5
-
6
-
7
-
8
-
9
-
10
-
11
-
12
-
13
-
14
-
15
-
16
-
17
-
18
-
19
-
20
-
21
-
22
-
23
-
24
-
25
-
26
-
27
-
28
-
29
-
30
-
 31
31 -
 32
32 -
 33
33 -
 34
34 -
 35
35 -
 36
36 -
 37
37 -
 38
38 -
 39
39 -
 40
40 -
 41
41 -
42
-
43
-
44
-
45
-
46
-
47
-
48
-
49
-
50
-
51
-
52
-
53
-
54
-
55
-
56
-
57
-
58
-
59
-
60
-
61
-
62
-
63
-
64
-
65
-
66
-
67
-
68
-
69
-
70
-
71
-
72
-
73
-
74
-
75
-
76
-
77
-
78
-
79
-
80
-
81
-
82
-
83
-
84
-
85
-
86
-
87
-
88
-
89
-
90
-
91
-
92
-
93
-
94
-
95
-
96
-
97
-
98
-
99
-
100
-
101
-
102
-
103
-
104
-
105
-
106
-
107
-
108
-
109
-
110
-
111
-
112
-
113
-
114
-
115
-
116
-
117
-
118
-
119
-
120
-
121
-
122
-
123
-
124
-
125
-
126
-
127
-
128
-
129
-
130
-
131
-
132
-
133
-
134
-
135
-
136
-
137
-
138
-
139
-
140
-
141
-
142
-
143
-
144
-
145
-
146
-
147
-
148
-
149
-
150
-
151
 |
 |