HP Integrity rx2800 rx2800 i2 User Service Guide - Page 49
Configuring the iLO 3 MP LAN using DHCP and DNS
 |
View all HP Integrity rx2800 manuals
Add to My Manuals
Save this manual to your list of manuals |
Page 49 highlights
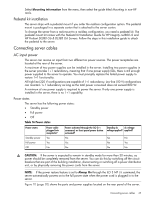
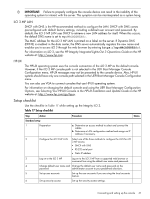
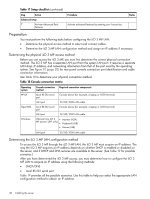
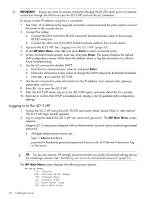
Table 19 LAN configuration methods DHCP DNS Yes Yes Yes Yes No Yes Yes No No No Yes No RS-232 serial port (iLO 3 MP LAN configuration method LC command) No DHCP Yes DHCP, RS-232 serial port Yes RS-232 serial port Yes RS-232 serial port Yes RS-232 serial port No Cannot set up the LAN. Reconsider your criteria. After you have determined howto configure the iLO 3 MP LAN to get an IP address, you must configure the iLO 3 MP LAN using the selected method. Configuring the iLO 3 MP LAN using DHCP and DNS DHCP automatically configures all DHCP-enabled servers with IP addresses, subnet masks, and gateway addresses. All HP Integrity entry class servers with iLO 3 MP are shipped from the factory with DHCP enabled. When you use DHCP and DNS, you can connect to the iLO 3 MP by entering the default host name in your browser rather than an IP address, only if the following conditions apply: • DHCP must be enabled (DHCP is enabled by default) • You are using a DHCP server that provides the domain name and the primary DNS server IP address • The primary DNS server accepts DDNS updates • The primary DNS server IP address has been configured through the DHCP server To configure the iLO 3 MP using DHCP and DNS: 1. Get the factory-set host name from the iLO 3 MP MAC address label on the right side of the server, above the rail. The default host name is 14 characters long, consisting of the letters mp followed by the 12 characters of the MAC address. For example: mp0014c29c064f. This address is assigned to the iLO 3 MP hardware. The iLO 3 MP hardware has a unique MAC address that identifies the hardware on the network. IMPORTANT: Make sure you get the MAC address of the iLO hardware and not the MAC address of the server core LAN card. 2. Connect the LAN cable into the iLO 3 MP port at the rear of the server. Figure 10 (page 20) shows the location of the iLO 3 MP port. 3. Connect the LAN cable from the server to an active network port. 4. Apply ac power to the server (if not already done). 5. Open a browser, telnet, or Secure Shell client, and enter the iLO 3 MP IP address. The iLO 3 MP log on window appears. Configuring the iLO 3 MP LAN using the RS-232 serial port IMPORTANT: Do not configure duplicate IP addresses on different servers within the same network. Duplicate server IP addresses conflict and the servers cannot connect to the network. The LC command enables you to configure an IP address, host name, subnet mask, and gateway address. Connecting and setting up the console 49
-
 1
1 -
2
-
3
-
4
-
5
-
6
-
7
-
8
-
9
-
10
-
11
-
12
-
13
-
14
-
15
-
16
-
17
-
18
-
19
-
20
-
21
-
22
-
23
-
24
-
25
-
26
-
27
-
28
-
29
-
30
-
31
-
32
-
33
-
34
-
35
-
36
-
37
-
38
-
39
-
40
-
41
-
42
-
43
-
 44
44 -
 45
45 -
 46
46 -
 47
47 -
 48
48 -
 49
49 -
 50
50 -
 51
51 -
 52
52 -
 53
53 -
 54
54 -
55
-
56
-
57
-
58
-
59
-
60
-
61
-
62
-
63
-
64
-
65
-
66
-
67
-
68
-
69
-
70
-
71
-
72
-
73
-
74
-
75
-
76
-
77
-
78
-
79
-
80
-
81
-
82
-
83
-
84
-
85
-
86
-
87
-
88
-
89
-
90
-
91
-
92
-
93
-
94
-
95
-
96
-
97
-
98
-
99
-
100
-
101
-
102
-
103
-
104
-
105
-
106
-
107
-
108
-
109
-
110
-
111
-
112
-
113
-
114
-
115
-
116
-
117
-
118
-
119
-
120
-
121
-
122
-
123
-
124
-
125
-
126
-
127
-
128
-
129
-
130
-
131
-
132
-
133
-
134
-
135
-
136
-
137
-
138
-
139
-
140
-
141
-
142
-
143
-
144
-
145
-
146
-
147
-
148
-
149
-
150
-
151
 |
 |