HP Integrity rx2800 rx2800 i2 User Service Guide - Page 40
Ensure pin 1, indicated on the empty socket with an embossed triangle, matches
 |
View all HP Integrity rx2800 manuals
Add to My Manuals
Save this manual to your list of manuals |
Page 40 highlights
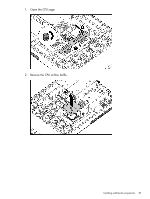
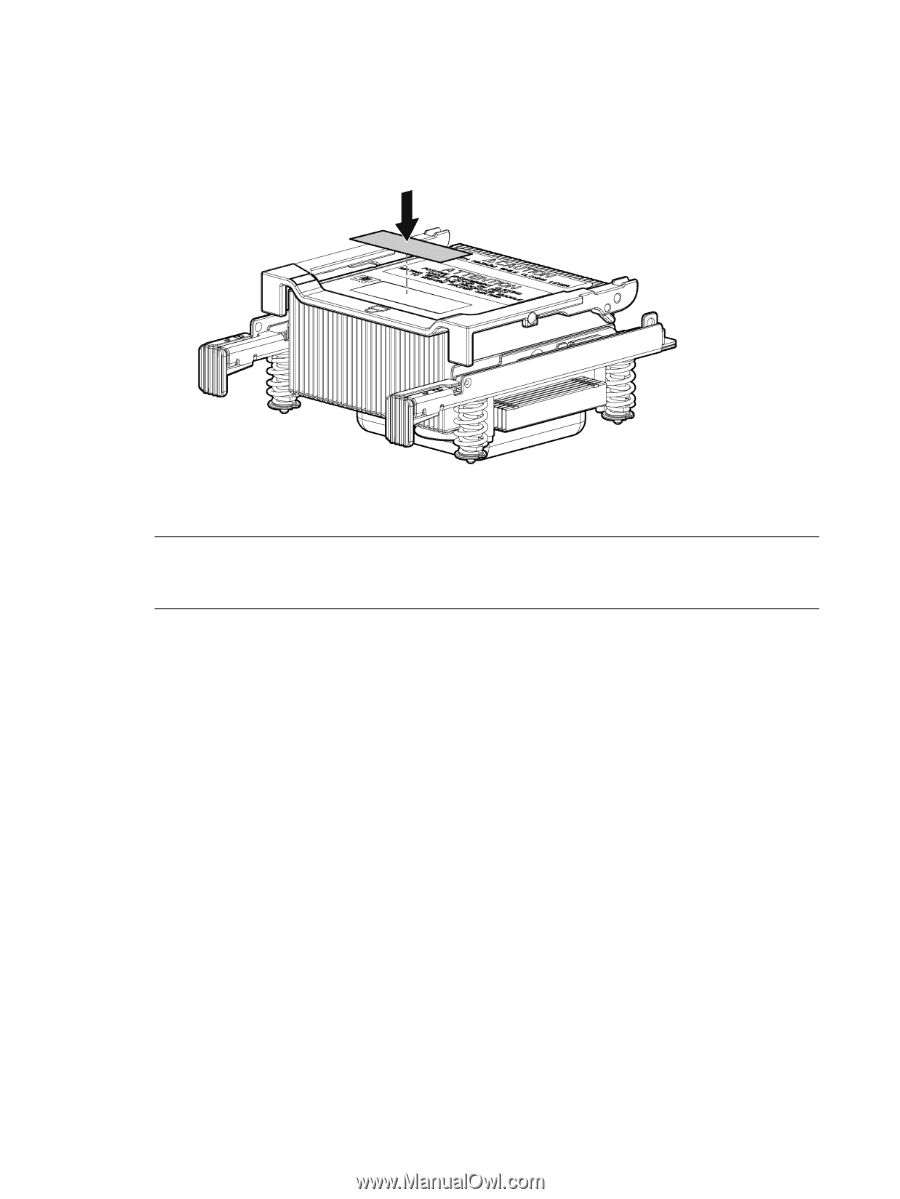
3. Transfer the duplicate part/serial numbers label from the CPU module to the CPU's heat sink: a. Remove the duplicate tear-away label that lists the part and serial numbers from the CPU module. b. Place the label on the top of the heat sink. 4. Install the CPU over the load posts. NOTE: Ensure pin 1, indicated on the empty socket with an embossed triangle, matches the pin 1 marker on the CPU module, the chamfered corner of its attached voltage regulator heat sink. 5. Remove the heat sink cover. 40 Installing the server
-
 1
1 -
2
-
3
-
4
-
5
-
6
-
7
-
8
-
9
-
10
-
11
-
12
-
13
-
14
-
15
-
16
-
17
-
18
-
19
-
20
-
21
-
22
-
23
-
24
-
25
-
26
-
27
-
28
-
29
-
30
-
31
-
32
-
33
-
34
-
 35
35 -
 36
36 -
 37
37 -
 38
38 -
 39
39 -
 40
40 -
 41
41 -
 42
42 -
 43
43 -
 44
44 -
 45
45 -
46
-
47
-
48
-
49
-
50
-
51
-
52
-
53
-
54
-
55
-
56
-
57
-
58
-
59
-
60
-
61
-
62
-
63
-
64
-
65
-
66
-
67
-
68
-
69
-
70
-
71
-
72
-
73
-
74
-
75
-
76
-
77
-
78
-
79
-
80
-
81
-
82
-
83
-
84
-
85
-
86
-
87
-
88
-
89
-
90
-
91
-
92
-
93
-
94
-
95
-
96
-
97
-
98
-
99
-
100
-
101
-
102
-
103
-
104
-
105
-
106
-
107
-
108
-
109
-
110
-
111
-
112
-
113
-
114
-
115
-
116
-
117
-
118
-
119
-
120
-
121
-
122
-
123
-
124
-
125
-
126
-
127
-
128
-
129
-
130
-
131
-
132
-
133
-
134
-
135
-
136
-
137
-
138
-
139
-
140
-
141
-
142
-
143
-
144
-
145
-
146
-
147
-
148
-
149
-
150
-
151
 |
 |
3.
Transfer the duplicate part/serial numbers label from the CPU module to the CPU's heat sink:
a.
Remove the duplicate tear-away label that lists the part and serial numbers from the CPU
module.
b.
Place the label on the top of the heat sink.
4.
Install the CPU over the load posts.
NOTE:
Ensure pin 1, indicated on the empty socket with an embossed triangle, matches the
pin 1 marker on the CPU module, the chamfered corner of its attached voltage regulator heat
sink.
5.
Remove the heat sink cover.
40
Installing the server