TASCAM SS-R200 100 SS-R200 SS-CDR200 Owners Manual
TASCAM SS-R200 Manual
 |
View all TASCAM SS-R200 manuals
Add to My Manuals
Save this manual to your list of manuals |
TASCAM SS-R200 manual content summary:
- TASCAM SS-R200 | 100 SS-R200 SS-CDR200 Owners Manual - Page 1
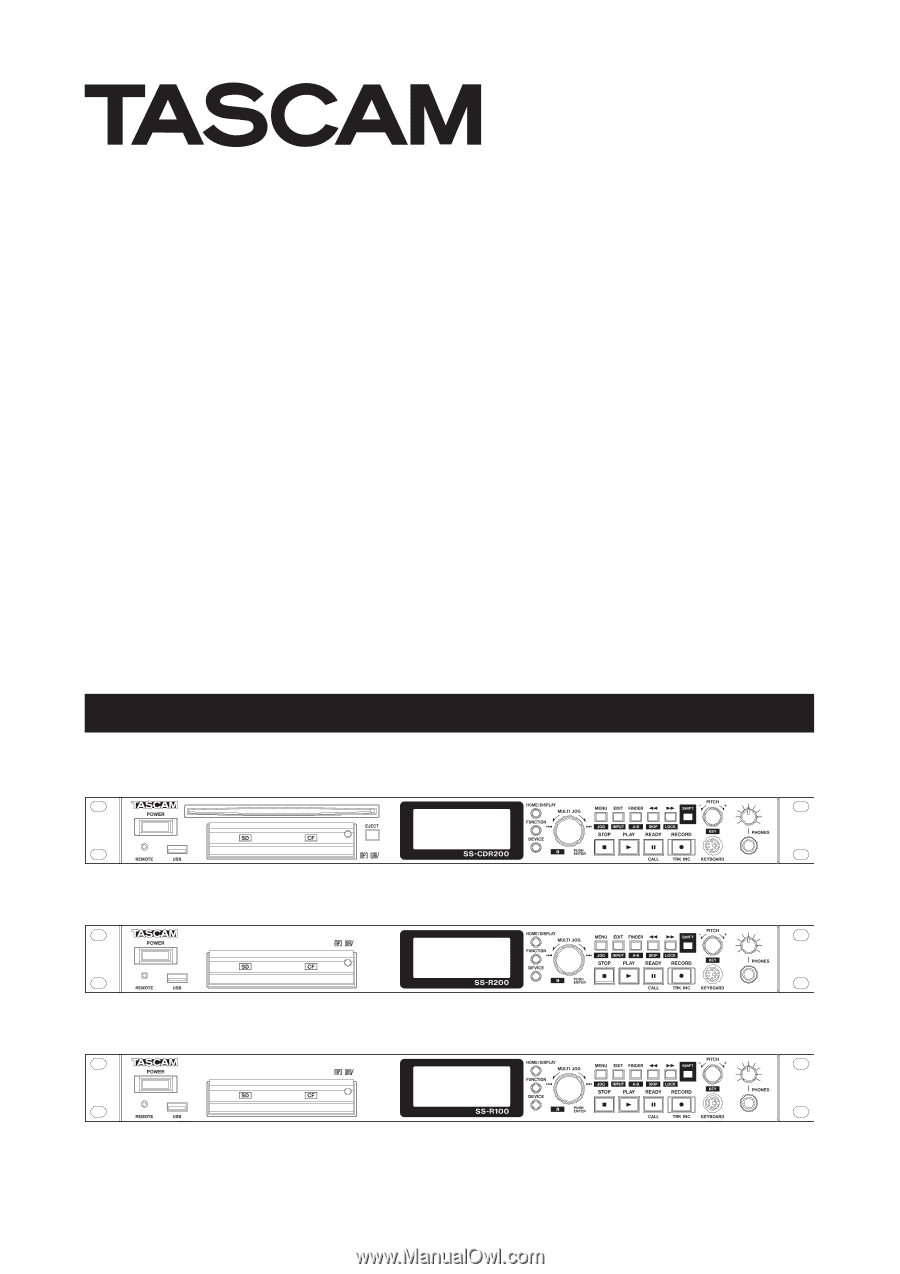
D01155420E SS-CDR200 Solid State/CD Stereo Audio Recorder SS-R200 SS-R100 Solid State Stereo Audio Recorder OWNER'S MANUAL - TASCAM SS-R200 | 100 SS-R200 SS-CDR200 Owners Manual - Page 2
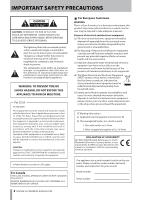
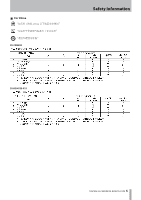
of important operating and maintenance (servicing) instructions in the literature accompanying the appliance LA NORME NMB-003 DU CANADA. 2 TASCAM SS-CDR200/SS-R200/SS-R100 88 For European Customers WARNING This the TEAC product described in this manual is in compliance with the corresponding - TASCAM SS-R200 | 100 SS-R200 SS-CDR200 Owners Manual - Page 3
Servicing is required when the apparatus has been damaged in any way, such as power-supply cord or plug is damaged, liquid has been spilled or objects have fallen into the apparatus, the apparatus has been exposed to rain or moisture, does not operate normally, or has been dropped. TASCAM SS-CDR200 - TASCAM SS-R200 | 100 SS-R200 SS-CDR200 Owners Manual - Page 4
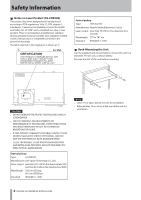
SPECIFIED HEREIN MAY RESULT IN HAZARDOUS RADIATION EXPOSURE. • IF THIS PRODUCT DEVELOPS TROUBLE, CONTACT YOUR NEAREST QUALIFIED SERVICE PERSONNEL, AND DO NOT USE THE PRODUCT IN ITS DAMAGED STATE. • at least 10 cm (4 in) at the rear of the unit for ventilation. 4 TASCAM SS-CDR200/SS-R200/SS-R100 - TASCAM SS-R200 | 100 SS-R200 SS-CDR200 Owners Manual - Page 5
88 For China 2000m SS-CDR200 Safety Information SS-R200/SS-R11 TASCAM SS-CDR200/SS-R200/SS-R100 5 - TASCAM SS-R200 | 100 SS-R200 SS-CDR200 Owners Manual - Page 6
Introduction 8 SS-CDR200, SS-R200 and SS-R100 differences.......... 8 Features 8 Included items 8 Conventions used in this manual 8 Playback 28 Files that can be played 28 Tracks and files 28 6 TASCAM SS-CDR200/SS-R200/SS-R100 Play area 28 Setting the play area 28 Selecting the current - TASCAM SS-R200 | 100 SS-R200 SS-CDR200 Owners Manual - Page 7
Troubleshooting 80 17 − Specifications 81 Media and file formats 81 Inputs and outputs 81 Analog audio inputs and outputs 81 Digital audio inputs and outputs 81 Control inputs and outputs 81 Audio performance 81 Backup memory 82 General 82 Dimensional drawings 83 TASCAM SS-CDR200/SS-R200 - TASCAM SS-R200 | 100 SS-R200 SS-CDR200 Owners Manual - Page 8
a TASCAM SS-CDR200 Solid State/CD Stereol Audio Recorder or SS-R200/SS-R100 Solid State Stereo Audio Recorder. Please read this manual thoroughly using a TASCAM RC-3F footswitch (sold separately) • Flash start using TASCAM RC-20 Direct Play Remote (sold separately) supported Included items This - TASCAM SS-R200 | 100 SS-R200 SS-CDR200 Owners Manual - Page 9
CAUTION Failure to follow these instructions could result in injury, damage to equipment or lost recording data, for example. Intellectual property rights • TASCAM is a trademark of TEAC this product on top of a powered amplifier or other equipment that emits heat. TASCAM SS-CDR200/SS-R200/SS-R100 9 - TASCAM SS-R200 | 100 SS-R200 SS-CDR200 Owners Manual - Page 10
this unit This unit uses USB memory, SD cards and CF cards for playback and recording. Microdrives cannot be used with this unit. 10 TASCAM SS-CDR200/SS-R200/SS-R100 The capacities and performance of your unit will vary based on the speed and abilities of the media used. Older and some cheaper USB - TASCAM SS-R200 | 100 SS-R200 SS-CDR200 Owners Manual - Page 11
be played back in CD players that support CD-RW disc playback. Slot loading of in automatically just before it disappears into the slot. Trouble inserting a disc If the disc becomes stuck during TASCAM website (http://tascam.com/) to register as a user online. TASCAM SS-CDR200/SS-R200/SS-R100 11 - TASCAM SS-R200 | 100 SS-R200 SS-CDR200 Owners Manual - Page 12
could harm your hearing or result in other trouble. 2 Disc slot (SS-CDR200 only) Insert CDs here. After a disc is inserted part way, left. Press this button again to return to the Home Screen. 12 TASCAM SS-CDR200/SS-R200/SS-R100 Press this button while pressing and holding the SHIFT button to set - TASCAM SS-R200 | 100 SS-R200 SS-CDR200 Owners Manual - Page 13
loud noises, which could harm your hearing or result in other trouble. r REMOTE jack (2.5 mm dia TRS) Connect a TASCAM RC-3F footswitch or TASCAM RC-20 Direct Play Remote control (both designed for use with to move between frames. (See "Jog playback" on page 31.) TASCAM SS-CDR200/SS-R200/SS-R100 13 - TASCAM SS-R200 | 100 SS-R200 SS-CDR200 Owners Manual - Page 14
Japanese keyboards, which are arranged differently from English keyboards, change the setting in the UTILITY menu. (See "Setting the keyboard language" on page 74.) 14 TASCAM SS-CDR200/SS-R200/SS-R100 - TASCAM SS-R200 | 100 SS-R200 SS-CDR200 Owners Manual - Page 15
and other information, see "Using the parallel connector" on page 76. c REMOTE IN connector Connect the included TASCAM RC-SS2 wired remote control, which is designed for use with this unit, here. v AC IN connector Connect the included power cord here. TASCAM SS-CDR200/SS-R200/SS-R100 15 - TASCAM SS-R200 | 100 SS-R200 SS-CDR200 Owners Manual - Page 16
(See "A-B repeat playback" on page 34.) 7 A.CUE button Turns the Auto Cue function ON/OFF. (See "Auto Cue function" on page 34.) 16 TASCAM SS-CDR200/SS-R200/SS-R100 8 A.READY button Turns the Auto Ready function ON/OFF. (See "Auto Ready function" on page 35.) 9 SYNC button Turns sync recording ON - TASCAM SS-R200 | 100 SS-R200 SS-CDR200 Owners Manual - Page 17
the playlist 2 Playback mode Shows the current playback mode. CONTINUE : Continuous playback mode SINGLE : Single playback mode PROGRAM : Program playback mode RANDOM : Random playback mode TASCAM SS-CDR200/SS-R200/SS-R100 17 - TASCAM SS-R200 | 100 SS-R200 SS-CDR200 Owners Manual - Page 18
-R/CD-RW disc with MP3 or WAV files that were recorded using a computer or other equipment besides this unit, the total time when 18 TASCAM SS-CDR200/SS-R200/SS-R100 stopped, and the total elapsed time and total remaining time during playback will not be shown. (Only the number of tracks and track - TASCAM SS-R200 | 100 SS-R200 SS-CDR200 Owners Manual - Page 19
on dark. NOTE When the Recording FUNCTION screen is open, press the FUNCTION button (or remote control FUNC button) to return to the Recording Screen. TASCAM SS-CDR200/SS-R200/SS-R100 19 - TASCAM SS-R200 | 100 SS-R200 SS-CDR200 Owners Manual - Page 20
selected MENU screen when CD media selected (SS-CDR200 only) The MENU has three or four main items. PLAY: Items related to playback REC: Items related to recording UTILITY: Items related to unit settings, etc. CD: Items related to CD operations (SS-CDR200 only) 20 TASCAM SS-CDR200/SS-R200/SS-R100 - TASCAM SS-R200 | 100 SS-R200 SS-CDR200 Owners Manual - Page 21
shown below are of the SS-CDR200 model. The SS-R200 and SS-R100 models have different appearances. • The display screens shown below are from the SS-CDR200. The SS-R200 and SS-R100 display screens are different in some cases. 1 Use the main unit or the included TASCAM RC-SS2 remote control to - TASCAM SS-R200 | 100 SS-R200 SS-CDR200 Owners Manual - Page 22
or t button. 4 Set SYNC to ON or OFF. Front panel operation: Turn the MULTI JOG dial to select ON. Remote control operation: 22 TASCAM SS-CDR200/SS-R200/SS-R100 8 Change the setting value. Front panel operation: Turn the MULTI JOG dial to change the value. Remote control operation: Use the 5 and - TASCAM SS-R200 | 100 SS-R200 SS-CDR200 Owners Manual - Page 23
, ampli er, etc. (SS-CDR200/ SS-R200 only) %*(*5"*/ $0"9*"- %*(*5"065 $0"9*"- Digital mixer, digital recorder, digital ampli er Computer RS-232C port (COM port, etc.) (SS-CDR200/SS-R200 only) External controller (RC-SS20, etc.) (SS-CDR200/SS-R200only) TASCAM SS-CDR200/SS-R200/SS-R100 23 - TASCAM SS-R200 | 100 SS-R200 SS-CDR200 Owners Manual - Page 24
panel POWER switch to turn the power ON. NOTE The screen above is an example from an SS-CDR200 or SS-R200 unit. The SS-R100 does not have the 5.RS-232C menu item. 3 Select CLOCK ADJUST. Startup screen 4 to adjust the display contrast. 2 Open the UTILITY menu. 24 TASCAM SS-CDR200/SS-R200/SS-R100 - TASCAM SS-R200 | 100 SS-R200 SS-CDR200 Owners Manual - Page 25
contacts facing in. 3 Close the card slot door. NOTE • The screen above is an example from an SS-CDR200 or SS-R200 unit. • The SS-R100 does not have the 5.RS-232C menu item. 4 Press the MULTI JOG dial or , [LOCK . Push it in again to eject the CF card partially. TASCAM SS-CDR200/SS-R200/SS-R100 25 - TASCAM SS-R200 | 100 SS-R200 SS-CDR200 Owners Manual - Page 26
takes time. Moreover, editing the playlist and other operations are not possible. Inserting and removing discs (SS-CDR200 only) CAUTION • Discs cannot be inserted when the power is OFF. • Trying to force a in automatically just before it disappears into the slot. 26 TASCAM SS-CDR200/SS-R200/SS-R100 - TASCAM SS-R200 | 100 SS-R200 SS-CDR200 Owners Manual - Page 27
. NOTE Even when panel lock is ON, control is still possible when using a TASCAM RC-3F footswitch connected to the front panel REMOTE JACK or an external device connected to one of the rear panel RS-232C, PARALLEL or REMOTE IN (RC-SS2) CONTROL I/O connectors. TASCAM SS-CDR200/SS-R200/SS-R100 27 - TASCAM SS-R200 | 100 SS-R200 SS-CDR200 Owners Manual - Page 28
are handled by the unit as "tracks." When explaining recording and playback in this manual, we usually refer to audio files as "tracks." We mainly use the term "files" when 28 TASCAM SS-CDR200/SS-R200/SS-R100 explaining media management. Please be aware that these two terms actually refer to the - TASCAM SS-R200 | 100 SS-R200 SS-CDR200 Owners Manual - Page 29
or remote control HOME/DISP button) to return to the Home Screen. NOTE • In this manual, unless otherwise specified, explanations assume that the playback mode is set to CONTINUE (continuous playback playback and enter playback standby: Press the READY button. TASCAM SS-CDR200/SS-R200/SS-R100 29 - TASCAM SS-R200 | 100 SS-R200 SS-CDR200 Owners Manual - Page 30
4 − Preparations In this manual, unless otherwise specified, explanations assume that the buttons on the remote to specify the track while in program or random mode. 30 TASCAM SS-CDR200/SS-R200/SS-R100 Searching backward and forward You can search forward or backward in a track while listening - TASCAM SS-R200 | 100 SS-R200 SS-CDR200 Owners Manual - Page 31
standby, press the READY [CALL] button (or remote control CALL button) to return to the point from where playback last started and start playback standby. TASCAM SS-CDR200/SS-R200/SS-R100 31 - TASCAM SS-R200 | 100 SS-R200 SS-CDR200 Owners Manual - Page 32
maximum of 99 tracks can be programmed. If you attempt to program a 100th track, a PROGRAM FULL warning message pop-up will appear. 32 TASCAM SS-CDR200/SS-R200/SS-R100 • If the total time of the programmed tracks exceeds 99 hours 59 minutes, 59 seconds will appear on the display. • In PROGRAM play - TASCAM SS-R200 | 100 SS-R200 SS-CDR200 Owners Manual - Page 33
the KEY LEVEL, it is shown in a pop-up on the Home Screen. You can set the KEY LEVEL in a range from ¢6-¢1, 0 (no pitch change), #1-#6. TASCAM SS-CDR200/SS-R200/SS-R100 33 - TASCAM SS-R200 | 100 SS-R200 SS-CDR200 Owners Manual - Page 34
button (or remote control A-B button) to set the starting point (A). --Repeat-- and A- appear in a pop-up on the Home Screen. 34 TASCAM SS-CDR200/SS-R200/SS-R100 NOTE If you press the remote control REPEAT button, the repeat playback starting point (A) will be cancelled. 2 Once again press the - TASCAM SS-R200 | 100 SS-R200 SS-CDR200 Owners Manual - Page 35
, and check that AUTO CUE is highlighted. 2 Press the remote control FUNC button to open the FUNCTION screen, and check that AUTO READY is highlighted. TASCAM SS-CDR200/SS-R200/SS-R100 35 - TASCAM SS-R200 | 100 SS-R200 SS-CDR200 Owners Manual - Page 36
. 3 Select OTHERS. 4 Press the MULTI JOG dial or , [LOCK] button (or remote control ENTER or t button) to open the PLAY OTHERS menu. 36 TASCAM SS-CDR200/SS-R200/SS-R100 5 Select MONO MIX. 6 Press the MULTI JOG dial or , [LOCK] button (or remote control ENTER or t button) to move the cursor to the - TASCAM SS-R200 | 100 SS-R200 SS-CDR200 Owners Manual - Page 37
first track in the play area will become the resume point. • The RESUME playback function setting is retained even after the power is turned OFF. TASCAM SS-CDR200/SS-R200/SS-R100 37 - TASCAM SS-R200 | 100 SS-R200 SS-CDR200 Owners Manual - Page 38
. 4 Press the MULTI JOG dial or , [LOCK] button (or remote control ENTER or t button) to open the PLAY OTHERS menu. 5 Select LINK. 38 TASCAM SS-CDR200/SS-R200/SS-R100 6 Press the MULTI JOG dial or , [LOCK] button (or remote control ENTER or t button) to move the cursor to the right and select the - TASCAM SS-R200 | 100 SS-R200 SS-CDR200 Owners Manual - Page 39
/2 or USB keyboard connected to the front panel, or by an external device connected to the parallel connector on the rear panel (SS-CDR200/SS-R200 only) as well as by a TASCAM RC-20 Direct Play Remote (sold separately). 1 Set the play area. (See "Play area" on page 28.) Set the play area as - TASCAM SS-R200 | 100 SS-R200 SS-CDR200 Owners Manual - Page 40
the USB/ SD/CF media is removed from the unit, all the files on the memory/card could be damaged or lost. For this 40 TASCAM SS-CDR200/SS-R200/SS-R100 reason, you should try as much as possible to avoid power interruptions during recording and playback. • This function was not created for the - TASCAM SS-R200 | 100 SS-R200 SS-CDR200 Owners Manual - Page 41
select the recording file format. USB/SD/CF media: .mp3 (default value), .wav CD-R/CD-RW disc (SS-CDR200 only): .mp3 (default value), CDDA (audio CD format) If the current device is set to CD and the MENU button) to open the MENU screen. 2 Open the REC menu. TASCAM SS-CDR200/SS-R200/SS-R100 41 - TASCAM SS-R200 | 100 SS-R200 SS-CDR200 Owners Manual - Page 42
to adjust the level and balance of the input signal. Follow the instructions in the "Monitoring the input signal" section above to enable monitoring of the input signal, and then follow these procedures. 42 TASCAM SS-CDR200/SS-R200/SS-R100 4 Press the MULTI JOG dial or , [LOCK] button (or remote - TASCAM SS-R200 | 100 SS-R200 SS-CDR200 Owners Manual - Page 43
format will be finalized automatically when ejected, as described above, you can also finalize a disc manually without ejecting it. In either case, follow these procedures to finalize a disc. 1 Press is on, SYNC REC will appear highlighted on the FUNCTION screen. TASCAM SS-CDR200/SS-R200/SS-R100 43 - TASCAM SS-R200 | 100 SS-R200 SS-CDR200 Owners Manual - Page 44
/DISP button) to return to the Home Screen. NOTE The sync recording setting is retained even after the power is turned OFF. 44 TASCAM SS-CDR200/SS-R200/SS-R100 Sync recording operation When the sync recording function is ON and the unit is in recording standby, recording will automatically start or - TASCAM SS-R200 | 100 SS-R200 SS-CDR200 Owners Manual - Page 45
If the sync level is too high If the sync level setting is too high, you may have problems such as failing to capture the beginning of a song that begins with a low volume. Level Recording is 1/75th of a second). Options: -75 f - +75 f (frame, default value: 0f) TASCAM SS-CDR200/SS-R200/SS-R100 45 - TASCAM SS-R200 | 100 SS-R200 SS-CDR200 Owners Manual - Page 46
through the modes in this order: OFF q LEVEL q DD q TIME q OFF. Creating a new track manually When recording, press the front panel or remote control RECORD button, to create a new track (with a ENTER or t button) to move the cursor right to select the value. 46 TASCAM SS-CDR200/SS-R200/SS-R100 - TASCAM SS-R200 | 100 SS-R200 SS-CDR200 Owners Manual - Page 47
(or remote control ENTER or t button) to open the WORD CLIP screen where you can edit the name. 9 To edit the file name, follow the instructions in "Inputting and editing characters" below. TASCAM SS-CDR200/SS-R200/SS-R100 47 - TASCAM SS-R200 | 100 SS-R200 SS-CDR200 Owners Manual - Page 48
remote control HOME/DISP button) to return to the Home Screen. NOTE The dither setting is retained even after the power is turned OFF. 48 TASCAM SS-CDR200/SS-R200/SS-R100 - TASCAM SS-R200 | 100 SS-R200 SS-CDR200 Owners Manual - Page 49
being used. • The above recording times are not continuous recording times. They are the total amounts of recordable time on the USB/SD/CF media. TASCAM SS-CDR200/SS-R200/SS-R100 49 - TASCAM SS-R200 | 100 SS-R200 SS-CDR200 Owners Manual - Page 50
in a folder structure. You can also manage MP3/WAV files on a data CD in a folder structure (SS-CDR200 only). You can select a folder or file and then enter the FINDER screen for that file and folder. file ( ) The names of music files appear next to these icons. 50 TASCAM SS-CDR200/SS-R200/SS-R100 - TASCAM SS-R200 | 100 SS-R200 SS-CDR200 Owners Manual - Page 51
position in the same folder or move or copy it to another folder. (See "Moving and copying files (USB/SD/CF media)" on page 54.) TASCAM SS-CDR200/SS-R200/SS-R100 51 - TASCAM SS-R200 | 100 SS-R200 SS-CDR200 Owners Manual - Page 52
dial (or remote control ENTER button) to open the RENAME screen. 3 Edit the file name. Follow the instructions in "Inputting and editing characters" on page 48. 4 When you have completed editing the file name, and punctuation marks cannot be used in names. 52 TASCAM SS-CDR200/SS-R200/SS-R100 - TASCAM SS-R200 | 100 SS-R200 SS-CDR200 Owners Manual - Page 53
want to add to the playlist, open the FINDER screen, and turn the MULTI JOG dial (or push remote control 5/b buttons) to select ADD PLAYLIST. TASCAM SS-CDR200/SS-R200/SS-R100 53 - TASCAM SS-R200 | 100 SS-R200 SS-CDR200 Owners Manual - Page 54
(or push remote control 5/b buttons) to select NEW FOLDER. 3 Input the folder name. Follow the instructions in "Inputting and editing characters" on page 48. 4 When you have completed inputting the folder name, ) to move the selected file to the desired position. 54 TASCAM SS-CDR200/SS-R200/SS-R100 - TASCAM SS-R200 | 100 SS-R200 SS-CDR200 Owners Manual - Page 55
to the position where you want it. Press the MULTI JOG dial (or remote control ENTER button) to show the following menu items in a popup. TASCAM SS-CDR200/SS-R200/SS-R100 55 - TASCAM SS-R200 | 100 SS-R200 SS-CDR200 Owners Manual - Page 56
this will start playback standby at the beginning of the selected track. 3 Edit the text. Follow the instructions in "Inputting and editing characters" on page 48. 4 After you finish editing the CD-Text, symbols and punctuation marks cannot be used in names. 56 TASCAM SS-CDR200/SS-R200/SS-R100 - TASCAM SS-R200 | 100 SS-R200 SS-CDR200 Owners Manual - Page 57
. 3 Turn the MULTI JOG dial (or press the remote control 5 and b buttons) to select DIVIDE. 4 Press the MULTI JOG dial (or remote control ENTER button). TASCAM SS-CDR200/SS-R200/SS-R100 57 - TASCAM SS-R200 | 100 SS-R200 SS-CDR200 Owners Manual - Page 58
files into one file. This function can only be used when the playback mode is set to CONTINUE. NOTE • You cannot combine MP3 files. 58 TASCAM SS-CDR200/SS-R200/SS-R100 5 Turn the MULTI JOG dial (or press the remote control 5 and b buttons) to select the file that you want to combine with the - TASCAM SS-R200 | 100 SS-R200 SS-CDR200 Owners Manual - Page 59
] button (or remote control EDIT button). • If there is no file operation that can be undone, a CAN'T UNDO warning message will appear in a pop-up. TASCAM SS-CDR200/SS-R200/SS-R100 59 - TASCAM SS-R200 | 100 SS-R200 SS-CDR200 Owners Manual - Page 60
MENU pop-up. For details about the items in the FINDER MENU pop-up, see "Using the playlist FINDER MENU" on the next page. 60 TASCAM SS-CDR200/SS-R200/SS-R100 - TASCAM SS-R200 | 100 SS-R200 SS-CDR200 Owners Manual - Page 61
total playback time in a pop-up. 3 Select the file or folder that you want to add. For instructions about using the FINDER screen, see "Navigating the FINDER screen" on page 50. If you select a folder, • You cannot add the same track more than once to a playlist. TASCAM SS-CDR200/SS-R200/SS-R100 61 - TASCAM SS-R200 | 100 SS-R200 SS-CDR200 Owners Manual - Page 62
the new position after moving. -- PLAYLIST -- and a progress bar appear in a pop-up while the movement completes, and then the Playlist XX screen reopens. 62 TASCAM SS-CDR200/SS-R200/SS-R100 - TASCAM SS-R200 | 100 SS-R200 SS-CDR200 Owners Manual - Page 63
10 - Copying files between CDs and other media (SS-CDR200) You can copy (or convert and copy) files on USB/SD/CF media to a blank CD. You can also copy . NOTE • You can select multiple files only within the same folder, so once you use the FUNCTION button (or TASCAM SS-CDR200/SS-R200/SS-R100 63 - TASCAM SS-R200 | 100 SS-R200 SS-CDR200 Owners Manual - Page 64
selecting tracks, select BURN EXECUTE, and press the MULTI JOG dial (or remote control ENTER button). A confirmation pop-up message appears. 64 TASCAM SS-CDR200/SS-R200/SS-R100 13 Press the MULTI JOG dial (or remote control ENTER button) again to start writing tracks to the CD-R/ CD-RW disc - TASCAM SS-R200 | 100 SS-R200 SS-CDR200 Owners Manual - Page 65
10 - Copying files between CDs and other media (SS-CDR200) Creating data CDs This section explains how files (MP3 or WAV files) from a USB/SD/CF media can be . In this case, delete some of the selected folders or files so that the limit is no longer exceeded. TASCAM SS-CDR200/SS-R200/SS-R100 65 - TASCAM SS-R200 | 100 SS-R200 SS-CDR200 Owners Manual - Page 66
- Copying files between CDs and other media (SS-CDR200) • If the total size of the copy- CD-R/CD-RW disc will be finalized automatically before it is ejected. (See "Finalizing CD-R/CD-RW discs (SS-CDR200 only)" on page 43.) NOTE • If the selected device media is still being read, MEDIA READ and - TASCAM SS-R200 | 100 SS-R200 SS-CDR200 Owners Manual - Page 67
10 - Copying files between CDs and other media (SS-CDR200) 7 Turn the MULTI JOG dial (or press the remote control 5 and b buttons) to select the file format Open the CD menu. 3 Select RIP TO MEMORY, and press the MULTI JOG dial (or remote control ENTER button). TASCAM SS-CDR200/SS-R200/SS-R100 67 - TASCAM SS-R200 | 100 SS-R200 SS-CDR200 Owners Manual - Page 68
10 - Copying files between CDs and other media (SS-CDR200) 4 Press the MULTI JOG dial (or remote MULTI JOG dial (or remote control ENTER button) to confirm the selections and open 68 TASCAM SS-CDR200/SS-R200/SS-R100 After this, the pop-up message disappears and the CD menu screen opens. 11 - TASCAM SS-R200 | 100 SS-R200 SS-CDR200 Owners Manual - Page 69
11 − CD-RW management (SS-CDR200 only) Using the CD menu to work with CD-RW discs, you can erase, unfinalize and refresh (completely erase) to start unfinalizing the disc. - UNFINALIZE - and a progress bar appear in a pop-up while the disc is being unfinalized. TASCAM SS-CDR200/SS-R200/SS-R100 69 - TASCAM SS-R200 | 100 SS-R200 SS-CDR200 Owners Manual - Page 70
11 − CD-RW management (SS-CDR200 only) Erasing tracks You can erase tracks that have been recorded in audio CD format on a CD-RW disc. The specified RW disc gas been refreshed, the CD menu will reopen. After the tracks have been erased, the CD menu will reopen. 70 TASCAM SS-CDR200/SS-R200/SS-R100 - TASCAM SS-R200 | 100 SS-R200 SS-CDR200 Owners Manual - Page 71
information Footswitch control You can operate this unit using a TASCAM RC-3F footswitch (sold separately) connected to the front panel REMOTE jack. TASCAM RC-3F Footswitch (sold separately) Setting up a footswitch is retained even after the power is turned OFF. TASCAM SS-CDR200/SS-R200/SS-R100 71 - TASCAM SS-R200 | 100 SS-R200 SS-CDR200 Owners Manual - Page 72
2 Open the UTILITY menu. 3 Select FACTORY PRESET. NOTE The screen above is an example from an SS-CDR200 or SS-R200 unit. The SS-R100 does not have the 5.RS-232C menu item. 4 Press the MULTI JOG dial (or remote Screen. Example when the current device is USB/SD/CF 72 TASCAM SS-CDR200/SS-R200/SS-R100 - TASCAM SS-R200 | 100 SS-R200 SS-CDR200 Owners Manual - Page 73
You can check the system and drive firmware versions used by the unit (SS-CDR200 only). 1. Press the MENU [JOG] button (or remote control MENU control ENTER button). The system and drive firmware versions used by the unit (SS-CDR200 only) are shown. 5. When you are done checking, press the HOME/ - TASCAM SS-R200 | 100 SS-R200 SS-CDR200 Owners Manual - Page 74
the STOP button Same as the RECORD button Same as the / button Same as the . button Same as the / button Same as the . button 74 TASCAM SS-CDR200/SS-R200/SS-R100 - TASCAM SS-R200 | 100 SS-R200 SS-CDR200 Owners Manual - Page 75
the key level of the key control function Number input *Ctrl + E only works with the SS-CDR200 NOTE To use the keyboard to edit, press the desired editing key when the FINDER screen is open pop-up. 6. Press the Enter again to confirm and execute the operation. TASCAM SS-CDR200/SS-R200/SS-R100 75 - TASCAM SS-R200 | 100 SS-R200 SS-CDR200 Owners Manual - Page 76
even after the power is turned OFF. • For details on the unit's RS-232C command protocol, please contact TASCAM customer support. 76 TASCAM SS-CDR200/SS-R200/SS-R100 Using the parallel connector Using the CONTROL I/O PARALLEL connector, you can control this unit through serial connection with - TASCAM SS-R200 | 100 SS-R200 SS-CDR200 Owners Manual - Page 77
14 − Using control I/O (SS-CDR200/SS-R200 only) The following is an example of connecting for playback control of this unit using fader start/stop STOP Pin be as follows. #22 #24 Device assignment Low Low USB High High SD High Low CF Low High CD TASCAM SS-CDR200/SS-R200/SS-R100 77 - TASCAM SS-R200 | 100 SS-R200 SS-CDR200 Owners Manual - Page 78
resolve the issue. If you are still unable correct the problem, please contact the nearest TASCAM service center. 1st line 2nd line Meaning 1 - error - be executed because media is not loaded in the selected device. (SS-CDR200 only). 15 - error - TRACK Playback is not possible because the - TASCAM SS-R200 | 100 SS-R200 SS-CDR200 Owners Manual - Page 79
SS-CDR200 only) An item with the same name already exists. (SS-CDR200 only) The media has been formatted by something other than this unit, and this can cause the following problems . The device cannot be detected. Please contact TASCAM customer support. Media is not loaded in the current device - TASCAM SS-R200 | 100 SS-R200 SS-CDR200 Owners Manual - Page 80
Troubleshooting If the unit is not functioning properly, please check the following items before calling for service. If you are still unable to resolve the problem please contact the retailer where you purchased the unit or TASCAM customer support characters. 80 TASCAM SS-CDR200/SS-R200/SS-R100 - TASCAM SS-R200 | 100 SS-R200 SS-CDR200 Owners Manual - Page 81
I only) CD-R, CD-R-DA, CD-RW, CD-RW-DA (12cm discs only, High Speed CD-RW supported) (CDR200 model only) Recording and playback file formats MP3: 44.1/48kHz, 64/128/192/256/320kbps WAV: 44.1/48kHz, output voltage: 0.5 V +5V power maximum supplied current: 100 mA TASCAM SS-CDR200/SS-R200/SS-R100 81 - TASCAM SS-R200 | 100 SS-R200 SS-CDR200 Owners Manual - Page 82
SS-CDR200 100 V: 20 W 110-240 V: 23 W SS-R200/SS-R100 100 V: 16 W 110-240 V: 20 W Dimensions (width × height × depth) 482.6 × 44.5 × 301 mm/19 x 1.75 x 11.85 in. Weight SS-CDR200 3.7 kg/8.16 lbs SS-R100/R200 3.4 kg/7.50 lbs Operating temperature range 5-35º C/41-95ºF 82 TASCAM SS-CDR200/SS - TASCAM SS-R200 | 100 SS-R200 SS-CDR200 Owners Manual - Page 83
instructions contained in your owner's manual. 4. Damage occurring during shipment of the product. (Claims must be presented to the carrier) 5. Damage resulting from repair or attempted repair by anyone other than TEAC or an authorized TASCAM service a defect or a problem, please contact the dealer - TASCAM SS-R200 | 100 SS-R200 SS-CDR200 Owners Manual - Page 84
Blvd., Futian District, Shenzhen 518040, China http://tascam.jp/ http://tascam.com/ http://teacmexico.net/ http://tascam.eu/ http://tascam.eu/ http://tascam.cn/ Printed in China ✂ WARRANTY Model/Modèle/Modell Modello/Modelo/型号 SS-CDR200/SS-R200/SS-R100 Owner's name/Nom du possesseur/Name des
-
 1
1 -
 2
2 -
 3
3 -
 4
4 -
 5
5 -
 6
6 -
 7
7 -
8
-
9
-
10
-
11
-
12
-
13
-
14
-
15
-
16
-
17
-
18
-
19
-
20
-
21
-
22
-
23
-
24
-
25
-
26
-
27
-
28
-
29
-
30
-
31
-
32
-
33
-
34
-
35
-
36
-
37
-
38
-
39
-
40
-
41
-
42
-
43
-
44
-
45
-
46
-
47
-
48
-
49
-
50
-
51
-
52
-
53
-
54
-
55
-
56
-
57
-
58
-
59
-
60
-
61
-
62
-
63
-
64
-
65
-
66
-
67
-
68
-
69
-
70
-
71
-
72
-
73
-
74
-
75
-
76
-
77
-
78
-
79
-
80
-
81
-
82
-
83
-
84
 |
 |
SS-CDR200
Solid State/CD Stereo Audio Recorder
SS-R200
SS-R100
Solid State Stereo Audio Recorder
D01155420E
OWNER'S MANUAL