TASCAM SS-R200 100 SS-R200 SS-CDR200 Owners Manual - Page 45
Auto Track function, If the sync level is too high, Using the menu
 |
View all TASCAM SS-R200 manuals
Add to My Manuals
Save this manual to your list of manuals |
Page 45 highlights
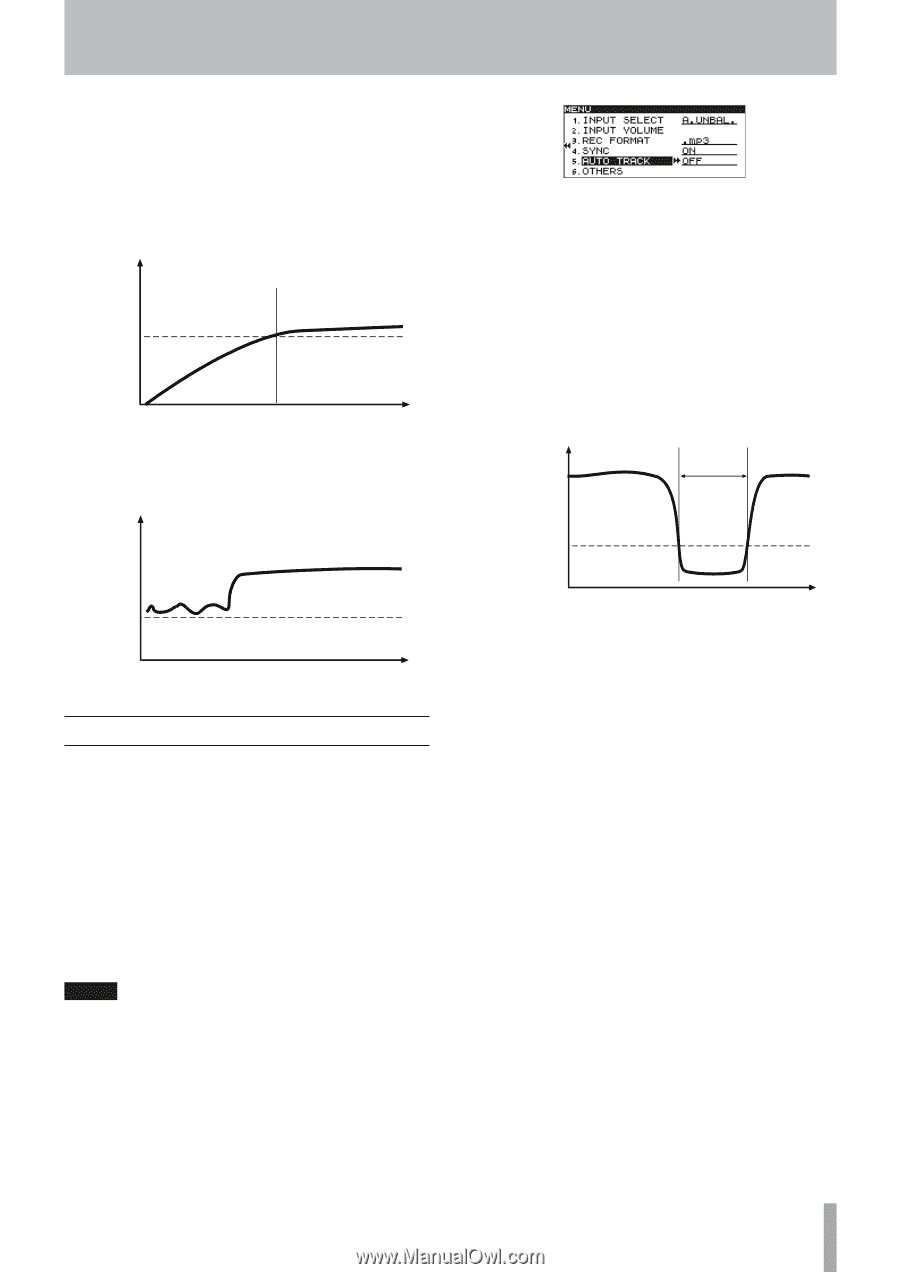
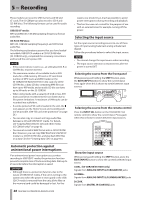
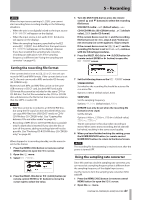
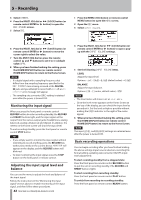
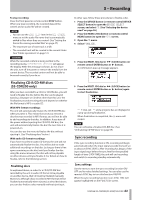
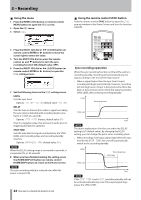
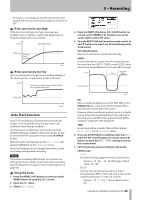
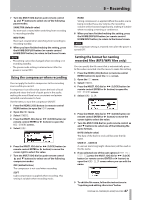
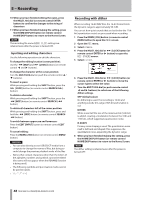
5 - Recording • To stop sync recording, use the REC menu SYNC item or push the remote control SYNC button to set SYNC to OFF. 88 If the sync level is too high If the sync level setting is too high, you may have problems such as failing to capture the beginning of a song that begins with a low volume. Level Recording starts SYNC_LVL This part is not recorded Time 88 If the sync level is too low Sync recording will not begin from recording standby, if the source you are recording has a high noise level. Level Noise level is higher than the SYNC LEVEL, so recording never starts SYNC_LVL Time Auto Track function Auto Track recording is a function that automatically creates a new track with a new number when a set condition is met during recording. Use the menu to enable Auto Track mode and make detailed settings. In addition, Auto Track mode can also be turned ON/OFF using the remote control A.TRACK button. When the Auto Track function in ON, AUTO TRACK will appear highlighted on the FUNCTION screen. Auto Track settings can be changed at any time, so you can change settings while recording. NOTE If you have recorded in WAV format, you can also use editing functions to divide or join tracks after recording. (See "Dividing files" on page 57 and "Combining files" on page 58.) 88 Using the menu 1 Press the MENU [JOG] button (or remote control MENU button) to open the MENU screen. 2 Open the REC menu. 3 Select AUTO TRACK. 4 Press the MULTI JOG dial or , [LOCK] button (or remote control ENTER or t button) to move the cursor right to select the value. 5 Turn the MULTI JOG dial (or push remote control 5 and b buttons) to select one of the following Auto Track modes. OFF (default value) New tracks will not be created automatically. LEVEL A new track will be created when the signal exceeds the auto track level (AUTO TRACK screen LEVEL value) after having stayed below it for two seconds or longer. Level 2 sec. New track created Auto track level Time DD When recording a digital source (CD, DAT, MD) via the DIGITAL IN jack, a new track will be created when a track division is detected in the source. However when recording an analog source or a digital source other than those listed above, this will work in the same way as LEVEL mode, and new tracks will be created in response to the input level. TIME A new track will be created at the set time interval (AUTO TRACK screen INTERVAL value). 6 If you set AUTO TRACK to anything other than OFF, press the , [LOCK] button (or remote control t button) to open the AUTO TRACK setting screen for the current mode. 7 Set the following items according to the mode. LEVEL mode • LEVEL Sets the level that triggers the Auto Track function. Options: -72 dB - -24 dB (6dB steps, default value: -54 dB) • DELAY Sets the time (in frames) from when a signal exceeding the LEVEL is detected until a new track is created (one frame is 1/75th of a second). Options: -75 f - +75 f (frame, default value: 0f) TASCAM SS-CDR200/SS-R200/SS-R100 45
-
 1
1 -
2
-
3
-
4
-
5
-
6
-
7
-
8
-
9
-
10
-
11
-
12
-
13
-
14
-
15
-
16
-
17
-
18
-
19
-
20
-
21
-
22
-
23
-
24
-
25
-
26
-
27
-
28
-
29
-
30
-
31
-
32
-
33
-
34
-
35
-
36
-
37
-
38
-
39
-
 40
40 -
 41
41 -
 42
42 -
 43
43 -
 44
44 -
 45
45 -
 46
46 -
 47
47 -
 48
48 -
 49
49 -
 50
50 -
51
-
52
-
53
-
54
-
55
-
56
-
57
-
58
-
59
-
60
-
61
-
62
-
63
-
64
-
65
-
66
-
67
-
68
-
69
-
70
-
71
-
72
-
73
-
74
-
75
-
76
-
77
-
78
-
79
-
80
-
81
-
82
-
83
-
84
 |
 |