TASCAM SS-R200 100 SS-R200 SS-CDR200 Owners Manual - Page 44
Sync recording operation, button to move
 |
View all TASCAM SS-R200 manuals
Add to My Manuals
Save this manual to your list of manuals |
Page 44 highlights
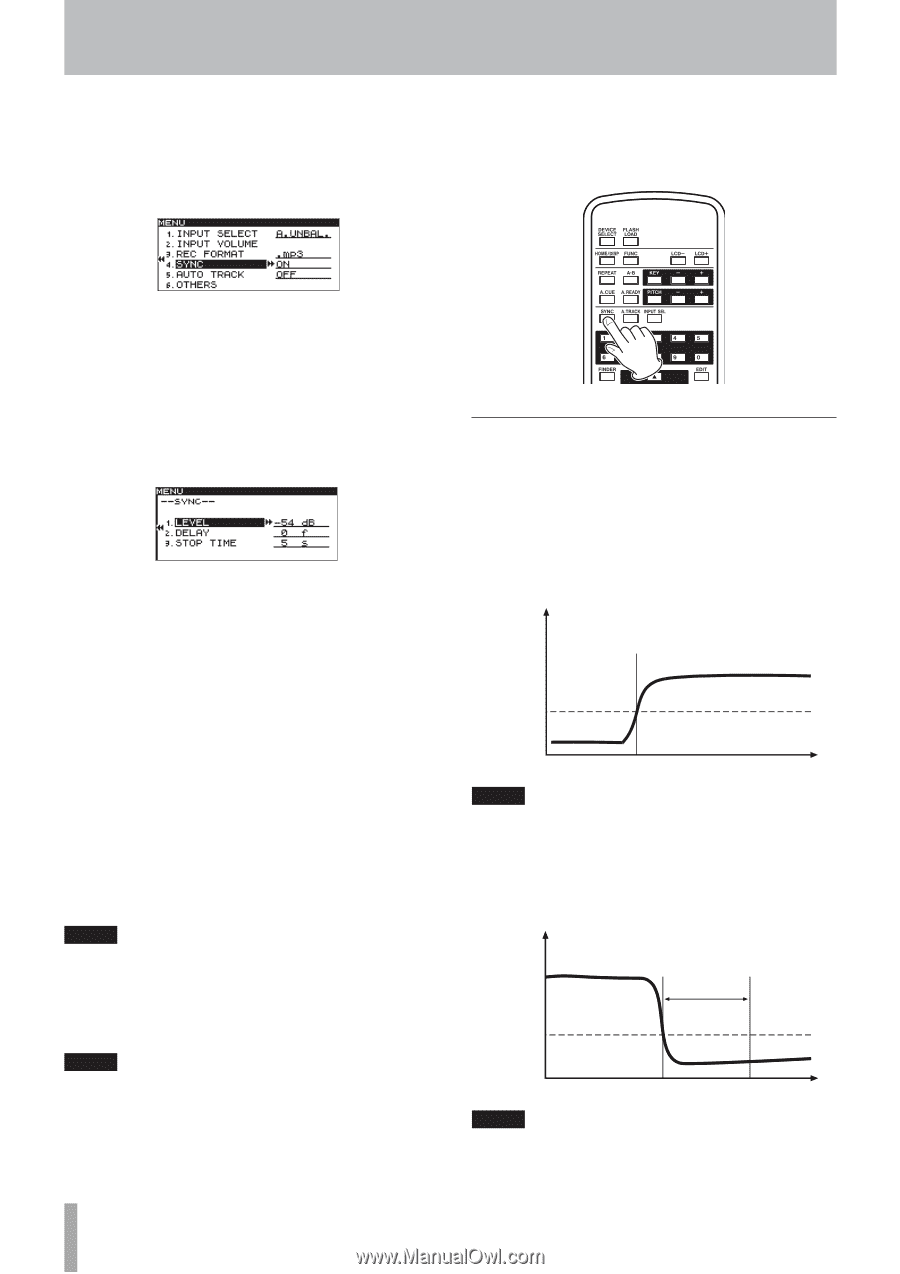
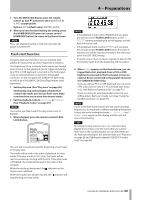
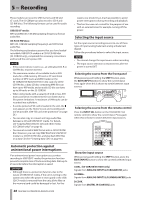
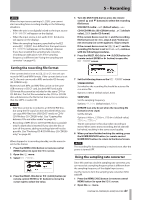
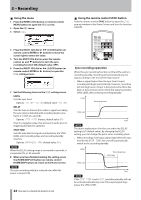
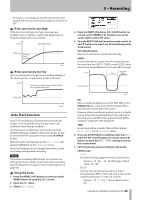
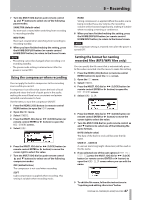
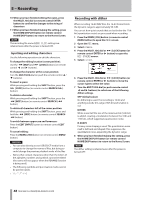
5 - Recording 88 Using the menu 1 Press the MENU [JOG] button (or remote control MENU button) to open the MENU screen. 2 Open the REC menu. 3 Select SYNC. 88 Using the remote control SYNC button Push the remote control SYNC button to open the SYNC pop-up window in the Home Screen and turn the function ON/OFF. 4 Press the MULTI JOG dial or , [LOCK] button (or remote control ENTER or t button) to move the cursor right to select the value. 5 Turn the MULTI JOG dial (or press the remote control 5 and b buttons) to turn the sync recording function ON (default value: OFF). 6 Press the MULTI JOG dial or , [LOCK] button (or remote control ENTER or t button) to open the SYNC setting screen. 7 Set the following items on the SYNC setting screen. LEVEL Sets the sync level. Options: -72 dB - -24 dB (default value: -54 dB) DELAY Sets the time (in frames) from when a signal exceeding the sync level is detected until recording begins (one frame is 1/75th of a second). Options: -75f - +75f (frames, default value: 0f) If set to a negative value, that amount of audio prior to triggering will also be captured. STOP TIME Sets the time that the signal must be below the SYNC LEVEL until recording stops and recording standby resumes. Options: INF (∞), 5s - 30s (default value: 5s) NOTE When the DELAY setting range is converted to seconds, it is equivalent to ±1.00 seconds. 8 When you have finished making the setting, press the HOME/DISPLAY button (or remote control HOME/DISP button) to return to the Home Screen. NOTE The sync recording setting is retained even after the power is turned OFF. 44 TASCAM SS-CDR200/SS-R200/SS-R100 Sync recording operation When the sync recording function is ON and the unit is in recording standby, recording will automatically start or stop according to the level of the input source. • When a signal higher than the sync level is input, recording will begin automatically. However, recording will not begin even if input is detected unless there has been at least one second in which the signal was below SYNC LEVEL after entering recording standby. Level Recording starts SYNC_LVL Time NOTE The above explanation is for the case when the DELAY setting is 0f (default value). By changing the DELAY setting, you can change the point when recording starts. • When recording, if the input signal stays below the sync level for the STOP TIME, the unit will automatically switch to the recording standby. LEVEL Recording stops STOP TIME SYNC_LVL Time NOTE If the STOP TIME is set to INF, recording standby will not be entered automatically even if the input signal stays below the SYNC LEVEL.
-
 1
1 -
2
-
3
-
4
-
5
-
6
-
7
-
8
-
9
-
10
-
11
-
12
-
13
-
14
-
15
-
16
-
17
-
18
-
19
-
20
-
21
-
22
-
23
-
24
-
25
-
26
-
27
-
28
-
29
-
30
-
31
-
32
-
33
-
34
-
35
-
36
-
37
-
38
-
 39
39 -
 40
40 -
 41
41 -
 42
42 -
 43
43 -
 44
44 -
 45
45 -
 46
46 -
 47
47 -
 48
48 -
 49
49 -
50
-
51
-
52
-
53
-
54
-
55
-
56
-
57
-
58
-
59
-
60
-
61
-
62
-
63
-
64
-
65
-
66
-
67
-
68
-
69
-
70
-
71
-
72
-
73
-
74
-
75
-
76
-
77
-
78
-
79
-
80
-
81
-
82
-
83
-
84
 |
 |