TRENDnet TEW-829DRU Users Guide - Page 39
Dynamic DNS, Server Address, Services, Apply, Enabled, DDNS Provider [IPv4], Host Name, Account
 |
View all TRENDnet TEW-829DRU manuals
Add to My Manuals
Save this manual to your list of manuals |
Page 39 highlights
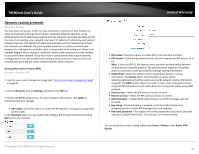
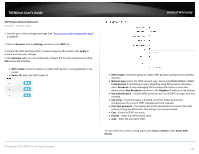
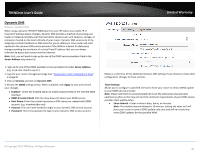
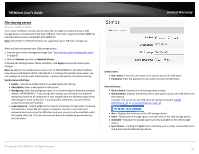
TRENDnet User's Guide Dynamic DNS Services > Dynamic DNS When using a dynamic IP/DHCP WAN type from your ISP where your public IP or Internet IP address always changes, dynamic DNS provides a method of accessing your router or network remotely over the Internet for devices such as IP cameras, storage, or computers hosted on the local LAN side of your router. Dynamic DNS services do thi by assigning a custom hostname or DNS name for you to reference. Your router will send updates to the dynamic DNS service provider if the WAN or Internet IP address(es) change providing the emulation of a virtual fixed IP address that you can always reference to access your router over the Internet. Note: First, you will need to sign up for one of the DDNS service providers listed in the Server Address drop-down list. 1. Sign up for one of the DDNS available service providers list under Server Address. (e.g. no-ip.com, dyndns.org etc.) 2. Log into your router management page (see "Access your router management page" on page 8). 3. Click on Services and click on Dynamic DNS. 4. Review the DDNS settings below. When complete, click Apply to save and commit your changes. Enabled - Check the enabled option to enable dynamic DNS on the selected WAN interface. DDNS Provider [IPv4]: Click the drop-down list Select your DDNS service. Host Name: Enter the custom hostname or DNS name you created with DDNS account. (e.g. trendnet.ddns.net) Account: The user name needed to login to your Dynamic DNS service account. Password: This is the password to login to your Dynamic DNS service account. Limited Warranty Below is a reference of the additional Dynamic DNS settings if you choose to make other configuration changes to these sections. Timer Settings Allows you to configure a specified interval to force your router to send a DDNS update to your DDNS service provider. Note: Please note that it is recommended not to set the interval too low and send updates too often as this may not meet the minimum requirements of your DDNS service provider client update policy. Force Interval - Enter a value in days, hours, or minutes. Note: The smallest interval allowed is 10 minutes. Setting the value to 0 will force your router to send a DDNS update only once and will not resend any more DDNS updates for the specified WAN. © Copyright 2019 TRENDnet. All Rights Reserved. 32
-
 1
1 -
2
-
3
-
4
-
5
-
6
-
7
-
8
-
9
-
10
-
11
-
12
-
13
-
14
-
15
-
16
-
17
-
18
-
19
-
20
-
21
-
22
-
23
-
24
-
25
-
26
-
27
-
28
-
29
-
30
-
31
-
32
-
33
-
 34
34 -
 35
35 -
 36
36 -
 37
37 -
 38
38 -
 39
39 -
 40
40 -
 41
41 -
 42
42 -
 43
43 -
 44
44 -
45
-
46
-
47
-
48
-
49
-
50
-
51
-
52
-
53
-
54
-
55
-
56
-
57
-
58
-
59
-
60
-
61
-
62
-
63
-
64
-
65
-
66
-
67
-
68
-
69
-
70
-
71
-
72
-
73
-
74
-
75
-
76
-
77
-
78
-
79
-
80
-
81
-
82
-
83
-
84
-
85
-
86
-
87
-
88
-
89
-
90
-
91
-
92
-
93
-
94
-
95
-
96
-
97
-
98
-
99
-
100
-
101
-
102
-
103
-
104
-
105
-
106
-
107
-
108
-
109
-
110
-
111
-
112
-
113
-
114
-
115
-
116
-
117
-
118
-
119
 |
 |
