TRENDnet TEW-829DRU Users Guide - Page 50
Connect wireless devices using WPS, PBC Software/Virtual Push Button, Network, PBC Start
 |
View all TRENDnet TEW-829DRU manuals
Add to My Manuals
Save this manual to your list of manuals |
Page 50 highlights
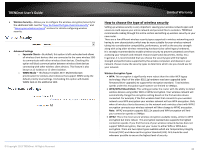
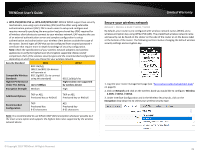
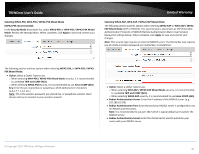
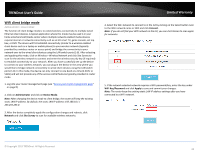
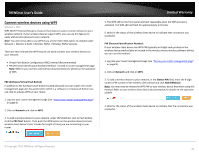
TRENDnet User's Guide Connect wireless devices using WPS Network > WPS WPS (Wi-Fi Protected Setup) is a feature that makes it easy to connect devices to your wireless network. If your wireless devices support WPS, you can use this feature to easily add wireless devices to your network. Note: You will not be able to use WPS if you set the Hide ESSID option to enabled under Network > Wireless 2.4GHz / Wireless 5GHz1 / Wireless 5GHz2 sections. There are two methods the WPS feature can easily connect your wireless devices to your network. Virtual Push Button Configuration (PBC) method (Recommended) PIN (Personal Identification Number) Method - located in router management page Note: Refer to your wireless client device documentation for details on the operation of WPS. PBC (Software/Virtual Push Button) In addition to the hardware push button located physically on your router, the router management page also has push button which is a software or virtual push button you can click to activate WPS on your router. 1. Log into your router management page (see "Access your router management page" on page 8). 2. Click on Network and click on WPS. 3. To add a wireless device to your network, under WPS Method, next to Push Button, click the PBC Start button. Then push the WPS button on the wireless device (consult wireless client device's User's Guide for length of time) you are connecting to your router. Limited Warranty 4. The WPS LED on the front panel will flash repeatedly when the WPS process is activated. The WPS LED will flash for approximately 2 minutes. 5. Wait for the status of the wireless client device to inidicate that connection was successful. PIN (Personal Identification Number) If your wireless client device has WPS PIN (typically an 8-digit code printed on the wireless device product label or located in the wireless device wireless software utility), you can use this method. 1. Log into your router management page (see "Access your router management page" on page 8). 2. Click on Network and click on WPS. 3. To add a wireless device to your network, in the Station PIN field, enter the 8-digit numeric PIN number of the wireless client device and click ADD ENROLLLE. Note: You may need to initiate the WPS PIN on your wireless device first when using this method. Refer to your wireless client device documentation for details on the operation of WPS. 4. Wait for the status of the wireless client device to inidicate that the connection was successful. © Copyright 2019 TRENDnet. All Rights Reserved. 43
-
 1
1 -
2
-
3
-
4
-
5
-
6
-
7
-
8
-
9
-
10
-
11
-
12
-
13
-
14
-
15
-
16
-
17
-
18
-
19
-
20
-
21
-
22
-
23
-
24
-
25
-
26
-
27
-
28
-
29
-
30
-
31
-
32
-
33
-
34
-
35
-
36
-
37
-
38
-
39
-
40
-
41
-
42
-
43
-
44
-
 45
45 -
 46
46 -
 47
47 -
 48
48 -
 49
49 -
 50
50 -
 51
51 -
 52
52 -
 53
53 -
 54
54 -
 55
55 -
56
-
57
-
58
-
59
-
60
-
61
-
62
-
63
-
64
-
65
-
66
-
67
-
68
-
69
-
70
-
71
-
72
-
73
-
74
-
75
-
76
-
77
-
78
-
79
-
80
-
81
-
82
-
83
-
84
-
85
-
86
-
87
-
88
-
89
-
90
-
91
-
92
-
93
-
94
-
95
-
96
-
97
-
98
-
99
-
100
-
101
-
102
-
103
-
104
-
105
-
106
-
107
-
108
-
109
-
110
-
111
-
112
-
113
-
114
-
115
-
116
-
117
-
118
-
119
 |
 |
