TRENDnet TEW-829DRU Users Guide - Page 91
SSL VPN Client Setup (Windows), Client Authentication Account.
 |
View all TRENDnet TEW-829DRU manuals
Add to My Manuals
Save this manual to your list of manuals |
Page 91 highlights
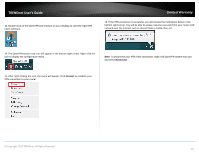
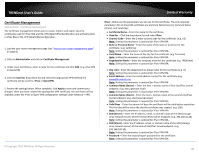
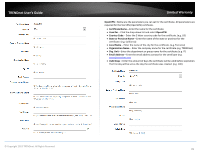
TRENDnet User's Guide 14. In the Certificate List drop-down list, select the name of the OpenVPN certificate you created and click Apply to save and commit the changes. (e.g. SSL-VPN) 15. Next to Client configuration file, click Export to download the configuration files for the VPN client computer. Note: Please do not change the filename for Windows installation. If installing in Linux, the .ovpn extension must be changed to .conf. Folder paths for SSL VPN client configuration files: Windows: C:\Program Files\OpenVPN\config Linux: /etc/openvpn Below is a reference of the additional SSL VPN settings if you choose to make other configuration changes to these sections. Note: Changing any settings will require you to export a new client configuration file. Port - Used to change the default SSL VPN server port. Server - Used to change the default IP address subnet and IP address range to distribute to SSL VPN clients. Proto - Used to change the default protocol. UDP or TCP. Connect Type - Changing this setting will change the access level of your SSL VPN clients. o LAN Access - This setting will allow your SSL VPN clients access to your LAN network and the Internet. o Internet Redirect - This setting will allow your SSL VPN clients access only the Internet only via full tunneling but no access to your LAN network Cipher - Select the cipher/encryption algorithm used for SSL VPN client connections. AES-256-CBC offers the highest degree security. Auth - The authentication/hash algorithm used for SSL VPN client connections. SHA256 offers highest degree of security. Enable client authentication - Checking this option will require additional security by means of user name and password authentication in addition to the standard encryption/authentication protocols. You will need to add a user name and password under Client Authentication Account. © Copyright 2019 TRENDnet. All Rights Reserved. Limited Warranty SSL VPN Client Setup (Windows) 1. Make sure to copy or move the configuration files downloaded from your router to the VPN client computer and that your client computer has access to the Internet. 2. Download the appropriate OpenVPN software version for your operating system from the following URL: https://openvpn.net/index.php/open-source/downloads.html Note: Please note there is also a link in the description in the router management page under Advanced > Setup > VPN. 3. Once you have downloaded the software, navigate to the location where you downloaded the file and double click to start the installation. 4. If prompted to run the file, click Run. 84
-
 1
1 -
2
-
3
-
4
-
5
-
6
-
7
-
8
-
9
-
10
-
11
-
12
-
13
-
14
-
15
-
16
-
17
-
18
-
19
-
20
-
21
-
22
-
23
-
24
-
25
-
26
-
27
-
28
-
29
-
30
-
31
-
32
-
33
-
34
-
35
-
36
-
37
-
38
-
39
-
40
-
41
-
42
-
43
-
44
-
45
-
46
-
47
-
48
-
49
-
50
-
51
-
52
-
53
-
54
-
55
-
56
-
57
-
58
-
59
-
60
-
61
-
62
-
63
-
64
-
65
-
66
-
67
-
68
-
69
-
70
-
71
-
72
-
73
-
74
-
75
-
76
-
77
-
78
-
79
-
80
-
81
-
82
-
83
-
84
-
85
-
 86
86 -
 87
87 -
 88
88 -
 89
89 -
 90
90 -
 91
91 -
 92
92 -
 93
93 -
 94
94 -
 95
95 -
 96
96 -
97
-
98
-
99
-
100
-
101
-
102
-
103
-
104
-
105
-
106
-
107
-
108
-
109
-
110
-
111
-
112
-
113
-
114
-
115
-
116
-
117
-
118
-
119
 |
 |
