TRENDnet TEW-829DRU Users Guide - Page 90
Secure Socket Layer VPN (SSL) / OpenVPN, SSL VPN Server Setup
 |
View all TRENDnet TEW-829DRU manuals
Add to My Manuals
Save this manual to your list of manuals |
Page 90 highlights
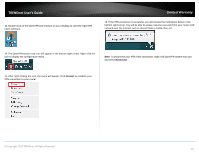
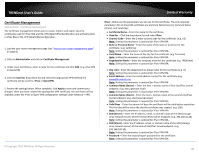
TRENDnet User's Guide Secure Socket Layer VPN (SSL) / OpenVPN Network > VPN > OpenVPN Limited Warranty 7. In the Local Name field, enter the city name. (e.g. Torrance) 8. In the Organization Name field, enter your company name (e.g. TRENDnet) SSL VPN Server Setup 1. Log into your router management page (see "Access your router management page" on page 8). 2. Click on Administrator and click Certificate Management. 3. Enter a name for the certificate to use for SSL VPN and click Add. (e.g. SSL-VPN) 9. In the Org. Unit field, enter the section, group, or department. (e.g. IT) 10. In the Email Address field, enter the email address used for the certificate. (e.g. [email protected]) 11. In the Validity Days field, enter the number of days the certificate will be valid and click Apply to save and commit the changes.. (e.g. 100) 4. Click the Used for drop-down list and select OpenVPN. 5. In the Country Code field, enter the two letter country code. (e.g. US) 6. In the State or Province Name field, enter the full name of the state or province. (e.g. California) 12. Click on Network, click VPN, and click the OpenVPN tab. 13. Check the Enable option to enable the SSL VPN server. Note: You may receive a notification if Dynamic DNS is not configured on your router. If you are using VPN, it is not required however, strongly recommended to setup the Dynamic DNS feature on your router to prevent any issues with VPN connectivity if your public (WAN) Internet IP address dynamically changes. © Copyright 2019 TRENDnet. All Rights Reserved. 83
-
 1
1 -
2
-
3
-
4
-
5
-
6
-
7
-
8
-
9
-
10
-
11
-
12
-
13
-
14
-
15
-
16
-
17
-
18
-
19
-
20
-
21
-
22
-
23
-
24
-
25
-
26
-
27
-
28
-
29
-
30
-
31
-
32
-
33
-
34
-
35
-
36
-
37
-
38
-
39
-
40
-
41
-
42
-
43
-
44
-
45
-
46
-
47
-
48
-
49
-
50
-
51
-
52
-
53
-
54
-
55
-
56
-
57
-
58
-
59
-
60
-
61
-
62
-
63
-
64
-
65
-
66
-
67
-
68
-
69
-
70
-
71
-
72
-
73
-
74
-
75
-
76
-
77
-
78
-
79
-
80
-
81
-
82
-
83
-
84
-
 85
85 -
 86
86 -
 87
87 -
 88
88 -
 89
89 -
 90
90 -
 91
91 -
 92
92 -
 93
93 -
 94
94 -
 95
95 -
96
-
97
-
98
-
99
-
100
-
101
-
102
-
103
-
104
-
105
-
106
-
107
-
108
-
109
-
110
-
111
-
112
-
113
-
114
-
115
-
116
-
117
-
118
-
119
 |
 |
