Brother International MD-611 Instruction Manual - English - Page 11
Contents, Inhalt
 |
View all Brother International MD-611 manuals
Add to My Manuals
Save this manual to your list of manuals |
Page 11 highlights
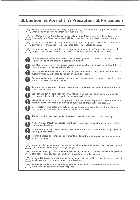
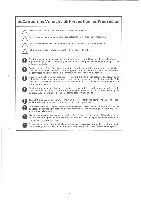
CONTENTS SAFETY INSTRUCTIONS 1. INSTALLATION 1 1.1 Installing the motor to the work table 1 1.2 Attaching the belt 3 1.3 Installing the belt cover 5 1.4 Connecting the connecting rod 5 1.5 Connecting the cords 6 1.6 Connecting the operation panel 10 1.7 Installing the head lamp 14 2. STANDARD ADJUSTMENTS 16 2.1 Adjusting the belt cover safety mechanism 16 2.1.1 Adjusting the belt casting prevention guide 16 2.1.2 Adjusting the finger guard 16 2.2 Adjusting the treadle 18 2.2.1 Adjusting the treadle pressure 18 2.2.2 Adjusting the treadle return pressure 18 2.2.3 Adjusting the treadle stroke 18 3. CORRECT OPERATION 20 3.1 Operating the treadle 20 3.1.1 For treadles with one forward and one rear stage 20 3.1.2 For treadles with two forward and two rear stages 24 3.2 Using the control box 26 3.2.1 Power switch and power indicator 26 3.2.2 Setting the sewing speed 26 3.3 Setting the DIP switches 28 3.4 Daily precautions 30 4. CONNECTING OPTIONS 34 4.1 Connecting the pedal for standing operations 34 4.2 Connecting the material edge sensor 37 5. TROUBLESHOOTING 39 INHALT SICHERHEITSHINWEISE 1. MONTAGE 1 1.1 Montage des Motors am Nahtisch 1 1.2 Montage des Riemens 3 1.3 Montage der Riemenschutzes 5 1.4 Montage der Zwischenstange 5 1.5 AnschluR der Kabel 6 1.6 AnschlieRen der Bedienungstafel 10 1.7 Montage der Leuchte 14 2. STANDARDEINSTELLUNGEN 16 2.1 Einstellen der Riemenschutz- Sicherheitsvorrichtung 16 2.1.1 Einstellen der Riemenschutzhihrung 16 2.1.2 Einstellen des Fingerschutzes 16 2.2 Einstellen des Pedals 18 2.2.1 Einstellen der Pedaldruckkraft 18 2.2.2 Einstellen der Pedalruckstellkraft 18 2.2.3 Einstellen des Pedalhubs 18 3. RICHTIGE BEDIENUNG 21 3.1 Bedienung des Pedals 21 3.1.1 Fur Pedale mit einer Vorwarts- und einer Ruckwartsstufe 21 3.1.2 Fur Pedale mit zwei Vorwarts- und zwei Ruckwartsstufen 24 3.2 Schaltkasten 26 3.2.1 Netzschalter und Netzkontrolleuchte 26 3.2.2 Einstellen der Nahgeschwindigkeit 26 3.3 Einstellen der DIP-Schalter 28 3.4 Tagliche VorsichtsmaRnahmen 31 4. ANSCHLIESSEN VON OPTIONEN 34 4.1 AnschlieRen des Pedals fur stehenden Betrieb 34 4.2 AnschlieRen des Stoffkantensensors 37 5. FEHLERSUCHE 39
-
 1
1 -
2
-
3
-
4
-
5
-
 6
6 -
 7
7 -
 8
8 -
 9
9 -
 10
10 -
 11
11 -
 12
12 -
 13
13 -
 14
14 -
 15
15 -
 16
16 -
17
-
18
-
19
-
20
-
21
-
22
-
23
-
24
-
25
-
26
-
27
-
28
-
29
-
30
-
31
-
32
-
33
-
34
-
35
-
36
-
37
-
38
-
39
-
40
-
41
-
42
-
43
-
44
-
45
-
46
-
47
-
48
-
49
-
50
-
51
-
52
-
53
-
54
-
55
-
56
-
57
-
58
-
59
 |
 |
