Canon imageCLASS MF4270 imageCLASS MF4270 Reference Guide - Page 52
When setting an envelope, gently insert the, When setting paper, gently insert the paper into
 |
View all Canon imageCLASS MF4270 manuals
Add to My Manuals
Save this manual to your list of manuals |
Page 52 highlights
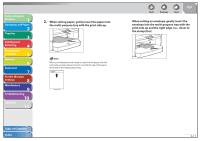
Before Using the Machine 1 Document and Paper 2 Copying 3 Sending and Receiving 4 Printing and Scanning 5 Network 6 Remote UI 7 System Manager Settings 8 Maintenance 9 Troubleshooting 10 Appendix 11 2. When setting paper, gently insert the paper into the multi-purpose tray with the print side up. When you load paper with a logo on, position the paper with the print side up (logo side) and insert it so that the top of the paper feeds first in the multi-purpose tray. Table of Contents Index Back Previous Next TOP When setting an envelope, gently insert the envelope into the multi-purpose tray with the print side up and the right edge (i.e., closer to the stamp) first. 2-11
-
 1
1 -
2
-
3
-
4
-
5
-
6
-
7
-
8
-
9
-
10
-
11
-
12
-
13
-
14
-
15
-
16
-
17
-
18
-
19
-
20
-
21
-
22
-
23
-
24
-
25
-
26
-
27
-
28
-
29
-
30
-
31
-
32
-
33
-
34
-
35
-
36
-
37
-
38
-
39
-
40
-
41
-
42
-
43
-
44
-
45
-
46
-
 47
47 -
 48
48 -
 49
49 -
 50
50 -
 51
51 -
 52
52 -
 53
53 -
 54
54 -
 55
55 -
 56
56 -
 57
57 -
58
-
59
-
60
-
61
-
62
-
63
-
64
-
65
-
66
-
67
-
68
-
69
-
70
-
71
-
72
-
73
-
74
-
75
-
76
-
77
-
78
-
79
-
80
-
81
-
82
-
83
-
84
-
85
-
86
-
87
-
88
-
89
-
90
-
91
-
92
-
93
-
94
-
95
-
96
-
97
-
98
-
99
-
100
-
101
-
102
-
103
-
104
-
105
-
106
-
107
-
108
-
109
-
110
-
111
-
112
-
113
-
114
-
115
-
116
-
117
-
118
-
119
-
120
-
121
-
122
-
123
-
124
-
125
-
126
-
127
-
128
-
129
-
130
-
131
-
132
-
133
-
134
-
135
-
136
-
137
-
138
-
139
-
140
-
141
-
142
-
143
-
144
-
145
-
146
-
147
-
148
-
149
-
150
-
151
-
152
-
153
-
154
-
155
-
156
-
157
-
158
-
159
-
160
-
161
-
162
-
163
-
164
-
165
-
166
-
167
-
168
-
169
-
170
-
171
-
172
-
173
-
174
-
175
-
176
-
177
-
178
-
179
-
180
-
181
-
182
-
183
-
184
-
185
-
186
-
187
-
188
-
189
-
190
-
191
-
192
-
193
-
194
-
195
-
196
-
197
-
198
-
199
-
200
-
201
-
202
-
203
-
204
-
205
-
206
-
207
-
208
-
209
-
210
-
211
-
212
-
213
-
214
-
215
-
216
-
217
-
218
-
219
-
220
-
221
-
222
-
223
-
224
-
225
-
226
-
227
-
228
-
229
-
230
-
231
-
232
-
233
-
234
-
235
-
236
-
237
-
238
-
239
-
240
-
241
-
242
-
243
-
244
-
245
-
246
-
247
-
248
-
249
-
250
-
251
-
252
-
253
-
254
-
255
-
256
-
257
-
258
-
259
-
260
-
261
-
262
-
263
-
264
-
265
-
266
-
267
-
268
-
269
-
270
-
271
-
272
 |
 |
1
2
3
4
5
6
7
8
9
10
11
Back
Next
Previous
TOP
2-11
Before Using the
Machine
Document and Paper
Copying
Sending and
Receiving
Printing and
Scanning
Network
Remote UI
System Manager
Settings
Maintenance
Troubleshooting
Appendix
Index
Table of Contents
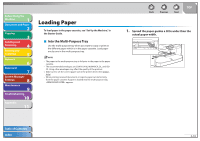
2.
When setting paper, gently insert the paper into
the multi-purpose tray with the print side up.
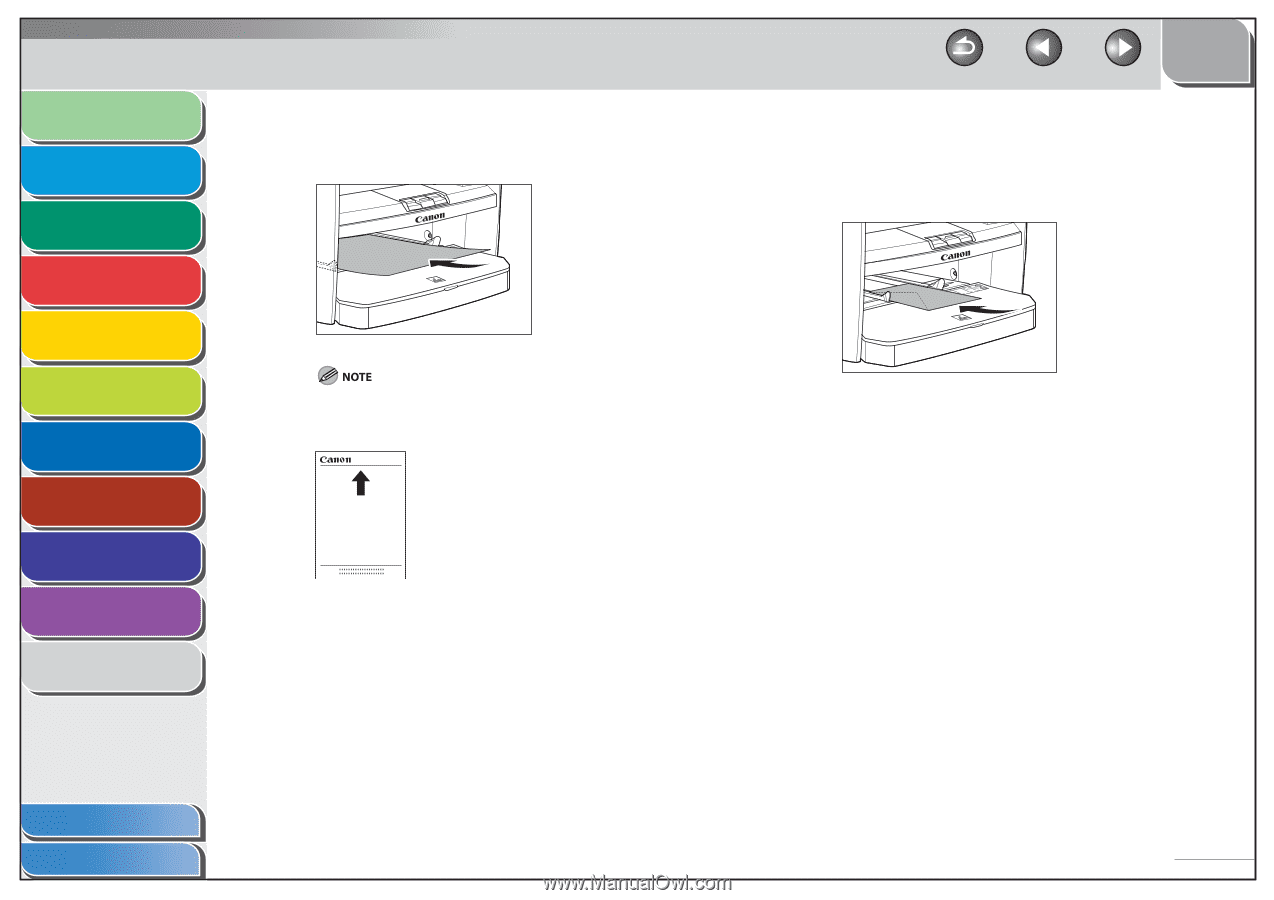
When you load paper with a logo on, position the paper with the
print side up (logo side) and insert it so that the top of the paper
feeds first in the multi-purpose tray.
When setting an envelope, gently insert the
envelope into the multi-purpose tray with the
print side up and the right edge (i.e., closer to
the stamp) first.