Canon imageCLASS MF4270 imageCLASS MF4270 Reference Guide - Page 80
Group Dialing, Using Address Book Key, Press [Address Book].
 |
View all Canon imageCLASS MF4270 manuals
Add to My Manuals
Save this manual to your list of manuals |
Page 80 highlights
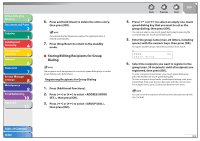
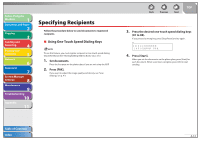
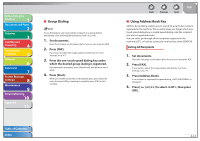
Before Using the Machine 1 Document and Paper 2 Copying 3 Sending and Receiving 4 Printing and Scanning 5 Network 6 Remote UI 7 System Manager Settings 8 Maintenance 9 Troubleshooting 10 Appendix 11 ˙ Group Dialing To use this feature, you must register recipients in a group dialing beforehand. (See "Storing/Editing Address Book," on p. 4-6.) 1. Set documents. Place the first page on the platen glass if you are not using the ADF. 2. Press [FAX]. If you want to adjust the image quality and density, see "Scan Settings," on p. 4-5. 3. Press the one-touch speed dialing key under which the desired group dialing is registered. If you pressed a wrong key, press [Stop/Reset], and perform step 3 again. 4. Press [Start]. When you set the documents on the platen glass, press [Start] for each document. When scanning is complete, press [OK] to start sending. Back Previous Next TOP ˙ Using Address Book Key Address book dialing enables you to search for a particular recipient registered in the machine. This is useful when you forget which onetouch speed dialing key or coded speed dialing code the recipient you want is registered under. You can either go through all the recipients registered in the machine (LIST), or look up a particular one by their name (SEARCH). Listing All Recipients 1. Set documents. Place the first page on the platen glass if you are not using the ADF. 2. Press [FAX]. If you want to adjust the image quality and density, see "Scan Settings," on p. 4-5. 3. Press [Address Book]. If no recipient is registered for speed dialing, is displayed. 4. Press [ ] or [ ] to select , then press [OK]. Table of Contents Index 4-14
-
 1
1 -
2
-
3
-
4
-
5
-
6
-
7
-
8
-
9
-
10
-
11
-
12
-
13
-
14
-
15
-
16
-
17
-
18
-
19
-
20
-
21
-
22
-
23
-
24
-
25
-
26
-
27
-
28
-
29
-
30
-
31
-
32
-
33
-
34
-
35
-
36
-
37
-
38
-
39
-
40
-
41
-
42
-
43
-
44
-
45
-
46
-
47
-
48
-
49
-
50
-
51
-
52
-
53
-
54
-
55
-
56
-
57
-
58
-
59
-
60
-
61
-
62
-
63
-
64
-
65
-
66
-
67
-
68
-
69
-
70
-
71
-
72
-
73
-
74
-
 75
75 -
 76
76 -
 77
77 -
 78
78 -
 79
79 -
 80
80 -
 81
81 -
 82
82 -
 83
83 -
 84
84 -
 85
85 -
86
-
87
-
88
-
89
-
90
-
91
-
92
-
93
-
94
-
95
-
96
-
97
-
98
-
99
-
100
-
101
-
102
-
103
-
104
-
105
-
106
-
107
-
108
-
109
-
110
-
111
-
112
-
113
-
114
-
115
-
116
-
117
-
118
-
119
-
120
-
121
-
122
-
123
-
124
-
125
-
126
-
127
-
128
-
129
-
130
-
131
-
132
-
133
-
134
-
135
-
136
-
137
-
138
-
139
-
140
-
141
-
142
-
143
-
144
-
145
-
146
-
147
-
148
-
149
-
150
-
151
-
152
-
153
-
154
-
155
-
156
-
157
-
158
-
159
-
160
-
161
-
162
-
163
-
164
-
165
-
166
-
167
-
168
-
169
-
170
-
171
-
172
-
173
-
174
-
175
-
176
-
177
-
178
-
179
-
180
-
181
-
182
-
183
-
184
-
185
-
186
-
187
-
188
-
189
-
190
-
191
-
192
-
193
-
194
-
195
-
196
-
197
-
198
-
199
-
200
-
201
-
202
-
203
-
204
-
205
-
206
-
207
-
208
-
209
-
210
-
211
-
212
-
213
-
214
-
215
-
216
-
217
-
218
-
219
-
220
-
221
-
222
-
223
-
224
-
225
-
226
-
227
-
228
-
229
-
230
-
231
-
232
-
233
-
234
-
235
-
236
-
237
-
238
-
239
-
240
-
241
-
242
-
243
-
244
-
245
-
246
-
247
-
248
-
249
-
250
-
251
-
252
-
253
-
254
-
255
-
256
-
257
-
258
-
259
-
260
-
261
-
262
-
263
-
264
-
265
-
266
-
267
-
268
-
269
-
270
-
271
-
272
 |
 |