Cisco 7925G Administration Guide - Page 101
Configuring Advanced Network Profile Settings
 |
UPC - 882658201943
View all Cisco 7925G manuals
Add to My Manuals
Save this manual to your list of manuals |
Page 101 highlights
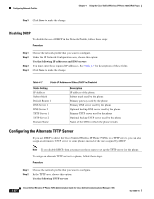
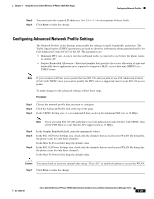
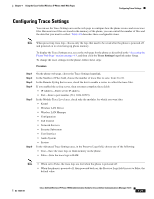
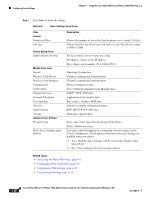
Chapter 4 Using the Cisco Unified Wireless IP Phone 7925G Web Pages Configuring Network Profiles Step 3 You must enter the required IP addresses. See Table 4-7 for descriptions of these fields. Step 4 Click Save to make the change. Configuring Advanced Network Profile Settings The Network Profiles in the Settings menu enable the settings for QoS, bandwidth, and power. The Traffic Specification (TSPEC) parameters are used to advertise information about generated traffic for Call Admission Control (CAC) to the AP. The parameters are: • Minimum PHY rate-Lowest rate that outbound traffic is expected to use before the phone roams to another AP • Surplus Bandwidth Allowance-Fractional number that specifies the excess allocation of time and bandwidth above application rates required to transport a MAC service data unit (MSDU) in a TSPEC frame. Note If your wireless LAN has access points that use 802.11b and you plan to use Call Admission Control (CAC) with TSPEC, then you need to modify the PHY rate to a supported rate for your 802.11b access points. To make changes to the advanced settings, follow these steps: Procedure Step 1 Step 2 Step 3 Choose the network profile that you want to configure. Click the Advanced Profile link at the top of the page. In the TSPEC Setting area, it is recommended that you keep the minimum PHY rate at 12 Mbps. Note If you are using 802.11b APs and plan to use Call Admission Control (CAC) with TSPEC, then set the PHY Rate to a rate that the APs support such as 11 Mbps. Step 4 Step 5 Step 6 In the Surplus Bandwidth field, enter the appropriate values. In the 802.11G Power Settings area, check only the channels that are used in your WLAN. By doing this, the phone scans for only those channels. In the Max Tx Power field, keep the default value. In the 802.11A Power Settings area, check only the channels that are used in your WLAN. By doing this, the phone scans for only those channels. In the Max Tx Power field, keep the default value. Caution You must check at least one channel after using "Clear All," to enable the phone to access the WLAN. Step 7 Click Save to make the change. OL-15984-01 Cisco Unified Wireless IP Phone 7925G Administration Guide for Cisco Unified Communications Manager 7.0(1) 4-25
-
 1
1 -
2
-
3
-
4
-
5
-
6
-
7
-
8
-
9
-
10
-
11
-
12
-
13
-
14
-
15
-
16
-
17
-
18
-
19
-
20
-
21
-
22
-
23
-
24
-
25
-
26
-
27
-
28
-
29
-
30
-
31
-
32
-
33
-
34
-
35
-
36
-
37
-
38
-
39
-
40
-
41
-
42
-
43
-
44
-
45
-
46
-
47
-
48
-
49
-
50
-
51
-
52
-
53
-
54
-
55
-
56
-
57
-
58
-
59
-
60
-
61
-
62
-
63
-
64
-
65
-
66
-
67
-
68
-
69
-
70
-
71
-
72
-
73
-
74
-
75
-
76
-
77
-
78
-
79
-
80
-
81
-
82
-
83
-
84
-
85
-
86
-
87
-
88
-
89
-
90
-
91
-
92
-
93
-
94
-
95
-
 96
96 -
 97
97 -
 98
98 -
 99
99 -
 100
100 -
 101
101 -
 102
102 -
 103
103 -
 104
104 -
 105
105 -
 106
106 -
107
-
108
-
109
-
110
-
111
-
112
-
113
-
114
-
115
-
116
-
117
-
118
-
119
-
120
-
121
-
122
-
123
-
124
-
125
-
126
-
127
-
128
-
129
-
130
-
131
-
132
-
133
-
134
-
135
-
136
-
137
-
138
-
139
-
140
-
141
-
142
-
143
-
144
-
145
-
146
-
147
-
148
-
149
-
150
-
151
-
152
-
153
-
154
-
155
-
156
-
157
-
158
-
159
-
160
-
161
-
162
-
163
-
164
-
165
-
166
-
167
-
168
-
169
-
170
-
171
-
172
-
173
-
174
-
175
-
176
-
177
-
178
-
179
-
180
-
181
-
182
-
183
-
184
-
185
-
186
-
187
-
188
-
189
-
190
-
191
-
192
-
193
-
194
-
195
-
196
-
197
-
198
-
199
-
200
-
201
-
202
-
203
-
204
-
205
-
206
-
207
-
208
-
209
-
210
-
211
-
212
-
213
-
214
-
215
-
216
-
217
-
218
-
219
-
220
-
221
-
222
-
223
-
224
-
225
-
226
-
227
-
228
-
229
-
230
-
231
-
232
-
233
-
234
-
235
-
236
-
237
-
238
-
239
-
240
-
241
-
242
-
243
-
244
 |
 |