Cisco 7925G Administration Guide - Page 97
Requesting and Importing the User Installed Certificate
 |
UPC - 882658201943
View all Cisco 7925G manuals
Add to My Manuals
Save this manual to your list of manuals |
Page 97 highlights
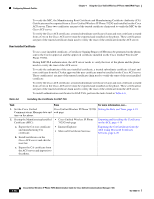
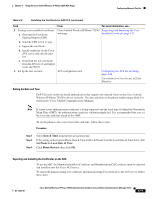
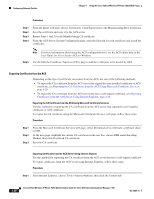
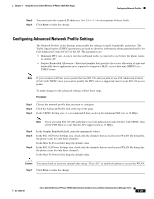
Chapter 4 Using the Cisco Unified Wireless IP Phone 7925G Web Pages Configuring Network Profiles Step 2 Step 3 Step 4 Step 5 Step 6 Under Certificates, click Certificates..., then click the Trusted Root Certification Authorities tab. Highlight the root certificate and click Export.... The Certificate Export Wizard appears. Click Next. At the next window, select DER encoded binary X.509 (.CER), and click Next. Specify a name for the certificate and click Next. Save the CA certificate to be installed on the phone. Requesting and Importing the User Installed Certificate To request and install the certificate on the phone, follow these steps: Procedure Step 1 Step 2 From the phone web page, choose the network profile using EAP-TLS, and select User Installed in the EAP-TLS Certificate field. Click Certificates. On the User Certificate Installation page, the Common Name field should match the user name in the ACS server. Note You can edit the Common Name field if you wish. Make sure that it matches the user name in the ACS server. See "Configuring the ACS Server Setup" section on page 4-22. Step 3 Step 4 Step 5 Step 6 Step 7 Step 8 Step 9 Enter the information to be displayed on the certificate, and click Submit to generate the Certificate Signing Request (CSR). In the next screen, select and copy the entire contents of the text box. Send this data to the CA administrator for signing. The CSR text is encoded and should be sent to the Certificate Authority for signing. The CSR text can be sent by e-mail or another method determined by your CA administrator. The following steps describe the basic CSR approval process on the CA web page. From the Microsoft Certificate Services Request a Certificate page, select Advanced certificate request to initiate the signing request. At the Advanced Certificate Request page, select Submit a certificate request by using a base-64-encoded PKCS CMC. Copy the certificate data from the Cisco Unified Wireless IP Phone 7925G and paste it in the Saved Request text box, then click Submit. Once the CSR is approved, the certificate must be exported in a DER encoded format and sent to the original requestor. Return to the phone web page and choose Certificates to import the signed certificate. On the Certificates page, locate the User Installed certificate line, and click Import. Browse to the certificate on your PC to import to the phone. Installing the Authentication Server Root Certificate The Authentication Server Root Certificate must be installed on the Cisco Unified Wireless IP Phone 7925G. To install the certificate, follow these steps: OL-15984-01 Cisco Unified Wireless IP Phone 7925G Administration Guide for Cisco Unified Communications Manager 7.0(1) 4-21
-
 1
1 -
2
-
3
-
4
-
5
-
6
-
7
-
8
-
9
-
10
-
11
-
12
-
13
-
14
-
15
-
16
-
17
-
18
-
19
-
20
-
21
-
22
-
23
-
24
-
25
-
26
-
27
-
28
-
29
-
30
-
31
-
32
-
33
-
34
-
35
-
36
-
37
-
38
-
39
-
40
-
41
-
42
-
43
-
44
-
45
-
46
-
47
-
48
-
49
-
50
-
51
-
52
-
53
-
54
-
55
-
56
-
57
-
58
-
59
-
60
-
61
-
62
-
63
-
64
-
65
-
66
-
67
-
68
-
69
-
70
-
71
-
72
-
73
-
74
-
75
-
76
-
77
-
78
-
79
-
80
-
81
-
82
-
83
-
84
-
85
-
86
-
87
-
88
-
89
-
90
-
91
-
 92
92 -
 93
93 -
 94
94 -
 95
95 -
 96
96 -
 97
97 -
 98
98 -
 99
99 -
 100
100 -
 101
101 -
 102
102 -
103
-
104
-
105
-
106
-
107
-
108
-
109
-
110
-
111
-
112
-
113
-
114
-
115
-
116
-
117
-
118
-
119
-
120
-
121
-
122
-
123
-
124
-
125
-
126
-
127
-
128
-
129
-
130
-
131
-
132
-
133
-
134
-
135
-
136
-
137
-
138
-
139
-
140
-
141
-
142
-
143
-
144
-
145
-
146
-
147
-
148
-
149
-
150
-
151
-
152
-
153
-
154
-
155
-
156
-
157
-
158
-
159
-
160
-
161
-
162
-
163
-
164
-
165
-
166
-
167
-
168
-
169
-
170
-
171
-
172
-
173
-
174
-
175
-
176
-
177
-
178
-
179
-
180
-
181
-
182
-
183
-
184
-
185
-
186
-
187
-
188
-
189
-
190
-
191
-
192
-
193
-
194
-
195
-
196
-
197
-
198
-
199
-
200
-
201
-
202
-
203
-
204
-
205
-
206
-
207
-
208
-
209
-
210
-
211
-
212
-
213
-
214
-
215
-
216
-
217
-
218
-
219
-
220
-
221
-
222
-
223
-
224
-
225
-
226
-
227
-
228
-
229
-
230
-
231
-
232
-
233
-
234
-
235
-
236
-
237
-
238
-
239
-
240
-
241
-
242
-
243
-
244
 |
 |