Cisco 7925G Administration Guide - Page 169
Accessing the CTL File Screen, Settings, System Configuration > Security > CTL File, Erase
 |
UPC - 882658201943
View all Cisco 7925G manuals
Add to My Manuals
Save this manual to your list of manuals |
Page 169 highlights
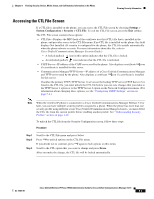
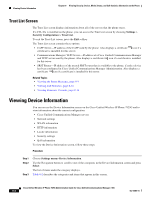
Chapter 8 Viewing Security, Device, Model, Status, and Call Statistics Information on the Phone Viewing Security Information Accessing the CTL File Screen If a CTL file is installed on the phone, you can access the CTL File screen by choosing Settings > System Configuration > Security > CTL File. To exit the CTL File screen, press the Exit softkey. The CTL File screen contains these options: • CTL File-Displays the MD5 hash of the certificate trust list (CTL) file that is installed in the phone, and provides access to the CTL File menu. If no CTL file is installed on the phone, this field displays Not Installed. (If security is configured for the phone, the CTL file installs automatically when the phone reboots or resets. For more information about this file, refer to Cisco Unified Communications Manager Security Guide.) - A locked padlock icon in this option indicates that the CTL file is locked. - An unlocked padlock icon indicates that the CTL file is unlocked. • CAPF Server-IP address of the CAPF server used by the phone. Also displays a certificate icon if a certificate is installed for this server. • Communications Manager/TFTP Server-IP address of a Cisco Unified Communications Manager and TFTP server used by the phone. Also displays a certificate icon if a certificate is installed for this server. If neither the primary TFTP (TFTP Server 1) server nor the backup TFTP server (TFTP Server 2) is listed in the CTL file, you must unlock the CTL file before you can save changes that you make to the TFTP Server 1 option or to the TFTP Server 2 option on the Network Configuration menu. (For information about changing these options, see the "Configuring DHCP Settings" section on page 5-6.) Note When the wireless IP phone is connected to a Cisco Unified Communications Manager Release 5.0 or later, you can have multiple security profiles assigned to a phone. When the phone has more than one security profile using different secure Cisco Unified Communications Manager clusters, you must delete the CTL file from the current profile before enabling another profile. See "Understanding Security Profiles" section on page 1-12. To unlock the CTL file from the Security Configuration screen, follow these steps: Procedure Step 1 Step 2 Step 3 Scroll to the CTL File menu and press Select. Press **# to unlock options on the CTL File menu. If you decide not to continue, press **# again to lock options on this menu. Scroll to the CTL option that you want to change and press Erase. After you make the change, the CTL file will be locked automatically. OL-15984-01 Cisco Unified Wireless IP Phone 7925G Administration Guide for Cisco Unified Communications Manager 7.0(1) 8-3
-
 1
1 -
2
-
3
-
4
-
5
-
6
-
7
-
8
-
9
-
10
-
11
-
12
-
13
-
14
-
15
-
16
-
17
-
18
-
19
-
20
-
21
-
22
-
23
-
24
-
25
-
26
-
27
-
28
-
29
-
30
-
31
-
32
-
33
-
34
-
35
-
36
-
37
-
38
-
39
-
40
-
41
-
42
-
43
-
44
-
45
-
46
-
47
-
48
-
49
-
50
-
51
-
52
-
53
-
54
-
55
-
56
-
57
-
58
-
59
-
60
-
61
-
62
-
63
-
64
-
65
-
66
-
67
-
68
-
69
-
70
-
71
-
72
-
73
-
74
-
75
-
76
-
77
-
78
-
79
-
80
-
81
-
82
-
83
-
84
-
85
-
86
-
87
-
88
-
89
-
90
-
91
-
92
-
93
-
94
-
95
-
96
-
97
-
98
-
99
-
100
-
101
-
102
-
103
-
104
-
105
-
106
-
107
-
108
-
109
-
110
-
111
-
112
-
113
-
114
-
115
-
116
-
117
-
118
-
119
-
120
-
121
-
122
-
123
-
124
-
125
-
126
-
127
-
128
-
129
-
130
-
131
-
132
-
133
-
134
-
135
-
136
-
137
-
138
-
139
-
140
-
141
-
142
-
143
-
144
-
145
-
146
-
147
-
148
-
149
-
150
-
151
-
152
-
153
-
154
-
155
-
156
-
157
-
158
-
159
-
160
-
161
-
162
-
163
-
 164
164 -
 165
165 -
 166
166 -
 167
167 -
 168
168 -
 169
169 -
 170
170 -
 171
171 -
 172
172 -
 173
173 -
 174
174 -
175
-
176
-
177
-
178
-
179
-
180
-
181
-
182
-
183
-
184
-
185
-
186
-
187
-
188
-
189
-
190
-
191
-
192
-
193
-
194
-
195
-
196
-
197
-
198
-
199
-
200
-
201
-
202
-
203
-
204
-
205
-
206
-
207
-
208
-
209
-
210
-
211
-
212
-
213
-
214
-
215
-
216
-
217
-
218
-
219
-
220
-
221
-
222
-
223
-
224
-
225
-
226
-
227
-
228
-
229
-
230
-
231
-
232
-
233
-
234
-
235
-
236
-
237
-
238
-
239
-
240
-
241
-
242
-
243
-
244
 |
 |