Cisco 7925G Administration Guide - Page 78
Installing the USB Drivers, Configuring the USB LAN on the PC
 |
UPC - 882658201943
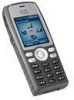
View all Cisco 7925G manuals
Add to My Manuals
Save this manual to your list of manuals |
Page 78 highlights
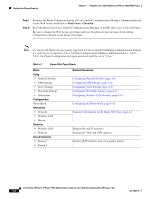
Setting Up Your PC to Configure the Phones Chapter 4 Using the Cisco Unified Wireless IP Phone 7925G Web Pages Installing the USB Drivers To install the drivers on your PC, perform the following steps: Procedure Step 1 Step 2 Log into Cisco.com. Download the installation package and "read me" file for the USB drivers from this location: http://www.cisco.com/cgi-bin/tablebuild.pl/ip-7900ser-crypto Note Before proceeding, review the "read me" file for specific instructions for your PC operating system. Step 3 Double-click on the USB-Install-7925.1-0-2.exe file to start the installation program. Step 4 Follow the prompts in the InstallShield Wizard. Note If you receive a Hardware Installation warning message stating that the software has not passed Microsoft Windows Logo testing, click Continue. Step 5 Step 6 Step 7 Step 8 Step 9 The driver installation is complete when you see the Finished screen. You can close the wizard. Plug the USB cable into the USB port on the PC and into the USB connector on the phone. The Found New Hardware Wizard dialog opens. To update the new software, click the button next to Yes, this time only and click Next. Click the button next to Install the Software automatically (Recommended). After 2-3 minutes, the software installs and a message appears on the task bar stating "Found New Hardware - Software installed and ready to use." Click Finish when the installation is complete. The phone briefly displays "USB Connected" on the status line. Configuring the USB LAN on the PC To configure the USB LAN connection on your PC, follow these steps: Procedure Step 1 Step 2 Step 3 To setup the USB LAN connection, do one of the following: • For Windows XP-Click Start > Settings > Control Panel > Network Connections. • For Windows 2000-Click Start > Settings > Control Panel > Network and Connections. Locate and double-click the new LAN connection to open the Local Area Connection Status window, then click Properties. Scroll to the Internet Protocol (TCP/IP) section and click Properties. Cisco Unified Wireless IP Phone 7925G Administration Guide for Cisco Unified Communications Manager 7.0(1) 4-2 OL-15984-01
-
 1
1 -
2
-
3
-
4
-
5
-
6
-
7
-
8
-
9
-
10
-
11
-
12
-
13
-
14
-
15
-
16
-
17
-
18
-
19
-
20
-
21
-
22
-
23
-
24
-
25
-
26
-
27
-
28
-
29
-
30
-
31
-
32
-
33
-
34
-
35
-
36
-
37
-
38
-
39
-
40
-
41
-
42
-
43
-
44
-
45
-
46
-
47
-
48
-
49
-
50
-
51
-
52
-
53
-
54
-
55
-
56
-
57
-
58
-
59
-
60
-
61
-
62
-
63
-
64
-
65
-
66
-
67
-
68
-
69
-
70
-
71
-
72
-
 73
73 -
 74
74 -
 75
75 -
 76
76 -
 77
77 -
 78
78 -
 79
79 -
 80
80 -
 81
81 -
 82
82 -
 83
83 -
84
-
85
-
86
-
87
-
88
-
89
-
90
-
91
-
92
-
93
-
94
-
95
-
96
-
97
-
98
-
99
-
100
-
101
-
102
-
103
-
104
-
105
-
106
-
107
-
108
-
109
-
110
-
111
-
112
-
113
-
114
-
115
-
116
-
117
-
118
-
119
-
120
-
121
-
122
-
123
-
124
-
125
-
126
-
127
-
128
-
129
-
130
-
131
-
132
-
133
-
134
-
135
-
136
-
137
-
138
-
139
-
140
-
141
-
142
-
143
-
144
-
145
-
146
-
147
-
148
-
149
-
150
-
151
-
152
-
153
-
154
-
155
-
156
-
157
-
158
-
159
-
160
-
161
-
162
-
163
-
164
-
165
-
166
-
167
-
168
-
169
-
170
-
171
-
172
-
173
-
174
-
175
-
176
-
177
-
178
-
179
-
180
-
181
-
182
-
183
-
184
-
185
-
186
-
187
-
188
-
189
-
190
-
191
-
192
-
193
-
194
-
195
-
196
-
197
-
198
-
199
-
200
-
201
-
202
-
203
-
204
-
205
-
206
-
207
-
208
-
209
-
210
-
211
-
212
-
213
-
214
-
215
-
216
-
217
-
218
-
219
-
220
-
221
-
222
-
223
-
224
-
225
-
226
-
227
-
228
-
229
-
230
-
231
-
232
-
233
-
234
-
235
-
236
-
237
-
238
-
239
-
240
-
241
-
242
-
243
-
244
 |
 |