Dell PowerVault MD3200 Owner's Manual - Page 163
Recopying the Virtual Disk, Summary, Disk Groups & Virtual Disks, Virtual Disk, Copy Manager
 |
View all Dell PowerVault MD3200 manuals
Add to My Manuals
Save this manual to your list of manuals |
Page 163 highlights
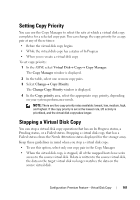
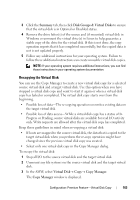
3 Click the Summary tab, then click Disk Groups & Virtual Disks to ensure that the virtual disk is in Optimal or Disabled status. 4 Remove the drive letter(s) of the source and (if mounted) virtual disk in Windows or unmount the virtual drive(s) in Linux to help guarantee a stable copy of the drive for the virtual disk. If this is not done, the copy operation reports that it has completed successfully, but the copied data is not is not updated properly. 5 Follow any additional instructions for your operating system. Failure to follow these additional instructions can create unusable virtual disk copies. NOTE: If your operating system requires additional instructions, you can find those instructions in your operating system documentation. Recopying the Virtual Disk You can use the Copy Manager to create a new virtual disk copy for a selected source virtual disk and a target virtual disk. Use this option when you have stopped a virtual disk copy and want to start it again or when a virtual disk copy has failed or completed. The virtual disk copy starts over from the beginning. • Possible loss of data-The re-copying operation overwrites existing data on the target virtual disk. • Possible loss of data access-While a virtual disk copy has a status of In Progress or Pending, source virtual disks are available for read I/O activity only. Write requests are allowed after the virtual disk copy has completed. Keep these guidelines in mind when re-copying a virtual disk: • If hosts are mapped to the source virtual disk, the data that is copied to the target virtual disk when you perform the re-copy operation might have changed since the previous virtual disk copy was created. • Select only one virtual disk copy in the Copy Manager dialog. To recopy the virtual disk: 1 Stop all I/O to the source virtual disk and the target virtual disk. 2 Unmount any file systems on the source virtual disk and the target virtual disk. 3 In the AMW, select Virtual Disk Copy Copy Manager. The Copy Manager window is displayed. Configuration: Premium Feature-Virtual Disk Copy 163
-
 1
1 -
2
-
3
-
4
-
5
-
6
-
7
-
8
-
9
-
10
-
11
-
12
-
13
-
14
-
15
-
16
-
17
-
18
-
19
-
20
-
21
-
22
-
23
-
24
-
25
-
26
-
27
-
28
-
29
-
30
-
31
-
32
-
33
-
34
-
35
-
36
-
37
-
38
-
39
-
40
-
41
-
42
-
43
-
44
-
45
-
46
-
47
-
48
-
49
-
50
-
51
-
52
-
53
-
54
-
55
-
56
-
57
-
58
-
59
-
60
-
61
-
62
-
63
-
64
-
65
-
66
-
67
-
68
-
69
-
70
-
71
-
72
-
73
-
74
-
75
-
76
-
77
-
78
-
79
-
80
-
81
-
82
-
83
-
84
-
85
-
86
-
87
-
88
-
89
-
90
-
91
-
92
-
93
-
94
-
95
-
96
-
97
-
98
-
99
-
100
-
101
-
102
-
103
-
104
-
105
-
106
-
107
-
108
-
109
-
110
-
111
-
112
-
113
-
114
-
115
-
116
-
117
-
118
-
119
-
120
-
121
-
122
-
123
-
124
-
125
-
126
-
127
-
128
-
129
-
130
-
131
-
132
-
133
-
134
-
135
-
136
-
137
-
138
-
139
-
140
-
141
-
142
-
143
-
144
-
145
-
146
-
147
-
148
-
149
-
150
-
151
-
152
-
153
-
154
-
155
-
156
-
157
-
 158
158 -
 159
159 -
 160
160 -
 161
161 -
 162
162 -
 163
163 -
 164
164 -
 165
165 -
 166
166 -
 167
167 -
 168
168 -
169
-
170
-
171
-
172
-
173
-
174
-
175
-
176
-
177
-
178
-
179
-
180
-
181
-
182
-
183
-
184
-
185
-
186
-
187
-
188
-
189
-
190
-
191
-
192
-
193
-
194
-
195
-
196
-
197
-
198
-
199
-
200
-
201
-
202
-
203
-
204
-
205
-
206
-
207
-
208
-
209
-
210
-
211
-
212
-
213
-
214
-
215
-
216
-
217
-
218
-
219
-
220
-
221
-
222
-
223
-
224
-
225
-
226
-
227
-
228
-
229
-
230
-
231
-
232
-
233
-
234
-
235
-
236
-
237
-
238
-
239
-
240
-
241
-
242
-
243
-
244
-
245
-
246
-
247
-
248
-
249
-
250
-
251
-
252
-
253
-
254
-
255
-
256
-
257
-
258
-
259
-
260
 |
 |