Dell PowerVault MD3200 Owner's Manual - Page 68
Naming or Renaming Storage Arrays, Setup, Devices, Rename., Name/Rename Storage Arrays
 |
View all Dell PowerVault MD3200 manuals
Add to My Manuals
Save this manual to your list of manuals |
Page 68 highlights
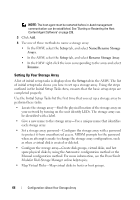
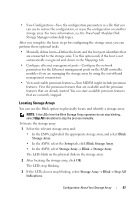
A confirmation message is displayed. 4 Click OK. Naming or Renaming Storage Arrays Each storage array should be assigned a unique up to 30-character alphanumeric name. A name can consist of letters, numbers, and the special characters underscore (_), dash (-), and pound sign (#). No other special characters are allowed. To rename a selected storage array: 1 Perform one of these actions: • In the AMW Setup tab, select Rename Storage Array. • In the EMW Devices tab Tree view, select Edit Rename. • In the EMW Devices tab Table view, select Edit Rename. • In the EMW Devices tab Tree view, right-click on the desired array icon and select Rename. The Name/Rename Storage Arrays dialog appears. 2 Select the relevant storage array from the Select storage array table. If you do not know the name or physical location of the storage array, click Blink. After locating the storage array, click OK to turn off the LEDs. The name of the storage array appears in the Storage array name. 3 In Storage array name, type the new name of the storage array. If applicable, add a comment for the storage array in Additional comment. 4 Click Apply. A message is displayed warning you about the implications of changing the storage array name. 5 Click Yes. The new storage array name appears in the Select storage array table. 6 Repeat step 2 through step 4 to name or rename additional storage arrays. NOTE: Avoid arbitrary names or names that might lose meaning in the future. 68 Configuration: About Your Storage Array
-
 1
1 -
2
-
3
-
4
-
5
-
6
-
7
-
8
-
9
-
10
-
11
-
12
-
13
-
14
-
15
-
16
-
17
-
18
-
19
-
20
-
21
-
22
-
23
-
24
-
25
-
26
-
27
-
28
-
29
-
30
-
31
-
32
-
33
-
34
-
35
-
36
-
37
-
38
-
39
-
40
-
41
-
42
-
43
-
44
-
45
-
46
-
47
-
48
-
49
-
50
-
51
-
52
-
53
-
54
-
55
-
56
-
57
-
58
-
59
-
60
-
61
-
62
-
 63
63 -
 64
64 -
 65
65 -
 66
66 -
 67
67 -
 68
68 -
 69
69 -
 70
70 -
 71
71 -
 72
72 -
 73
73 -
74
-
75
-
76
-
77
-
78
-
79
-
80
-
81
-
82
-
83
-
84
-
85
-
86
-
87
-
88
-
89
-
90
-
91
-
92
-
93
-
94
-
95
-
96
-
97
-
98
-
99
-
100
-
101
-
102
-
103
-
104
-
105
-
106
-
107
-
108
-
109
-
110
-
111
-
112
-
113
-
114
-
115
-
116
-
117
-
118
-
119
-
120
-
121
-
122
-
123
-
124
-
125
-
126
-
127
-
128
-
129
-
130
-
131
-
132
-
133
-
134
-
135
-
136
-
137
-
138
-
139
-
140
-
141
-
142
-
143
-
144
-
145
-
146
-
147
-
148
-
149
-
150
-
151
-
152
-
153
-
154
-
155
-
156
-
157
-
158
-
159
-
160
-
161
-
162
-
163
-
164
-
165
-
166
-
167
-
168
-
169
-
170
-
171
-
172
-
173
-
174
-
175
-
176
-
177
-
178
-
179
-
180
-
181
-
182
-
183
-
184
-
185
-
186
-
187
-
188
-
189
-
190
-
191
-
192
-
193
-
194
-
195
-
196
-
197
-
198
-
199
-
200
-
201
-
202
-
203
-
204
-
205
-
206
-
207
-
208
-
209
-
210
-
211
-
212
-
213
-
214
-
215
-
216
-
217
-
218
-
219
-
220
-
221
-
222
-
223
-
224
-
225
-
226
-
227
-
228
-
229
-
230
-
231
-
232
-
233
-
234
-
235
-
236
-
237
-
238
-
239
-
240
-
241
-
242
-
243
-
244
-
245
-
246
-
247
-
248
-
249
-
250
-
251
-
252
-
253
-
254
-
255
-
256
-
257
-
258
-
259
-
260
 |
 |
