Dell PowerVault MD3200 Owner's Manual - Page 233
Locating an Expansion Enclosure
 |
View all Dell PowerVault MD3200 manuals
Add to My Manuals
Save this manual to your list of manuals |
Page 233 highlights
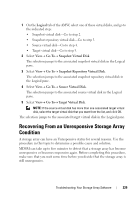
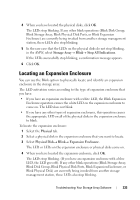
4 When you have located the physical disks, click OK. The LEDs stop blinking. If any other blink operations (Blink Disk Group, Blink Storage Array, Blink Physical Disk Ports, or Blink Expansion Enclosure) are currently being invoked from another storage management station, these LEDs also stop blinking. 5 In the rare case that the LEDs on the physical disks do not stop blinking, in the AMW, select Storage Array Blink Stop All Indications. If the LEDs successfully stop blinking, a confirmation message appears. 6 Click OK. Locating an Expansion Enclosure You can use the Blink option to physically locate and identify an expansion enclosure in the storage array. The LED activation varies according to the type of expansion enclosure that you have. • If you have an expansion enclosure with a white LED, the Blink Expansion Enclosure operation causes the white LED on the expansion enclosure to come on. The LED does not blink. • If you have any other types of expansion enclosures, this operation causes the appropriate LED on all of the physical disks in the expansion enclosure to blink. To locate the expansion enclosure: 1 Select the Physical tab. 2 Select a physical disk in the expansion enclosure that you want to locate. 3 Select Physical Disk Blink Expansion Enclosure. The LED or LEDs on the expansion enclosure or physical disks come on. 4 When you have located the expansion enclosure, click OK. The LEDs stop blinking. (If you have an expansion enclosure with a blue LED, the LED goes off). If any other blink operations (Blink Storage Array, Blink Disk Group, Blink Physical Disk Ports, Blink Expansion Enclosure, or Blink Physical Disk) are currently being invoked from another storage management station, these LEDs also stop blinking. Troubleshooting: Your Storage Array Software 233
-
 1
1 -
2
-
3
-
4
-
5
-
6
-
7
-
8
-
9
-
10
-
11
-
12
-
13
-
14
-
15
-
16
-
17
-
18
-
19
-
20
-
21
-
22
-
23
-
24
-
25
-
26
-
27
-
28
-
29
-
30
-
31
-
32
-
33
-
34
-
35
-
36
-
37
-
38
-
39
-
40
-
41
-
42
-
43
-
44
-
45
-
46
-
47
-
48
-
49
-
50
-
51
-
52
-
53
-
54
-
55
-
56
-
57
-
58
-
59
-
60
-
61
-
62
-
63
-
64
-
65
-
66
-
67
-
68
-
69
-
70
-
71
-
72
-
73
-
74
-
75
-
76
-
77
-
78
-
79
-
80
-
81
-
82
-
83
-
84
-
85
-
86
-
87
-
88
-
89
-
90
-
91
-
92
-
93
-
94
-
95
-
96
-
97
-
98
-
99
-
100
-
101
-
102
-
103
-
104
-
105
-
106
-
107
-
108
-
109
-
110
-
111
-
112
-
113
-
114
-
115
-
116
-
117
-
118
-
119
-
120
-
121
-
122
-
123
-
124
-
125
-
126
-
127
-
128
-
129
-
130
-
131
-
132
-
133
-
134
-
135
-
136
-
137
-
138
-
139
-
140
-
141
-
142
-
143
-
144
-
145
-
146
-
147
-
148
-
149
-
150
-
151
-
152
-
153
-
154
-
155
-
156
-
157
-
158
-
159
-
160
-
161
-
162
-
163
-
164
-
165
-
166
-
167
-
168
-
169
-
170
-
171
-
172
-
173
-
174
-
175
-
176
-
177
-
178
-
179
-
180
-
181
-
182
-
183
-
184
-
185
-
186
-
187
-
188
-
189
-
190
-
191
-
192
-
193
-
194
-
195
-
196
-
197
-
198
-
199
-
200
-
201
-
202
-
203
-
204
-
205
-
206
-
207
-
208
-
209
-
210
-
211
-
212
-
213
-
214
-
215
-
216
-
217
-
218
-
219
-
220
-
221
-
222
-
223
-
224
-
225
-
226
-
227
-
 228
228 -
 229
229 -
 230
230 -
 231
231 -
 232
232 -
 233
233 -
 234
234 -
 235
235 -
 236
236 -
 237
237 -
 238
238 -
239
-
240
-
241
-
242
-
243
-
244
-
245
-
246
-
247
-
248
-
249
-
250
-
251
-
252
-
253
-
254
-
255
-
256
-
257
-
258
-
259
-
260
 |
 |