HP 450c Service Manual
HP 450c - DesignJet Color Inkjet Printer Manual
 |
View all HP 450c manuals
Add to My Manuals
Save this manual to your list of manuals |
HP 450c manual content summary:
- HP 450c | Service Manual - Page 1
HP DesignJet 430 HP DesignJet 450C HP DesignJet 455CA Printers Service Manual - HP 450c | Service Manual - Page 2
8 of this manual, for precautions you should take to prevent damage to the Printer circuits from electrostatic discharge. Safety Symbols General definitions of safety symbols are given immediately after the table of contents. Product Support, Barcelona Division Hewlett-Packard Española, S.A. Avda - HP 450c | Service Manual - Page 3
Service Manual HP DesignJet 430 HP DesignJet 450C HP DesignJet 455CA Printers - HP 450c | Service Manual - Page 4
. Part Numbers Part numbers for plotter options, accessories and service parts are located in chapter 7. Conventions This manual contains information for the color HP DesignJet 430, 450C and 455CA printers. A small arrow ' is used to indicate other parts of the Service Manual or User's Guide where - HP 450c | Service Manual - Page 5
Printer has problems with the Cutter 1Ć7 What can I do if the Bail Mechanism Fails 1Ć8 What is an EEROM error 1Ć8 2 System Error Codes Important Information on Troubleshooting Error Codes 2Ć2 System Error codes 2Ć4 3 User Messages User Messages 3Ć2 HP DesignJet 430, 450C and 455CA Printers - HP 450c | Service Manual - Page 6
Run 4Ć18 Modular Test 4Ć19 Electronics Test 4Ć21 Service Mode 2 4Ć22 Stopping a Test 4Ć22 Entering Service Mode 2 4Ć22 Bail Test 4Ć23 Electrical Test 4Ć24 Servo/Encoder Test 4Ć25 Service 5Ć5 To adjust the carriageĆtoĆmedia distance 5Ć7 iv Contents HP DesignJet 430, 450C and 455CA Printers - HP 450c | Service Manual - Page 7
, Drive Roller, Bail and Overdrive Assembly . . . . . 7Ć22 Printer Labels 7Ć24 Users Guide and Quick Reference Guide Bundle 7Ć25 Front Panel Overlays 7Ć25 Compatible Documentation 7Ć26 PlugĆin memory (RAM SIMM 7Ć26 Cartridges 7Ć26 External Print Servers 7Ć27 HP DesignJet 430, 450C and 455CA - HP 450c | Service Manual - Page 8
8Ć52 9 Preventive Maintenance Moisture on Printer 9Ć2 Level of Printer Usage 9Ć2 Friction on Slider Rod 9Ć2 Noisy Carriage Wheel 9Ć2 Ink Spilling 9Ć3 Belt Swelling 9Ć3 Cleaning the Printer 9Ć4 General Cleaning 9Ć4 Cleaning the Drive Roller 9Ć4 vi Contents HP DesignJet 430, 450C and 455CA - HP 450c | Service Manual - Page 9
10Ć7 Sensors 10Ć7 ROM 10Ć7 RAM 10Ć7 EEROM 10Ć7 Input/Output Interfaces 10Ć8 BiĆTronics 10Ć8 RSĆ232ĆC 10Ć8 Power Supply 10Ć8 Water Condensation 10Ć8 Memory Usage 10Ć9 Plot Orientation 10Ć9 Raster Image Processor 10Ć9 HP DesignJet 430, 450C and 455CA Printers Contents vii - HP 450c | Service Manual - Page 10
the plotter. C A U T I O N The CAUTION sign denotes a hazard. It calls attention to an operating procedure, practice, or the like, which, if not correctly performed or adhered to, could result in damage to or destruction of part or all of the product. viii Contents HP DesignJet 430, 450C and - HP 450c | Service Manual - Page 11
1 Troubleshooting HP DesignJet 430, 450C and 455CA Printers 1-1 - HP 450c | Service Manual - Page 12
Revision? Before spending time troubleshooting the problem by doing the various tests or replacing parts (which may not need replacing), check which firmware revision the printer is using. To check which firmware revision the printer is using, Print the Service Configuration Plot ' page 4Ć29 - HP 450c | Service Manual - Page 13
help you differentiate between possible Cartridge errors and other problems such as incorrect frontĆpanel selection, driver or RIP configuration or mechanical problems. For information on solving PrintĆQuality problems ' Chapter 6. Troubleshooting HP DesignJet 430, 450C and 455CA Printers 1-3 - HP 450c | Service Manual - Page 14
. Check and, if necessary, adjust the Carriage height (Details ' chapter 5). 3 The Belt is not correctly positioned over the idler pulley. 4 Check for a faulty bail lever mechanism because the Carriage may have trouble passing over it. 1-4 HP DesignJet 430, 450C and 455CA Printers Troubleshooting - HP 450c | Service Manual - Page 15
Problem: Remove all the cartridges from the Carriage and try installing just the rejected cartridge. If the cartridge is still rejected then replace 7 Replace the Trailing Cable ' page 8Ć8. 8 Replace the Carriage Assembly ' page 8Ć37. Troubleshooting HP DesignJet 430, 450C and 455CA Printers 1-5 - HP 450c | Service Manual - Page 16
Printer. To find the faulty component, power OFF the Printer and connect one of the cables and power ON again. Once the faulty component is connected, it will not allow the Printer to power ON. This component should then be replaced. 1-6 HP DesignJet 430, 450C and 455CA Printers Troubleshooting - HP 450c | Service Manual - Page 17
be placed as close to the edge as possible to make sure that the media that is coming out falls correctly. If the Printer is in the middle of the table, the media that is coming out will be lifted up causing the cutter to crash into it. Troubleshooting HP DesignJet 430, 450C and 455CA - HP 450c | Service Manual - Page 18
information (or a communication cable was disconnected while sending information to the EEROM using software diagnostic tools). It is generally not easy to discover the cause, due to the intermittent character of the failure modes. 1-8 HP DesignJet 430, 450C and 455CA Printers Troubleshooting - HP 450c | Service Manual - Page 19
after an electricity powerĆcut, or after turning off the Printer during the bench run or other service tests, then the Printer is not faulty. You just need to reset the EEROM. EEROM is probably faulty. Replace the electronics module. Troubleshooting HP DesignJet 430, 450C and 455CA Printers 1-9 - HP 450c | Service Manual - Page 20
- HP 450c | Service Manual - Page 21
2 System Error Codes HP DesignJet 430, 450C and 455CA Printers 2-1 - HP 450c | Service Manual - Page 22
problems which occurred in earlier firmware releases may have been solved in later revisions. So if there is a new firmware revision then update the ROM SIMM before replacing any parts. Refer to Chapter 7 for the part number of the ROM SIMM. 2-2 HP DesignJet 430, 450C and 455CA Printers System - HP 450c | Service Manual - Page 23
MEDIA ERROR K GROUP L M CARTRIDGES DATA MEDIA A FAST B NORMAL C BEST G PAPER H FILM I COATED J GLOSSY N ROLL O SHEET 5 PRINT QUALITY 6 MEDIA TYPE possible error codes and the instructions necessary to solve the problem. System Error Codes HP DesignJet 430, 450C and 455CA Printers 2-3 - HP 450c | Service Manual - Page 24
HP DesignJet 430, 450C and 455CA Printers D K E L F M A G N B H O C I J Steady KLM Cartridges + Data + Media: An error which the customer could probably solve, like a paper jam, minor cartridge problem : D RAM SIMM installed is not an original HP supported part. D RAM SIMM badly - HP 450c | Service Manual - Page 25
Electronics Module. D K E L F M A G N B H O C I J Steady DFK Ready + Load Media + Cartridges: Mechanical Problem. Possible causes: D Check the Bail Assembly. D Check the Capping Position in the Service Station. System Error Codes HP DesignJet 430, 450C and 455CA Printers 2-5 - HP 450c | Service Manual - Page 26
the bailĆlift system to see if it is working correctly. D Use the bail cycle test to help troubleshoot. problem to your HP Response Center. Note conditions and actions before error occurred. Include setup sheet and service configuration plot in report. 2-6 HP DesignJet 430, 450C and 455CA Printers - HP 450c | Service Manual - Page 27
due to the bad contacts of the connector. D If this error remains, report the problem to your HP Response Center. Note conditions and actions before error occurred. Include setup sheet and service configuration plot in report. System Error Codes HP DesignJet 430, 450C and 455CA Printers 2-7 - HP 450c | Service Manual - Page 28
D Switch the Printer OFF and ON again and see if the error remains. If the error appears continuously, replace the Electronics Module. D The Calibrations in the EEROM have been lost. Perform the Accuracy Calibration (refer to Chapter 5). 2-8 HP DesignJet 430, 450C and 455CA Printers System Error - HP 450c | Service Manual - Page 29
F M A G N B H O C I J Steady DEM Ready + Align Media + Media: YĆaxis Movement Error. Possible causes: D Something is causing excessive friction in the YĆaxis (carriage axis). D The carriage touches the bail as it moves. System Error Codes HP DesignJet 430, 450C and 455CA Printers 2-9 - HP 450c | Service Manual - Page 30
motors. D Faulty motor encoder. D Trailing Cable received an electrostatic discharge while the Printer was operating. Replace the Trailing Cable ' page 8Ć8. D K E L F D Faulty Carriage Assembly. D Faulty Electronics Module. 2-10 HP DesignJet 430, 450C and 455CA Printers System Error Codes - HP 450c | Service Manual - Page 31
3 User Messages HP DesignJet 430, 450C and 455CA Printers 3-1 - HP 450c | Service Manual - Page 32
therefore find this table useful in troubleshooting. Key to table starting below This graphic ... means ... The fifteen lights on the printer's front panel. The sequence of may have a power problem, or the printer may be switched off. 3-2 HP DesignJet 430, 450C and 455CA Printers User Messages - HP 450c | Service Manual - Page 33
media lever, realign the media, and raise the media lever. The printer is ready, but you need to load media. When you are ready to print, load media. The printer has a file in memory, which it is waiting to print, but no media is loaded. Load media. User Messages HP DesignJet 430, 450C and 455CA - HP 450c | Service Manual - Page 34
the correct part numbers of the cartridges supported by this printer, see Chapter 7. Either: the current print is too large for DATA the printer's memory. Look on your computer screen for any error message: some drivers, for example the Microsoft Windows driver supplied with your printer, allow you - HP 450c | Service Manual - Page 35
4 Service Tests HP DesignJet 430, 450C and 455CA Printers 4-1 - HP 450c | Service Manual - Page 36
no need to replace it. PowerĆOn The Printers automatically perform a series of internal self tests and mechanical initialization sequences whenever the user switches the Printer on. If media sensor. 14 Sets the Printer to accept media. 4-2 HP DesignJet 430, 450C and 455CA Printers Service Tests - HP 450c | Service Manual - Page 37
, Bench run Media-axis test, Modular test, Bench run Sensors test, Modular test Sensors test, Modular test Carriage test, Modular test Electrical test, Power-on tests, Bench run Bail cycle test Electrical test, Power-on tests, Bench run Service Tests HP DesignJet 430, 450C and 455CA Printers 4-3 - HP 450c | Service Manual - Page 38
' page 4Ć19 This test has been created to check the interaction between various components of the Printer. It combines the following tests: D CarriageĆaxis test. D Carriage test. D MediaĆaxis test. D FrontĆpanel test. D Sensors test. 4-4 HP DesignJet 430, 450C and 455CA Printers Service Tests - HP 450c | Service Manual - Page 39
if the Printer needs to be reconfigured as a DesignJet 430, 450C or 455CA. 15 Service Configuration Plot ' page 4Ć29 Gives a service report of the Printer. 16 Clearing the EEROM ' page 4Ć32 Instructions on how to clear the EEROM. Service Tests HP DesignJet 430, 450C and 455CA Printers 4-5 - HP 450c | Service Manual - Page 40
to perform a test. If there are any system failures during Service Mode 1 initialization, the Sheet LED (LED O) will be lit. This failure means that the Electronics Module has failed and needs to be replaced. Reprint SERVICE MODE 1 + 4-6 HP DesignJet 430, 450C and 455CA Printers Service Tests - HP 450c | Service Manual - Page 41
: D Baud Rate = 9600 D Data Bits = 8 D Stop Bits = 1 D Parity = None D Flow Control = None D Connector = Select the Communications Port that you are using. 6 Select OK and Switch the Printer ON. 7 Perform the service tests on the Printer. Using an HP Palmtop PC 1 Use HP cable number F1015Ć80002 and - HP 450c | Service Manual - Page 42
in the YĆaxis, the Best LED (LED C) will start to flash. 6 If the Printer does not raise the Bail Assembly then the test has failed. If the bail fails the test, try replacing the following component: 1 BailĆlift mechanism ' page 8Ć28. 4-8 HP DesignJet 430, 450C and 455CA Printers Service Tests - HP 450c | Service Manual - Page 43
that the cable for the Front Panel Assembly is connected to the Electronics Module. Also make sure that the cable is NOT damaged or twisted. 2 Replace the Front Panel Assembly ' page 8Ć12. 3 Replace the Electronics Module ' page 8Ć13. Service Tests HP DesignJet 430, 450C and 455CA Printers 4-9 - HP 450c | Service Manual - Page 44
y-axis test 6 The test continuously repeats itself until you press the Cancel and Media Source keys. 4-10 The test is continued on the next page. HP DesignJet 430, 450C and 455CA Printers Service Tests - HP 450c | Service Manual - Page 45
trailing cable ' page 8Ć8. 8 Replace the carriage assembly ' page 8Ć37. Only replace one component at a time and perform the test again before replacing another component. Using this procedure you will be able to determine exactly which component failed. Service Tests HP DesignJet 430, 450C and - HP 450c | Service Manual - Page 46
flex circuit and the cartridges. Perform the Carriage test as follows: 1 In service mode 1, press Carriage Test (Print Quality Key). 2 The test will start Pen BLACK continuity: WORKS ........... The test is continued on the next page. 4-12 HP DesignJet 430, 450C and 455CA Printers Service Tests - HP 450c | Service Manual - Page 47
BLACK continuity problem replace one component at a time and perform the test again before replacing another component. Using this procedure you will be able to determine exactly which component failed. The test is continued on the next page. Service Tests HP DesignJet 430, 450C and 455CA Printers - HP 450c | Service Manual - Page 48
8Ć37. 3 Replace the Electronics Module ' page 8Ć13. Only replace one component at a time and perform the test again before replacing another component. Using this procedure you will be able to determine exactly which component failed. 4-14 HP DesignJet 430, 450C and 455CA Printers Service Tests - HP 450c | Service Manual - Page 49
). 4 Replace the Electronics Module ' page 8Ć13. Only replace one component at a time and perform the test again before replacing another component. Using this procedure you will be able to determine exactly which component failed. Service Tests HP DesignJet 430, 450C and 455CA Printers 4-15 - HP 450c | Service Manual - Page 50
operation of the components of the Media Axis. Perform the MediaĆAxis test as follows: 1 In service mode 1, press MediaĆAxis Test (Media Load Button). 2 The test will start and the drive roller 4-16 The test is continued on the next page. HP DesignJet 430, 450C and 455CA Printers Service Tests - HP 450c | Service Manual - Page 51
page 8Ć23. 4 Replace electronics module ' page 8Ć13. Only replace one component at a time and perform the test again before replacing another component. Using this procedure you will be able to determine exactly which component failed. Service Tests HP DesignJet 430, 450C and 455CA Printers 4-17 - HP 450c | Service Manual - Page 52
Media Source and Form Feed keys in Service Mode 1. If these keys are accidently pressed, you must immediately EXIT the Bench Run by switching OFF the Printer and powering ON again while pressing the Print Quality and Media Source keys. 4-18 HP DesignJet 430, 450C and 455CA Printers Service Tests - HP 450c | Service Manual - Page 53
Printer when the test begins, and the test will fail. Always make sure that the carriage is parked in the service station before starting this test. If one part of the test fails, the other parts The test is continued on the next page. Service Tests HP DesignJet 430, 450C and 455CA Printers 4-19 - HP 450c | Service Manual - Page 54
is moved and ONLY the Encoder Sensor test fails, then you need to replace the Carriage Assembly ' page 8Ć37. If any of the tests fail, refer to the individual test documented in this chapter for the correct troubleshooting procedure. 4-20 HP DesignJet 430, 450C and 455CA Printers Service Tests - HP 450c | Service Manual - Page 55
, the Sheet LED (LED O) will start to flash. 5 The test continuously repeats itself until you press the Cancel and Media Source keys. If the bail fails the test, try replacing the following component: 1 Electronics Module ' page 8Ć13. Service Tests HP DesignJet 430, 450C and 455CA Printers 4-21 - HP 450c | Service Manual - Page 56
user mode. When you are in Service Mode 2, All the LEDs will go off except the ones that have been selected. Once inside a test, all the LEDs, except for the LEDs in the Error Group, will begin to flash. + Media Source SERVICE MODE 2 4-22 HP DesignJet 430, 450C and 455CA Printers Service Tests - HP 450c | Service Manual - Page 57
the Printer does not raise the Bail Assembly then the test has failed. 4 The test continuously repeats itself until you press any of the frontĆpanel keys. If the bail fails the test, try replacing the following component: 1 BailĆlift mechanism ' page 8Ć28. Service Tests HP DesignJet 430, 450C and - HP 450c | Service Manual - Page 58
Test (Form Feed Key). 2 The test will start and the Printer will check some of the electrical parts. 3 If the test fails, an error code will appear on the frontĆpanel. Refer to Chapter 2 in order to correctly troubleshoot the failure. 4-24 HP DesignJet 430, 450C and 455CA Printers Service Tests - HP 450c | Service Manual - Page 59
of the test, you must print the Service Configuration Plot (Print Quality and Media Type keys). 4 If the test fails, an error code will appear on the frontĆpanel. Refer to Chapter 2 in order to correctly troubleshoot the failure. Service Tests HP DesignJet 430, 450C and 455CA Printers 4-25 - HP 450c | Service Manual - Page 60
instructions to be able to pick out the important information from the printed code. Perform the Service Monitor as follows: 1 In service Printer exits the service monitor mode if the file(s) sent contain PJL universal exit language. 4-26 HP DesignJet 430, 450C and 455CA Printers Service - HP 450c | Service Manual - Page 61
' page 8Ć11. 2 Disconnect the media motor encoder cable from the main PCA (connector ENC X). 3 Turn the Printer ON while holding the Reprint key down. 4 Press the the deconfiguration mode. The instructions are continued on the next page. Service Tests HP DesignJet 430, 450C and 455CA Printers 4-27 - HP 450c | Service Manual - Page 62
incorrectly configured then Error Code EKL" will be displayed on the front panel. Turn the Printer OFF and perform the EEROM Model ID configuration procedure again from step 2. 13 Perform the accuracy calibration (refer to Chapter 5). 4-28 HP DesignJet 430, 450C and 455CA Printers Service Tests - HP 450c | Service Manual - Page 63
Bench Run Maximum X-Axis (Media-Axis) PWM: 87 Encoder-Tests Maximum Y-Axis (Carriage-Axis) PWM: 62 Encoder-Tests Maximum X-Axis (Media-Axis) PWM: 62 X-axis Calibration: Amp1 = 7.467, Phase1 = -0.450, Amp2 = 8.956, Phase2 = 2.325, Factor = -0.000500 Service Tests HP DesignJet 430, 450C and - HP 450c | Service Manual - Page 64
How many times the Printer has been powered ON. Number of Color Plots How many color plots have been produced since the EEROM was last erased. Number of Black Plots How many mono plots have been produced since the EEROM was last erased. 4-30 HP DesignJet 430, 450C and 455CA Printers Service Tests - HP 450c | Service Manual - Page 65
replaced. The numbers refer to (from left to right): Cyan, Magenta, Yellow, Black. Factory Spittoon The estimated level of ink in the spittoon. This level will be incorrect if the EEROM has been cleared. Number of Bail any problems. Service Tests HP DesignJet 430, 450C and 455CA Printers 4-31 - HP 450c | Service Manual - Page 66
Just the UserĆDefined Setup Parameters 1 Switch the Printer OFF. 2 While holding down the Reprint, Cancel, Media Type and Media Source keys down, switch the Printer ON. 3 Once the the LEDs begin to light up one by one, release the keys. 4-32 HP DesignJet 430, 450C and 455CA Printers Service Tests - HP 450c | Service Manual - Page 67
Clearing All Parameters 1 Switch the Printer OFF. 2 While holding down the Setup, Form Feed, Reprint, Print Quality and Media Type keys down, switch the Printer ON. 3 Once the the LEDs begin to light up one by one, release the keys Service Tests HP DesignJet 430, 450C and 455CA Printers 4-33 - HP 450c | Service Manual - Page 68
- HP 450c | Service Manual - Page 69
5 Service Calibrations and Adjustments HP DesignJet 430, 450C and 455CA Printers 5-1 - HP 450c | Service Manual - Page 70
Point Accuracy ? Various part tolerances inside the Printer affect the accuracy (in instructing the Printer to draw an incorrect line length. D The EEROM has been cleared. The accuracy constants are stored in this nonĆvolatile memory component. 5-2 HP DesignJet 430, 450C and 455CA Printers Service - HP 450c | Service Manual - Page 71
on the calibration plot (see Figure 2). The Ready LED begins to flash. The Printer takes less than 10 minutes to: read the calibration sheet; calculate the calibration data; save the data in the EEROM; and eject the sheet. 9 Unload the sheet. Service Calibrations HP DesignJet 430, 450C and 455CA - HP 450c | Service Manual - Page 72
Figure 1 Figure 2 5-4 HP DesignJet 430, 450C and 455CA Printers Service Calibrations - HP 450c | Service Manual - Page 73
the ink dots, and vertical lines are not straight. (A big distance may also prevent the carriage from actuating the bail lever.) too far from the media. For the correct installation procedure ' Chapter 8. To check the carriageĆto Service Calibrations HP DesignJet 430, 450C and 455CA Printers 5-5 - HP 450c | Service Manual - Page 74
Drive Roller Drive Roller 6 With the gauge held in place, manually move the carriage over the GO side of the gauge. The Replace the Yellow cartridge in the carriage. 10 Move the carriage back into the service station. 11 Close the top cover. 5-6 HP DesignJet 430, 450C and 455CA Printers Service - HP 450c | Service Manual - Page 75
them slightly outwards. Take care neither to cut yourself on the encoder strip, nor to damage the strip. 2 Pull the top of the carriage up. Service Calibrations HP DesignJet 430, 450C and 455CA Printers 5-7 - HP 450c | Service Manual - Page 76
. 6 Check the trailing cable to make sure that it is positioned under the plastic tabs at the back of the carriage cover, and not above them. Trailing cable under tabs ! Otherwise, the Printer will not be able to load media. 5-8 HP DesignJet 430, 450C and 455CA Printers Service Calibrations - HP 450c | Service Manual - Page 77
6 Print Quality HP DesignJet 430, 450C and 455CA Printers 6-1 - HP 450c | Service Manual - Page 78
to the customer that the problem is not in the printer and that he should address it through the 3rd party vendor support structure. 7 Accuracy Calibration (details ' Chapter 5) D Perform Accuracy calibration" using HP Matte Film. 6-2 HP DesignJet 430, 450C and 455CA Printers Print Quality - HP 450c | Service Manual - Page 79
frontĆpanel selection, driver or RIP configuration or mechanical problems. To achieve the best performance from the printer, advise the customer to only use genuine HP accessories and supplies, whose reliability and performance have been thoroughly tested to give troubleĆfree performance and best - HP 450c | Service Manual - Page 80
PrintĆQuality Plot The printĆquality plot for the HP DesignJet 430/450C/455CA is represented below. Use a 10X magnifier to help identify plotĆquality problems. Test 6 6-4 HP DesignJet 430, 450C and 455CA Printers Print Quality - HP 450c | Service Manual - Page 81
correspond to the nozzle number that prints each step. There are two cartridge nozzle errors (see Figure 1): D Nozzles not printing. D Nozzles misdirected. Figure 1 Print Quality HP DesignJet 430, 450C and 455CA Printers 6-5 - HP 450c | Service Manual - Page 82
dried ink around Replace the Electronics Module ' page 8Ć13. Only replace one component at a time and check if the problem has gone before replacing another component. Using this procedure you will be able to determine exactly which component failed. 6-6 HP DesignJet 430, 450C and 455CA Printers - HP 450c | Service Manual - Page 83
even when the Printer is working within this specification. If the VLS error is already less than 2 mils, do not try to improve it. The VLS error is composed of two parts (see Figure 3): D ThetaĆZeta error D Bidirectional error Figure 3 Print Quality HP DesignJet 430, 450C and 455CA Printers 6-7 - HP 450c | Service Manual - Page 84
D EncoderĆstrip slots are damaged or dirty. D Dirt on the pulley is causing the belt to slip. D Friction between carriage bushings and slider rod: ThetaĆZeta Error You can see cartridge. D Faulty cartridge. D Faulty carriage. Figure 4 6-8 HP DesignJet 430, 450C and 455CA Printers Print Quality - HP 450c | Service Manual - Page 85
Replace the Trailing Cable ' page 8Ć8. D Replace the Carriage Assembly ' page 8Ć37. D Replace the Electronics Module ' page 8Ć13. Only replace one component at a time and check if the problem has gone before replacing present in one part of the circle HP DesignJet 430, 450C and 455CA Printers 6-9 - HP 450c | Service Manual - Page 86
(Details ' Users Guide) using genuine HP media then print the PrintĆQuality Plot again to see if there has been any improvement. 2 If the error is still present, replace the failing cartridge and print the PrintĆQuality Plot again. 6-10 HP DesignJet 430, 450C and 455CA Printers Print Quality - HP 450c | Service Manual - Page 87
the paper horizontally across the box. Stop as soon as you see a different shade in the upper box. You can then determine the percentage scaling from the figure at the top or bottom of the box. Figure 7 (Correct) Print Quality Figure 8 (Incorrect) HP DesignJet 430, 450C and 455CA Printers 6-11 - HP 450c | Service Manual - Page 88
D Replace the Trailing Cable ' page 8Ć8. D Replace the Carriage Assembly ' page 8Ć37. Only replace one component at a time and check if the problem has gone before replacing another then causes white (or lighter) bands. 6-12 Figure 9 HP DesignJet 430, 450C and 455CA Printers Print Quality - HP 450c | Service Manual - Page 89
poorĆquality media, where it is counteracted by another problem: large dot gain. This is where the ink spreads out excessively on the media around the desired dot position. To accurately test for banding, use HP polyester inkjet film. Print Quality HP DesignJet 430, 450C and 455CA Printers 6-13 - HP 450c | Service Manual - Page 90
8Ć37. D Replace the Electronics Module ' page 8Ć13. Only replace one component at a time and check if the problem has gone before replacing another component. Using this procedure you will be able to determine exactly which component failed. 6-14 HP DesignJet 430, 450C and 455CA Printers Print - HP 450c | Service Manual - Page 91
type of media loaded in the printer. If the customer is using nonĆHP media with HP drivers, the colors in the required print may not be accurate. Advise the customer to use HP media if they want to improve the accuracy of the colors. Print Quality HP DesignJet 430, 450C and 455CA Printers 6-15 - HP 450c | Service Manual - Page 92
sprayed ink located around the point at which the required dot is placed. Product Fault The cartridges are positioned too far from the media. Solution Check the carriageĆtoĆmedia distance. (Details ' chapter 5.) Replace the faulty cartridge(s). 6-16 HP DesignJet 430, 450C and 455CA Printers Print - HP 450c | Service Manual - Page 93
Guide, chapter 9.) D Bleeding: Different color inks, printed side by side, run into each other. D Blooming: Ink absorbs into the paper, spreading beyond the desired ink dot. D Wicking: Ink is too small. (Adjustment ' chapter 5.) Print Quality HP DesignJet 430, 450C and 455CA Printers 6-17 - HP 450c | Service Manual - Page 94
are noticed when printing in color. Cartridge Fault One or more of the print cartridges is running out of ink. (Typically the inks of the four cartridges are used at different rates.) Solution Replace the print cartridge with a new one. 6-18 HP DesignJet 430, 450C and 455CA Printers Print Quality - HP 450c | Service Manual - Page 95
7 Parts and Diagrams HP DesignJet 430, 450C and 455CA Printers 7-1 - HP 450c | Service Manual - Page 96
is given as well as the part number. To obtain replacement parts, contact the nearest HP Support Office. You must include the part number and part description in the order you send. Also include the Printer model and serial number. 7-2 HP DesignJet 430, 450C and 455CA Printers Parts and Diagrams - HP 450c | Service Manual - Page 97
Page 7Ć18 Carriage Assembly Page 7Ć16 Pincharm Assembly Covers Page 7Ć20 Page 7Ć8 X & YĆaxis Motors Page 7Ć12 Rollfeed Assembly Page 7Ć6 Printer Support Page 7Ć4 FrontĆPanel, Spittoon & Electronics Module Page 7Ć10 Figure 1 Ć General View Parts and Diagrams HP DesignJet 430, 450C and 455CA - HP 450c | Service Manual - Page 98
on Drawing Figure 2 Ć Printer Support HP Part Number Quantity Description 1 C4704Ć60095 1 Hardware Kit (Includes Screw Drivers) 2 C4704Ć60086 2 Ć60074 1 X Bar Assembly (E/A0Ćsize) 8 C4704Ć60073 6 Paper Loop Assembly 7-4 HP DesignJet 430, 450C and 455CA Printers Parts and Diagrams - HP 450c | Service Manual - Page 99
1 1 1 1 3 2 57 4 1 1 6 1 3 1 2 Figure 2 Ć Printer Support Parts and Diagrams HP DesignJet 430, 450C and 455CA Printers 7-5 - HP 450c | Service Manual - Page 100
Reference on Drawing Figure 3 Ć Rollfeed Assembly HP Part Number Quantity Description 1 C4717Ć60004 1 Rollfeed Hardware Kit 2 C4717A 1 Hub Kit (for Chinese Spindles only) 5 C4713Ć60038 1 Extensions Kit Assembly 7-6 HP DesignJet 430, 450C and 455CA Printers Parts and Diagrams - HP 450c | Service Manual - Page 101
5 1 3 4 2 Figure 3 Ć Rollfeed Assembly Parts and Diagrams HP DesignJet 430, 450C and 455CA Printers 7-7 - HP 450c | Service Manual - Page 102
size) C4714Ć60097 1 Back Cover (E/A0Ćsize) 6 0515Ć2246 2 Screw Torx M3 7 C4699Ć60072 1 Cable Cip Assembly 8 C4713Ć00011 1 SIMM Cover Plate 9 See Page 7Ć26 1 RAM SIMM 10 C4713Ć60125 1 ROM SIMM (Version A.01.03) 7-8 HP DesignJet 430, 450C and 455CA Printers Parts and Diagrams - HP 450c | Service Manual - Page 103
3 1 2 5 10 9 8 7 6 4 Figure 4 Ć Covers Parts and Diagrams HP DesignJet 430, 450C and 455CA Printers 7-9 - HP 450c | Service Manual - Page 104
Figure 5 Ć Front Panel, Spittoon and Electronics Module Reference HP Part Number Quantity on Drawing Description 1 C4713Ć60091 1 FrontĆPanel Assembly 2 2 Washer (Included with Item 5) 7 C4713Ć60037 1 Electronics Module 7-10 HP DesignJet 430, 450C and 455CA Printers Parts and Diagrams - HP 450c | Service Manual - Page 105
5 6 4 1 7 3 2 5 6 Figure 5 Ć Front Panel, Spittoon and Electronics Module Parts and Diagrams HP DesignJet 430, 450C and 455CA Printers 7-11 - HP 450c | Service Manual - Page 106
Ć2248 3 Screw 10 Ć 3 Washer (Included with Item 9) 11 C4713Ć60094 1 MediaĆMotor Assembly (Includes Helical Gear) 12 C3180Ć60012 1 MediaĆMotor Cable Ć 6040Ć0858 AR Lubricant Ć C3190Ć60155 AR Lubricant Grease 7-12 HP DesignJet 430, 450C and 455CA Printers Parts and Diagrams - HP 450c | Service Manual - Page 107
5 6 4 3 10 9 8 7 11 1 2 Fig 6 Ć X and Y axis Motors and Encoder Strip Parts and Diagrams HP DesignJet 430, 450C and 455CA Printers 7-13 - HP 450c | Service Manual - Page 108
and Service Station Assembly Reference HP Part Number Quantity on Drawing Description 1 0515Ć1743 2 Screw M4 x 17 Tap 20 2 C3190Ć60142 1 Service 1 Left Strap (clip) Ć C4713Ć40042 1 Primer Cover (DesignJet 430) 7-14 HP DesignJet 430, 450C and 455CA Printers Parts and Diagrams - HP 450c | Service Manual - Page 109
8 9 5 4 7 6 2 3 1 1 Figure 7 Ć Primer Assembly and Service Station Assembly Parts and Diagrams HP DesignJet 430, 450C and 455CA Printers 7-15 - HP 450c | Service Manual - Page 110
Ć60052 1 Trailing Cable Guide (D/A1Ćsize) C4700Ć60052 1 Trailing Cable Guide (E/A0Ćsize) 7 1400Ć1021 4 Trailing Cable Plastic Clip 8 C4713Ć60040 1 Cutter Assembly Ć C4701Ć40001 1 Cartridge Cover (DesignJet 430) 7-16 HP DesignJet 430, 450C and 455CA Printers Parts and Diagrams - HP 450c | Service Manual - Page 111
7 6 3 1 2 4 5 8 Figure 8 Ć Carriage Assembly and Trailing Cable Parts and Diagrams HP DesignJet 430, 450C and 455CA Printers 7-17 - HP 450c | Service Manual - Page 112
80013 1 Cable Spring 17 C3190Ć40021 1 Gear Support 18 C2847Ć20017 1 Shoulder Screw 19 C1633Ć40019 1 Overdrive Gear 20 0515Ć0083 1 Ring Net .250 OD 21 C3190Ć60131 1 Clutch Assembly 22 C4713Ć40030 1 Sideplate Bushing 7-18 HP DesignJet 430, 450C and 455CA Printers Parts and - HP 450c | Service Manual - Page 113
1 15 16 13 11 12 17 9 10 14 22 7 5 4 3 6 4 3 8 2 19 18 21 20 Figure 9 Ć Bail and Overdrive Mechanisms Parts and Diagrams HP DesignJet 430, 450C and 455CA Printers 7-19 - HP 450c | Service Manual - Page 114
Reference on Drawing Figure 10 Ć Pincharm Assembly HP Part Number Quantity Description 1 0624Ć0771 1 Screw M3 x 30 Mach T10 2 C4713Ć40025 1 Pincharm Lever (D/A1Ćsize) C4699Ć60081 7 Pincharm Assembly (E/A0Ćsize) 7-20 HP DesignJet 430, 450C and 455CA Printers Parts and Diagrams - HP 450c | Service Manual - Page 115
11 8 9 10 5 12 2 7 1 6 4 3 7 Figure 10 Ć Pincharm Assembly Parts and Diagrams HP DesignJet 430, 450C and 455CA Printers 7-21 - HP 450c | Service Manual - Page 116
Bail and Overdrive Assembly Reference HP Part Number Quantity on Drawing Description 1 C4713Ć60093 1 Bail Assembly (D/A1Ćsize) C4714Ć60093 1 Bail C4699Ć60042 1 Driver Roller Assy (D/A1Ćsize) C4700Ć60042 1 Driver Roller Assy HP DesignJet 430, 450C and 455CA Printers Parts and Diagrams - HP 450c | Service Manual - Page 117
4 14 2 3 1 10 2 4 16 12 13 6 and 7 15 8 and 9 11 5 Figure 11 Ć Entry Platen, Drive Roller, Bail and Overdrive Assembly Parts and Diagrams HP DesignJet 430, 450C and 455CA Printers 7-23 - HP 450c | Service Manual - Page 118
Quick Reference Guide Holder 4 C4713Ć00013 1 Nameplate (DesignJets 430) C4715Ć00013 1 Nameplate (DesignJets 450C) C6080Ć00001 1 Nameplate (DesignJets 455CA) 5 C4705Ć00017 1 Cartridge Insertion Label (Left End Cover) 7-24 HP DesignJet 430, 450C and 455CA Printers Parts and Diagrams - HP 450c | Service Manual - Page 119
Overlay French Front Panel Overlay Spanish Front Panel Overlay Italian Front Panel Overlay Japanese Front Panel Overlay Portuguese Front Panel Overlay Chinese Front Panel Overlay Parts and Diagrams HP DesignJet 430, 450C and 455CA Printers 7-25 - HP 450c | Service Manual - Page 120
SIMM C3133A 8MB RAM SIMM C3146A 16MB RAM SIMM D3578A 32MB RAM SIMM Note: For the location of the plugĆin memory see page 7Ć8. Cartridges HP Part Number Description 51640A 51644C 51644M 51644Y Black Cyan Magenta Yellow 7-26 HP DesignJet 430, 450C and 455CA Printers Parts and Diagrams - HP 450c | Service Manual - Page 121
1.5 m (4.9 ft) Apple Macintosh 128K and 512K Extension cable 92219M 31391A 1.5 m (4.9 ft) 5 m (16.4 ft) Connector type at computer end of cable 9-pin female 25-pin male 25-pin female 8-pin male mini-DIN 9-pin male 25-pin female Parts and Diagrams HP DesignJet 430, 450C and 455CA Printers 7-27 - HP 450c | Service Manual - Page 122
- HP 450c | Service Manual - Page 123
8 Removal and Installation HP DesignJet 430, 450C and 455CA Printers 8-1 - HP 450c | Service Manual - Page 124
Removing the DriveĆBelt Pulley 8Ć42 Removing the Drive Roller 8Ć44 Reinstalling the Drive Roller 8Ć45 Removing the PinchĆArm Lift Mechanism 8Ć47 Removing the Overdrive Assembly 8Ć50 Removing the Entry Platen 8Ć52 8-2 HP DesignJet 430, 450C and 455CA Printers Removal and Installation - HP 450c | Service Manual - Page 125
. Switch the Printer off, and disconnect it from the power source prior to performing any maintenance. Prevent water or other liquids from running onto electrical components or circuits, or through openings in the module. Removal and Installation HP DesignJet 430, 450C and 455CA Printers 8-3 - HP 450c | Service Manual - Page 126
ground to remove static charges before using them on the Printer. 6. After removing any PCA from the Printer, place it on a conductive foam pad or into its conductive packaging to prevent ESD damage to any ICs on the PCA. 8-4 HP DesignJet 430, 450C and 455CA Printers Removal and Installation - HP 450c | Service Manual - Page 127
to remove and install the printer. Long Torx screwdriver with the indicated attachments. T8 T9 T10 T15 T20 T25 Pozidrive PZ1 screwdriver. and 3/16 5.5 inch mm Small flatĆblade screwdriver. Nut driver with the indicated attachments. Removal and Installation HP DesignJet 430, 450C and 455CA - HP 450c | Service Manual - Page 128
(ROM SIMM). To do this, first hold the SIMM at an angle, and then gradually push it back until it clicks vertically into place. Notch 2 1 5. Replace the cover plate, the cable clip (held by the left screw) and the screws. 8-6 HP DesignJet 430, 450C and 455CA Printers Removal and Installation - HP 450c | Service Manual - Page 129
off Installation 1. Install the bail assembly by installing the left side first, then install the bail assembly into holes in the left and right hand side chassis. 2. Close the Top Cover. 3. Perform Bail Service Test ' page 4Ć23. Removal and Installation HP DesignJet 430, 450C and 455CA Printers - HP 450c | Service Manual - Page 130
cover to the left, so that the other hinges uncouple. Reassembling: Close the cover and click each hinge into place. 4. Remove the cover from the Printer. 8-8 HP DesignJet 430, 450C and 455CA Printers Removal and Installation - HP 450c | Service Manual - Page 131
from the Printer. 3. Remove one screw (Item 1) from the rear that attaches the Left Rollfeed Assembly (Item 3) to the Printer. 4. Slide the Left Rollfeed Assembly (Item 3) forward and remove it from the Printer. 1 3 2 Figure 1: Rollfeed Assembly Removal and Installation HP DesignJet 430, 450C and - HP 450c | Service Manual - Page 132
the knack. As a guide, before you replace an endĆcover, take a look at the various clips on its inside, and identify where they fit on the Printer. Make sure that the primer plunger is installed properly when reinstalling the endĆcover. 8-10 HP DesignJet 430, 450C and 455CA Printers Removal and - HP 450c | Service Manual - Page 133
stiff. 5. Pull the endĆcover up, taking care not to damage the frontĆpanel cables. 6. Inside the endĆcover, press the two tabs of the frontĆpanel towards each base of the Printer as shown. 1 B A C 2 Figure 2: Right EndĆCover Removal and Installation HP DesignJet 430, 450C and 455CA Printers 8-11 - HP 450c | Service Manual - Page 134
the Front Panel cable is properly routed by the clips inside the RightĆend cover and remains underneath the Spittoon at all times. If the Cable is not routed correctly, the Cutter Assembly can trap the cable and damage it. 8-12 HP DesignJet 430, 450C and 455CA Printers Removal and Installation - HP 450c | Service Manual - Page 135
Printer on the setup sheet and on the service SIMM installed. Removal The electronics module is a fieldĆreplaceable part. You Printer, and remove it. 4. Remove one screw (item 1) and washer (item 2) from the back cover. Removal and Installation HP DesignJet 430, 450C and 455CA Printers - HP 450c | Service Manual - Page 136
for a new one, remove the RAM SIMM (if installed) from the old module and install it into the new one. Refer to page 8Ć13 before installing the ROM SIMM from the old module into the new module. 2 1 8-14 3 5 4 Figure 3: Electronics Module HP DesignJet 430, 450C and 455CA Printers Removal and - HP 450c | Service Manual - Page 137
back and forth the length of its travel to ensure free movement. The encoder strip should not bind or rub on the carriage. Removal and Installation HP DesignJet 430, 450C and 455CA Printers 8-15 - HP 450c | Service Manual - Page 138
6 5 4 3 21 8-16 Figure 4: Encoder Strip HP DesignJet 430, 450C and 455CA Printers Removal and Installation - HP 450c | Service Manual - Page 139
the encoder strip ' page 8Ć15. 2. Remove the screw (item 1) that attaches the right bracket (item 2) to the Printer chassis. 3. Pull the right bracket to the right, and remove it from the Printer. 2 1 Figure 5: Right Bracket Removal and Installation HP DesignJet 430, 450C and 455CA Printers 8-17 - HP 450c | Service Manual - Page 140
downwards. B A 4. Slightly rotate the motor on its hinge until the indicated part of the black plastic is parallel with the side of the chassis beam. Beam Black Plastic 5. Pull the motor out to the right of the Printer. 8-18 HP DesignJet 430, 450C and 455CA Printers Removal and Installation - HP 450c | Service Manual - Page 141
is one spring on the motor assembly which fits onto the protruding plastic part on top of the motor. Position this part inside the chassis beam. Also, make sure the belt is correctly positioned on the grooves of the shaft. Removal and Installation HP DesignJet 430, 450C and 455CA Printers 8-19 - HP 450c | Service Manual - Page 142
2) that attaches the spittoon (item 3) to the right sideĆplate. 3. Rotate the Spittoon slightly and Slide it to the right, and remove it from the Printer. 3 Figure 6: Spittoon 2 1 8-20 HP DesignJet 430, 450C and 455CA Printers Removal and Installation - HP 450c | Service Manual - Page 143
Spittoon ' page 8Ć20. 2. Remove the right bracket ' page 8Ć17. 3. Slide the Cutter Assembly (item 1) (including the Cutter Bushing) out of the right side of the printer. 1 Figure 7: Cutter Assembly Removal and Installation HP DesignJet 430, 450C and 455CA Printers 8-21 - HP 450c | Service Manual - Page 144
worm pinion and driveĆroller gear mesh slightly during use. Don't install a new motor and an old gear, or vice versa: install the gear that comes with the motor. Apply the grease that comes the motor or the gear ' page 5Ć2. 8-22 HP DesignJet 430, 450C and 455CA Printers Removal and Installation - HP 450c | Service Manual - Page 145
grease that comes with the new motor to the worm pinion and driveĆroller gear. Calibration: After having reassembled the Printer, perform the accuracy calibration (Details ' chapter 5.) 3 1 2 Figure 8: Media Motor Assembly Removal and Installation HP DesignJet 430, 450C and 455CA Printers 8-23 - HP 450c | Service Manual - Page 146
attaches the right cam journal assembly (item 9) to the PinchĆarm Bar Cam (item 10). 6. Remove the three parts of the right cam journal assembly (items 7, 9 and 11). 10 6 8-24 3 2 1 8 7 5 4 11 9 Figure 9: PinchĆarm Mechanism HP DesignJet 430, 450C and 455CA Printers Removal and Installation - HP 450c | Service Manual - Page 147
endĆcover ' page 8Ć10. 2. Disconnect the four short tubes from the ink separator. 3. Remove the screw that attaches the primer to the left sideĆplate. Torx-20 4. Slide the primer to the left, and remove it from the Printer. Removal and Installation HP DesignJet 430, 450C and 455CA Printers 8-25 - HP 450c | Service Manual - Page 148
the Service Station Removal 1. Remove the left endĆcover ' page 8Ć10. 2. Disconnect the four short tubes from the primer ink separator. 3. Remove the screw that attaches the service station to the left sideĆplate. Torx-20 8-26 HP DesignJet 430, 450C and 455CA Printers Removal and Installation - HP 450c | Service Manual - Page 149
4. Slide the service station to the left, and remove it from the Printer. The service station is one orderable assembly. Do not open it. Reassembling: Ensure that the cartridge caps are clean, the wipers straight, and the openings clear. Removal and Installation HP DesignJet 430, 450C and 455CA - HP 450c | Service Manual - Page 150
, do the following: 1. On the engaging lever, move the cable ball slightly towards the back of the Printer. 2. Allow the engaging lever to move towards the left of the Printer, so that the cable comes free of the lever. 8-28 HP DesignJet 430, 450C and 455CA Printers Removal and Installation - HP 450c | Service Manual - Page 151
5. Release the cable from the engagingĆlever support. 6. Release the cable from the bailĆgear assembly. Removal and Installation HP DesignJet 430, 450C and 455CA Printers 8-29 - HP 450c | Service Manual - Page 152
7. Remove the engaging lever. 8. Remove the spring from the bailĆgear assembly. 9. Loosen the screw from the top of the bailĆgear assembly. Torx-8 8-30 HP DesignJet 430, 450C and 455CA Printers Removal and Installation - HP 450c | Service Manual - Page 153
to hold the bail cam steady inside the sideĆplate at the same time. You can access the cam through the hole underneath the sideĆplate. Torx-15 11. Pull the bail gear assembly out from the Printer. The cam falls to the floor of the Printer. Removal and Installation HP DesignJet 430, 450C and 455CA - HP 450c | Service Manual - Page 154
Removing the EngagingĆLever Support Removal 1. Remove the primer ' page 8Ć25. 2. Remove the service station ' page 8Ć26. 3. Release the cable from the engaging lever support ' page 8Ć28. 4. Remove the engaging lever. 8-32 HP DesignJet 430, 450C and 455CA Printers Removal and Installation - HP 450c | Service Manual - Page 155
5. Remove the spring from the engagingĆ lever support. 6. Remove the three screws that attach the support to the left sideĆplate. Torx-10 + Torx-20 7. Pull the support upwards and remove it from the Printer. Removal and Installation HP DesignJet 430, 450C and 455CA Printers 8-33 - HP 450c | Service Manual - Page 156
the guides on the right bracket. C B A C D 3. Move the carriage out of the service station. 4. Release the two indicated clips on the top of the cartridge carriage by pulling them slightly outwards and pull the top of the carriage up. 8-34 HP DesignJet 430, 450C and 455CA Printers Removal - HP 450c | Service Manual - Page 157
5. Disconnect the trailing cable from the connector on the carriage. 6. Release the trailing cable from the clips on the trailingĆcable guide, and remove the trailing cable from the Printer. Removal and Installation HP DesignJet 430, 450C and 455CA Printers 8-35 - HP 450c | Service Manual - Page 158
4. Slide the trailingĆcable guide to the right, releasing it from the leftĆbracket tab. 5. Rotate the trailingĆcable guide back on its hinge, until it clicks off from the chassis beam. 6. Remove the trailingĆcable guide from the Printer. 8-36 HP DesignJet 430, 450C and 455CA Printers Removal and - HP 450c | Service Manual - Page 159
belt from the motor shaft. If you need greater maneuverability of the motor, press the black plastic tab on the top very slightly downwards. B A Reassembling: Make sure the belt is correctly positioned on the grooves of the shaft. Removal and Installation HP DesignJet 430, 450C and 455CA Printers - HP 450c | Service Manual - Page 160
on the left of the Printer. Reassembling: Make sure the belt is correctly positioned on the grooves of the pulley. 6. Release the two indicated clips on the top of the cartridge carriage by pulling them slightly outwards. 8-38 HP DesignJet 430, 450C and 455CA Printers Removal and Installation - HP 450c | Service Manual - Page 161
7. Pull the top of the carriage up. 8. Disconnect the trailing cable from the connector on the carriage. 9. Rest the top of the carriage on the trailingĆcable guide. Removal and Installation HP DesignJet 430, 450C and 455CA Printers 8-39 - HP 450c | Service Manual - Page 162
the trailing cable ' page 8Ć8. After reassembling, make sure that you check the carriageĆtoĆmedia distance ' page 5Ć5. Calibration: After having reassembled the Printer, perform the black cartridgeĆalignment. (Details ' User's Guide.) 8-40 HP DesignJet 430, 450C and 455CA Printers Removal and - HP 450c | Service Manual - Page 163
: Clip the belt to the carriage, using the same part of the belt as was originally used. Also, match the vertical lines on the belt with the vertical grooves on the carriage. The horizontal lines on the belt face outwards. Removal and Installation HP DesignJet 430, 450C and 455CA Printers 8-41 - HP 450c | Service Manual - Page 164
of the motor, press the black plastic tab on top very slightly downwards. B A Reassembling: Make sure the belt is correctly positioned on the shaft grooves. 3. On the left of the Printer, remove the belt from the pulley. 8-42 HP DesignJet 430, 450C and 455CA Printers Removal and Installation - HP 450c | Service Manual - Page 165
Make sure the belt is correctly positioned on the pulley grooves. 4. Underneath the left side of the chassis beam, release the black plastic clip and push the pulley shaft upwards. 5. Remove the pulley, shaft, and bushing from the Printer. Removal and Installation HP DesignJet 430, 450C and 455CA - HP 450c | Service Manual - Page 166
Support ' page 8Ć32. 5. Remove the large black plastic gear from the left sideĆplate. Torx-20 6. Remove the overdrive assembly ' page 8Ć50. 7. Use the Pincharm Lever to raise the pinchĆwheels, and lift the right side of the drive roller up. 8. Lift the roller out of the Printer. 8-44 HP DesignJet - HP 450c | Service Manual - Page 167
to the left of the sideĆplate. 3. Use the Pincharm Lever to lift the pinchĆwheels, and let the roller drop into place. Removal and Installation HP DesignJet 430, 450C and 455CA Printers 8-45 - HP 450c | Service Manual - Page 168
mount as you replace the three screws. This is to ensure correct spacing between the drive roller and the cartridge nozzles. Calibration: Perform the accuracy calibration after reassembling the Printer. (Details ' chapter 5.) 8-46 HP DesignJet 430, 450C and 455CA Printers Removal and Installation - HP 450c | Service Manual - Page 169
bar cam (item 3) to the left until it clears the pinchĆarm assembly (item 5) you want to replace. 7. Remove the pinchĆarm assembly and spring from the chassis. Take care that the spring does not fall. Bushing Spring Pinch arm Removal and Installation HP DesignJet 430, 450C and 455CA Printers 8-47 - HP 450c | Service Manual - Page 170
Installation 1. Reinsert the pinchĆarm assemblies into the chassis. Make sure that the bushings are correctly inserted in the where the nut is inside the journal. Reinstall the journal and slightly tighten the screw (item 1). 8-48 HP DesignJet 430, 450C and 455CA Printers Removal and Installation - HP 450c | Service Manual - Page 171
4 5 3 1 2 Figure 10: PinchĆarm Lift Mechanism Removal and Installation HP DesignJet 430, 450C and 455CA Printers 8-49 - HP 450c | Service Manual - Page 172
Remove the Primer Assembly ' page 8Ć25. 3. Remove the Service Station ' page 8Ć26. 4. Disconnect the mediaĆsensor cable from the main PCA (connector labeled MEDIA). 5. Remove the deflectors and media sensor) from the printer. 8-50 HP DesignJet 430, 450C and 455CA Printers Removal and Installation - HP 450c | Service Manual - Page 173
3 2 1 4 4 7 6 5 Figure 11: Overdrive Assembly Removal and Installation HP DesignJet 430, 450C and 455CA Printers 8-51 - HP 450c | Service Manual - Page 174
. 4. Release the indicated entryĆplaten clips by pushing the bottom front corners of the entry platen up. 5. Pull the entry platen horizontally out from the Printer. 8-52 HP DesignJet 430, 450C and 455CA Printers Removal and Installation - HP 450c | Service Manual - Page 175
Installation 1. Position the entry platen between the two sideĆplates. 2. Slide the top of the entry platen in, and the entry platen below it. Upper Pins Lower Pin Entry Platen 3. Refasten the indicated entryĆplaten clips. Removal and Installation HP DesignJet 430, 450C and 455CA Printers 8-53 - HP 450c | Service Manual - Page 176
Ćplate. 5. Replace the screw (item 1) on the rightĆhand side and the screw (item 3) on the leftĆhand side. 1. Tighten the screws, making sure that the entry platen is aligned tight against the right sideĆplate. 1 2 3 Figure 12: Entry Platen 8-54 HP DesignJet 430, 450C and 455CA Printers Removal - HP 450c | Service Manual - Page 177
9 Preventive Maintenance HP DesignJet 430, 450C and 455CA Printers 9-1 - HP 450c | Service Manual - Page 178
performance and long lifetime of the HP DesignJet 430/450C/455CA Printers, users should limit use to the following recommendations (duty cycle): Average number of plots per day Maximum number of plots per day 10 E/A0 CAD plots 20 E/A0 CAD plots The service configuration plot gives an indication - HP 450c | Service Manual - Page 179
on the service configuration plot may greatly underestimate the amount of ink in the spittoon. Belt Swelling To prevent new belts from swelling incorrectly, keep them in their bags with dissicant until you need to install them. Preventive Maintenance HP DesignJet 430, 450C and 455CA Printers 9-3 - HP 450c | Service Manual - Page 180
9 If other areas of the roller have been stained by ink, repeat the above steps. 10 Reconnect the Printer to the ac source, turn the Printer on, and load paper to test that no ink reflections disrupt operation of media loading. 9-4 HP DesignJet 430, 450C and 455CA Printers Preventive Maintenance - HP 450c | Service Manual - Page 181
10 Functional Overview HP DesignJet 430, 450C and 455CA Printers 10-1 - HP 450c | Service Manual - Page 182
the HP DesignJets 430, 450C and 455CA. Before reading it, read the functional overview of the DesignJet 220 ' HP DesignJet 220 and HP DesignJet 200 Printers - Service Manual," part number C3187Ć90000. (Information on the DesignJet 650C ' HP C2858B/C2859B DesignJet 650C Service Manual," part number - HP 450c | Service Manual - Page 183
bail sensor on the Printer to detect if the bail is up or down. BailĆLift Mechanism The bail features an automatic lift mechanism driven by the media motor using a series of gears and actuated by the cartridge carriage. The cable . Functional Overview HP DesignJet 430, 450C and 455CA Printers 10-3 - HP 450c | Service Manual - Page 184
(2x30) trailing cable. The carriage PCA contains: D Optical line sensor D Thermistor circuit D Linear encoder D Cartridge nozzle firing circuit Some electronic components on the DesignJet 450C and 450CA carriage PCA are not present on the DesignJet 430 carriage PCA. At powerĆon the Printer firmware - HP 450c | Service Manual - Page 185
-section Bail-Lift Engaging Tab Integrated Line Sensor Producing an Image PrintĆMode Characteristics Note that the firmware can recognize from the plot data whether a plot is color or monochrome. You do not set this parameter on the front panel. Functional Overview HP DesignJet 430, 450C and - HP 450c | Service Manual - Page 186
and DesignJets 230 and 250C look identical, their characteristics are different. Installing the incorrect primer can damage the cartridges or reduce the servicing of the cartridges. For the correct part numbers for the primers ' chapter 7. 10-6 HP DesignJet 430, 450C and 455CA Printers Functional - HP 450c | Service Manual - Page 187
part; you do not need to open it. If you replace the electronics module, remember to swap any SIMMs from the old module to the new one. Sensors There is no bail sensor for the HP DesignJets 430, 450C and 455CA. There is a pinchĆarm sensor which is different to the one installed on the HP DesignJets - HP 450c | Service Manual - Page 188
module. It is one exchangeable part. Water Condensation In humid environments, water may condense on the sideĆplates. A wick attached to the underside of the right sideĆplate routes water drops away from the mainĆPCA electronics. 10-8 HP DesignJet 430, 450C and 455CA Printers Functional Overview - HP 450c | Service Manual - Page 189
. Some types of graphics require relatively large amounts of memory. Examples are wide lines, raster fill patterns, polygons, Printer without being stored in a display list, so the size of the file that you can send is almost unlimited. Functional Overview HP DesignJet 430, 450C and 455CA Printers - HP 450c | Service Manual - Page 190
- HP 450c | Service Manual - Page 191
Glossary HP DesignJet 2500CP and 2000CP Printers Glossary-1 - HP 450c | Service Manual - Page 192
when data are transferred. ... (Part of a definition from The Harper Collins Dictionary of Computer Terms, E Ian R. Sinclair 1991.) cmąCentimeter(s). Customer EngineersąHP field support engineers. D/A1Ćsize plottersąModels C3190A and C4694A. data displayąService monitor. dBąDecibel(s). dcąDirect - HP 450c | Service Manual - Page 193
. HPąHewlettĆPackard. HPĆGLąPrecursor of HPĆGL/2. HPĆGL/2ąHewlettĆPackard's standard graphics language for its plotters. HPĆRTLąHewlettĆPackard Raster Meter(s) marginąPart of the media on which the plotter is incapable of printing. MbyteąMegabyte. HP DesignJet 2500CP and 2000CP Printers Glossary-3 - HP 450c | Service Manual - Page 194
Part Number. power cycleąThe switching of the plotter off and then on again. primary colorsącyan, magenta, yellow, black. print qualityąPlot quality Product Line 30ąHewlettĆPackard's product line of largeĆformat, pen and therĆ malĆinkjet plotters. Glossary-4 HP DesignJet 2500CP and 2000CP Printers - HP 450c | Service Manual - Page 195
secąSecond(s). secondary colorsąRed, blue, green. service monitorąData display; display data; monitor mode. SIMMąSingle InĆline Memory Module. skewąMisalignment. special paperąA paper specifically develĆ oped by HP, for HP inkjet plotters. SPROCąServoĆProcessor Code. swathąThat portion of a drawing - HP 450c | Service Manual - Page 196
- HP 450c | Service Manual - Page 197
Index HP DesignJet 430, 450C and 455CA Printers Index-1 - HP 450c | Service Manual - Page 198
media adjust, 5Ć7 check, 5Ć5 drive mechanics, 10Ć4 LED, 10Ć3 motor, 4Ć3, 10Ć4 control, 1Ć8 error, 2Ć9 removing, 8Ć18 noise, 9Ć2 PCA, 10Ć4 Carriage Assembly part number, 7Ć16 problem, 1Ć4 Carriage Axis, Service Test, 4Ć10, 4Ć12 carriageĆtoĆmedia distance, 6Ć8 HP DesignJet 430, 450C and 455CA Printers - HP 450c | Service Manual - Page 199
, plotterĆcomputer, 4Ć3 Compatible Documentation, 7Ć26 configuration, plot, service, 4Ć29 configuration procedure, EEROM model ID, 4Ć27 continuity problem, cartridge, 1Ć5 cover sensor, 4Ć3 Cover Sensors, problem, 1Ć4 Covers, part numbers, 7Ć8 HP DesignJet 430, 450C and 455CA Printers customer - HP 450c | Service Manual - Page 200
accuracy, 5Ć2 endĆcovers, removing left, 8Ć10 right, 8Ć11 engaging gear, 1Ć8 engaging lever problem, 1Ć8 support, removing, 8Ć32 entering service mode 1, 4Ć6 service mode 2, 4Ć22 Entry Platen, part number, 7Ć22 entry platen, removing, 8Ć52 environmental conditions, 6Ć17 errors, EEROM, 1Ć8 exchange - HP 450c | Service Manual - Page 201
problem, 1Ć4 line sensor, not calibrated, 4Ć14 linear encoder (on carriage), 10Ć4 Liquids, 8Ć3 Load Media, frontĆpanel light, 3Ć3 HP DesignJet 430, 450C and 455CA Printers axis, Service Tests, 4Ć16 Media Loading, problem, 1Ć7 memory, usage, 10Ć9 MIO, 10Ć8 modular test, 4Ć19 moisture, on plotter, 9Ć2 - HP 450c | Service Manual - Page 202
heads touching media, 6Ć17 touching service station, 6Ć13 Print Quality problems, 1Ć3, 6Ć2 Troubleshooting Checklist, 6Ć2 print quality, 1Ć8 plot, 6Ć4 Print Quality Plot Analyzing, 6Ć5 no defects found, 6Ć15 printĆmode characteristics, 10Ć5 Printer Configuration, 6Ć2 HP DesignJet 430, 450C and 455CA - HP 450c | Service Manual - Page 203
endĆcover, 8Ć11 roller, 8Ć44 Rollfeed Assembly, 8Ć9 service station, 8Ć26 spittoon, DesignJet 230/250C, 8Ć20, 8Ć21 top cover, 8Ć8 trailing cable, 8Ć34 trailingĆcable guide, 8Ć36 repaired assemblies, 7Ć2 replacement parts, 7Ć2 resistance of motor driver, 2Ć9, 4Ć11 right bracket, removing, 8Ć17 right - HP 450c | Service Manual - Page 204
errors, number of, service configuration plot, 4Ć29 T tape on cartridges, 1Ć5 test, service, 4Ć3 Tests, Service, 1Ć3 thermistor circuit, 10Ć4 thetaĆZ error, 6Ć8 thinĆfilm damage, 1Ć5 Tools, 8Ć5 top cover, removing, 8Ć8 Trailing Cable mispositioned, 1Ć4 HP DesignJet 430, 450C and 455CA Printers - HP 450c | Service Manual - Page 205
, Warning, 8Ć3 water condensation, 10Ć8 on main PCA, 10Ć8 wearing of parts, 1Ć8 wick, 10Ć8 wicking, 6Ć17 window sensor, 10Ć7 X XĆaxis calibration, service configuration plot, 4Ć29 XĆaxis Motor, part number, 7Ć12 Y YĆaxis Motor, part number, 7Ć12 HP DesignJet 430, 450C and 455CA Printers Index-9 - HP 450c | Service Manual - Page 206
- HP 450c | Service Manual - Page 207
About This Edition This is the first edition of this service manual. 1st edition, titled HP C4713A, 4714A, 4715A, 4715A, C6080A and C6081A HP DesignJet 430, 450C and 455CA Service Manual, September 1997 - HP 450c | Service Manual - Page 208
D HP DesignJet 450C printers (models C4715A and C4716A) D HP DesignJet 455CA printers (models C6080A and C6081A) For information about using these printers, refer to the corresponding user and quick-reference guides. The procedures described in this manual are to be performed by HP-qualified service
-
 1
1 -
 2
2 -
 3
3 -
 4
4 -
 5
5 -
 6
6 -
 7
7 -
8
-
9
-
10
-
11
-
12
-
13
-
14
-
15
-
16
-
17
-
18
-
19
-
20
-
21
-
22
-
23
-
24
-
25
-
26
-
27
-
28
-
29
-
30
-
31
-
32
-
33
-
34
-
35
-
36
-
37
-
38
-
39
-
40
-
41
-
42
-
43
-
44
-
45
-
46
-
47
-
48
-
49
-
50
-
51
-
52
-
53
-
54
-
55
-
56
-
57
-
58
-
59
-
60
-
61
-
62
-
63
-
64
-
65
-
66
-
67
-
68
-
69
-
70
-
71
-
72
-
73
-
74
-
75
-
76
-
77
-
78
-
79
-
80
-
81
-
82
-
83
-
84
-
85
-
86
-
87
-
88
-
89
-
90
-
91
-
92
-
93
-
94
-
95
-
96
-
97
-
98
-
99
-
100
-
101
-
102
-
103
-
104
-
105
-
106
-
107
-
108
-
109
-
110
-
111
-
112
-
113
-
114
-
115
-
116
-
117
-
118
-
119
-
120
-
121
-
122
-
123
-
124
-
125
-
126
-
127
-
128
-
129
-
130
-
131
-
132
-
133
-
134
-
135
-
136
-
137
-
138
-
139
-
140
-
141
-
142
-
143
-
144
-
145
-
146
-
147
-
148
-
149
-
150
-
151
-
152
-
153
-
154
-
155
-
156
-
157
-
158
-
159
-
160
-
161
-
162
-
163
-
164
-
165
-
166
-
167
-
168
-
169
-
170
-
171
-
172
-
173
-
174
-
175
-
176
-
177
-
178
-
179
-
180
-
181
-
182
-
183
-
184
-
185
-
186
-
187
-
188
-
189
-
190
-
191
-
192
-
193
-
194
-
195
-
196
-
197
-
198
-
199
-
200
-
201
-
202
-
203
-
204
-
205
-
206
-
207
-
208
 |
 |
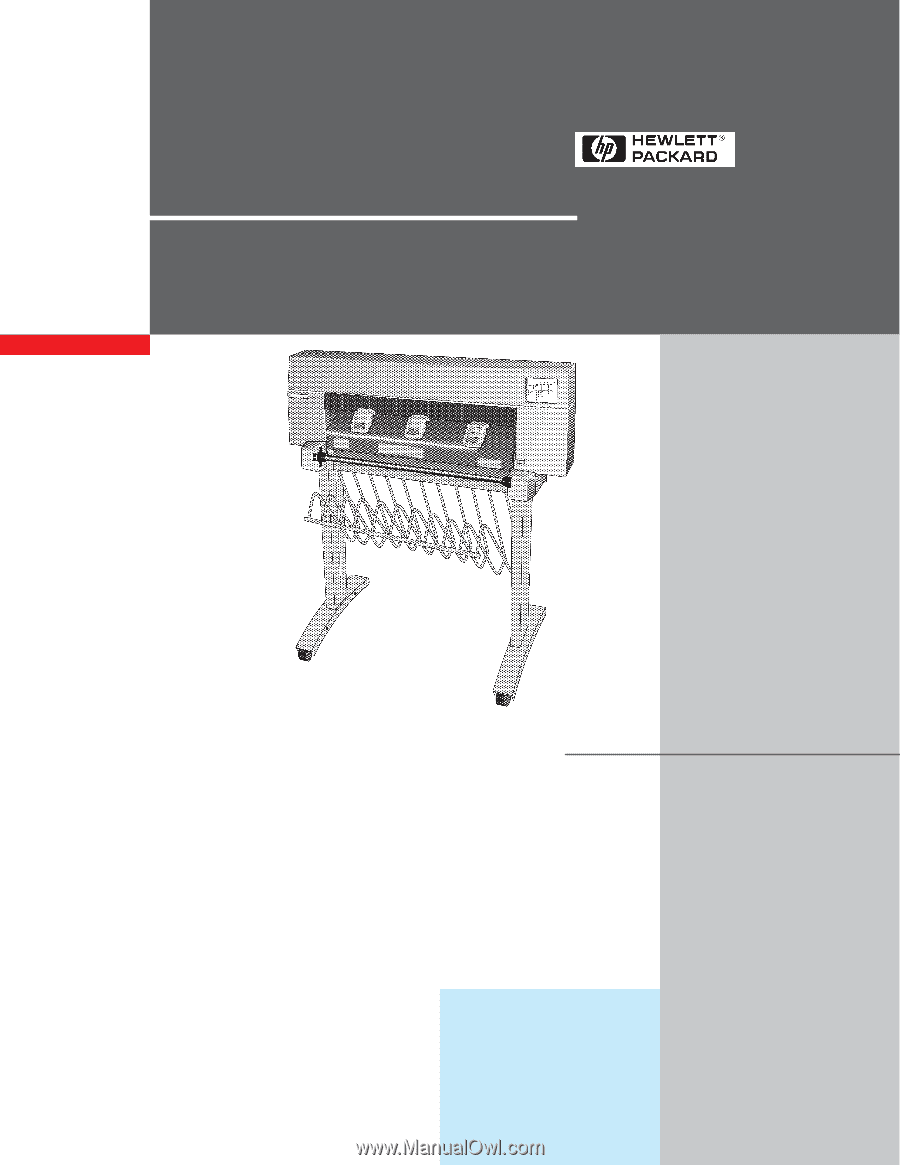
Service Manual
HP DesignJet 430
HP DesignJet 450C
HP DesignJet 455CA
Printers