HP 450c Service Manual - Page 133
Removing the Right EndĆCover, Remove the Right Rollfeed Assembly
 |
View all HP 450c manuals
Add to My Manuals
Save this manual to your list of manuals |
Page 133 highlights
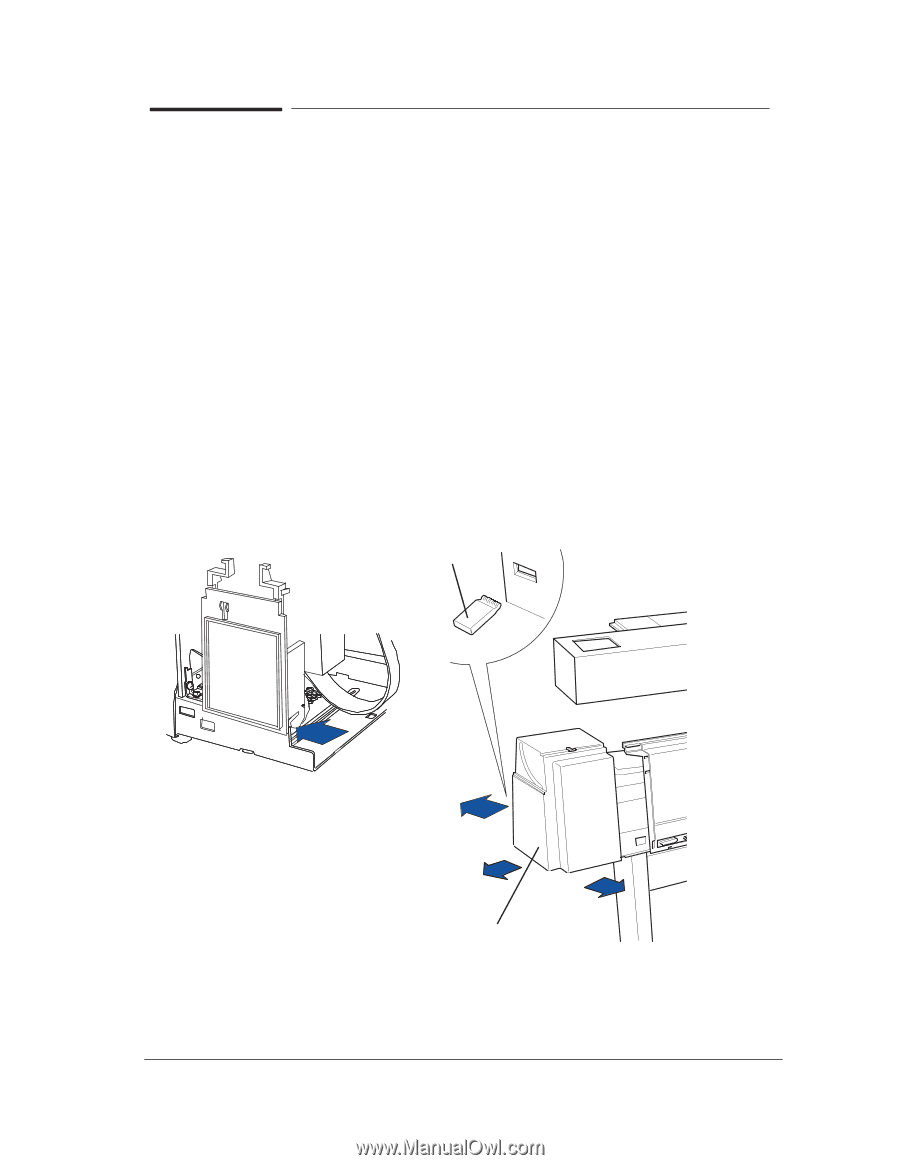
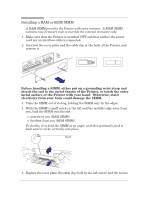
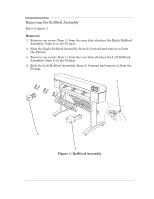
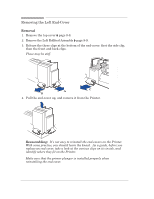
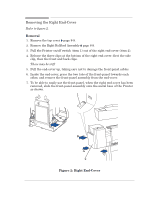
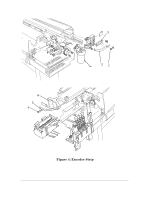
Removing the Right EndĆCover Refer to figure 2. Removal 1. Remove the top cover ' page 8Ć8. 2. Remove the Right Rollfeed Assembly ' page 8Ć9. 3. Pull the Printer on/off switch (item 1) out of the right endĆcover (item 2). 4. Release the three clips at the bottom of the right endĆcover: first the side clip, then the front and back clips. These may be stiff. 5. Pull the endĆcover up, taking care not to damage the frontĆpanel cables. 6. Inside the endĆcover, press the two tabs of the frontĆpanel towards each other, and remove the frontĆpanel assembly from the endĆcover. 7. To be able to easily use the frontĆpanel, when the right endĆcover has been removed, slide the frontĆpanel assembly onto the metal base of the Printer as shown. 1 B A C 2 Figure 2: Right EndĆCover Removal and Installation HP DesignJet 430, 450C and 455CA Printers 8-11
-
 1
1 -
2
-
3
-
4
-
5
-
6
-
7
-
8
-
9
-
10
-
11
-
12
-
13
-
14
-
15
-
16
-
17
-
18
-
19
-
20
-
21
-
22
-
23
-
24
-
25
-
26
-
27
-
28
-
29
-
30
-
31
-
32
-
33
-
34
-
35
-
36
-
37
-
38
-
39
-
40
-
41
-
42
-
43
-
44
-
45
-
46
-
47
-
48
-
49
-
50
-
51
-
52
-
53
-
54
-
55
-
56
-
57
-
58
-
59
-
60
-
61
-
62
-
63
-
64
-
65
-
66
-
67
-
68
-
69
-
70
-
71
-
72
-
73
-
74
-
75
-
76
-
77
-
78
-
79
-
80
-
81
-
82
-
83
-
84
-
85
-
86
-
87
-
88
-
89
-
90
-
91
-
92
-
93
-
94
-
95
-
96
-
97
-
98
-
99
-
100
-
101
-
102
-
103
-
104
-
105
-
106
-
107
-
108
-
109
-
110
-
111
-
112
-
113
-
114
-
115
-
116
-
117
-
118
-
119
-
120
-
121
-
122
-
123
-
124
-
125
-
126
-
127
-
 128
128 -
 129
129 -
 130
130 -
 131
131 -
 132
132 -
 133
133 -
 134
134 -
 135
135 -
 136
136 -
 137
137 -
 138
138 -
139
-
140
-
141
-
142
-
143
-
144
-
145
-
146
-
147
-
148
-
149
-
150
-
151
-
152
-
153
-
154
-
155
-
156
-
157
-
158
-
159
-
160
-
161
-
162
-
163
-
164
-
165
-
166
-
167
-
168
-
169
-
170
-
171
-
172
-
173
-
174
-
175
-
176
-
177
-
178
-
179
-
180
-
181
-
182
-
183
-
184
-
185
-
186
-
187
-
188
-
189
-
190
-
191
-
192
-
193
-
194
-
195
-
196
-
197
-
198
-
199
-
200
-
201
-
202
-
203
-
204
-
205
-
206
-
207
-
208
 |
 |