HP 450c Service Manual - Page 76
Check the trailing cable to make sure that it is positioned under
 |
View all HP 450c manuals
Add to My Manuals
Save this manual to your list of manuals |
Page 76 highlights
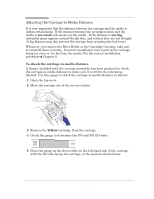
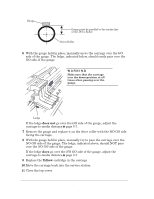
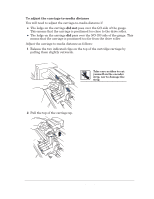
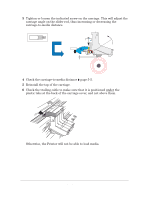
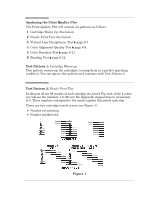
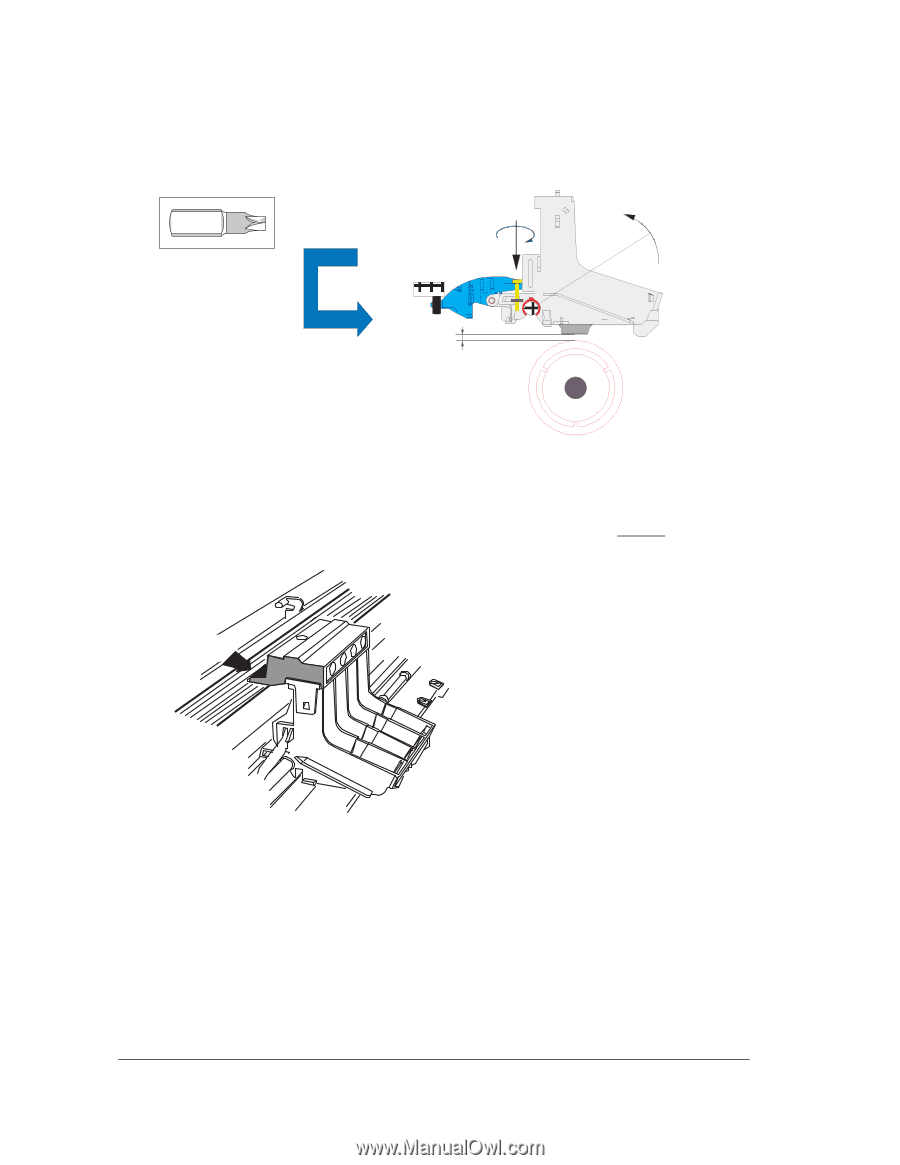
3 Tighten or loosen the indicated screw on the carriage. This will adjust the carriage angle on the slider rod, thus increasing or decreasing the carriageĆtoĆmedia distance. Torx-8 Rotating Clockwise ÎÎÎÎ Gap ÎÎ Increases 4 Check the carriageĆtoĆmedia distance ' page 5Ć5. 5 Reinstall the top of the carriage. 6 Check the trailing cable to make sure that it is positioned under the plastic tabs at the back of the carriage cover, and not above them. Trailing cable under tabs ! Otherwise, the Printer will not be able to load media. 5-8 HP DesignJet 430, 450C and 455CA Printers Service Calibrations
-
 1
1 -
2
-
3
-
4
-
5
-
6
-
7
-
8
-
9
-
10
-
11
-
12
-
13
-
14
-
15
-
16
-
17
-
18
-
19
-
20
-
21
-
22
-
23
-
24
-
25
-
26
-
27
-
28
-
29
-
30
-
31
-
32
-
33
-
34
-
35
-
36
-
37
-
38
-
39
-
40
-
41
-
42
-
43
-
44
-
45
-
46
-
47
-
48
-
49
-
50
-
51
-
52
-
53
-
54
-
55
-
56
-
57
-
58
-
59
-
60
-
61
-
62
-
63
-
64
-
65
-
66
-
67
-
68
-
69
-
70
-
 71
71 -
 72
72 -
 73
73 -
 74
74 -
 75
75 -
 76
76 -
 77
77 -
 78
78 -
 79
79 -
 80
80 -
 81
81 -
82
-
83
-
84
-
85
-
86
-
87
-
88
-
89
-
90
-
91
-
92
-
93
-
94
-
95
-
96
-
97
-
98
-
99
-
100
-
101
-
102
-
103
-
104
-
105
-
106
-
107
-
108
-
109
-
110
-
111
-
112
-
113
-
114
-
115
-
116
-
117
-
118
-
119
-
120
-
121
-
122
-
123
-
124
-
125
-
126
-
127
-
128
-
129
-
130
-
131
-
132
-
133
-
134
-
135
-
136
-
137
-
138
-
139
-
140
-
141
-
142
-
143
-
144
-
145
-
146
-
147
-
148
-
149
-
150
-
151
-
152
-
153
-
154
-
155
-
156
-
157
-
158
-
159
-
160
-
161
-
162
-
163
-
164
-
165
-
166
-
167
-
168
-
169
-
170
-
171
-
172
-
173
-
174
-
175
-
176
-
177
-
178
-
179
-
180
-
181
-
182
-
183
-
184
-
185
-
186
-
187
-
188
-
189
-
190
-
191
-
192
-
193
-
194
-
195
-
196
-
197
-
198
-
199
-
200
-
201
-
202
-
203
-
204
-
205
-
206
-
207
-
208
 |
 |
5-8
Service Calibrations
HP DesignJet 430, 450C and 455CA Printers
3
Tighten or loosen the indicated screw on the carriage. This will adjust the
carriage angle on the slider rod, thus increasing or decreasing the
carriageĆtoĆmedia distance.
Gap
Increases
Rotating
Clockwise
Torx-8
4
Check the carriageĆtoĆmedia distance
'
page 5Ć5.
5
Reinstall the top of the carriage.
6
Check the trailing cable to make sure that it is positioned under
the
plastic tabs at the back of the carriage cover, and not above them.
Trailing cable
under tabs !
Otherwise, the Printer will not be able to load media.