HP 450c Service Manual - Page 41
Viewing Test Output via the Serial Port, Using an HP Palmtop PC
 |
View all HP 450c manuals
Add to My Manuals
Save this manual to your list of manuals |
Page 41 highlights
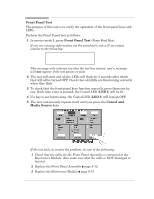
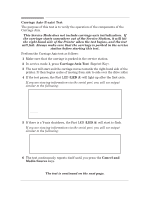
Viewing Test Output via the Serial Port Some of the tests in service mode 1 send test information to the printer's serial port. To view the information via the Serial Port: Using Windows 3.1 1 Turn the printer and PC OFF. 2 Connect the Printer to the PC using a serial interface cable and switch the PC ON. 3 Select the Terminal Icon in the Accessories Group in Windows. 4 In Terminal, select Settings and then select Communications from the pull down menu. 5 Make sure you use the following configuration: D Baud Rate = 9600 D Data Bits = 8 D Stop Bits = 1 D Parity = None D Flow Control = None D Connector = Select the Communications Port that you are using. 6 Select OK and Switch the Printer ON. 7 Perform the service tests on the Printer. Using an HP Palmtop PC 1 Use HP cable number F1015Ć80002 and adapter number 5181Ć6640 to connect the Palmtop to the Printer's serial interface port. Both cable and adaptor are included in the HP F1021B Connectivity Pack. 2 Turn the Printer on in service mode 1. 3 Turn the Palmtop on. 4 Open the Data Comm application on the Palmtop and press MENU. 5 Move to the Connect menu and press ENTER. 6 Ensure that Settings are the same for both Printer and Palmtop. 7 Again move to the Connect menu and press ENTER. 8 With Connect highlighted in the Connect menu, press ENTER. 9 Perform the service tests on the Printer. To stop communication between the Printer and the Palmtop, highlight Hangup in the Connect menu and press ENTER. Service Tests HP DesignJet 430, 450C and 455CA Printers 4-7
-
 1
1 -
2
-
3
-
4
-
5
-
6
-
7
-
8
-
9
-
10
-
11
-
12
-
13
-
14
-
15
-
16
-
17
-
18
-
19
-
20
-
21
-
22
-
23
-
24
-
25
-
26
-
27
-
28
-
29
-
30
-
31
-
32
-
33
-
34
-
35
-
 36
36 -
 37
37 -
 38
38 -
 39
39 -
 40
40 -
 41
41 -
 42
42 -
 43
43 -
 44
44 -
 45
45 -
 46
46 -
47
-
48
-
49
-
50
-
51
-
52
-
53
-
54
-
55
-
56
-
57
-
58
-
59
-
60
-
61
-
62
-
63
-
64
-
65
-
66
-
67
-
68
-
69
-
70
-
71
-
72
-
73
-
74
-
75
-
76
-
77
-
78
-
79
-
80
-
81
-
82
-
83
-
84
-
85
-
86
-
87
-
88
-
89
-
90
-
91
-
92
-
93
-
94
-
95
-
96
-
97
-
98
-
99
-
100
-
101
-
102
-
103
-
104
-
105
-
106
-
107
-
108
-
109
-
110
-
111
-
112
-
113
-
114
-
115
-
116
-
117
-
118
-
119
-
120
-
121
-
122
-
123
-
124
-
125
-
126
-
127
-
128
-
129
-
130
-
131
-
132
-
133
-
134
-
135
-
136
-
137
-
138
-
139
-
140
-
141
-
142
-
143
-
144
-
145
-
146
-
147
-
148
-
149
-
150
-
151
-
152
-
153
-
154
-
155
-
156
-
157
-
158
-
159
-
160
-
161
-
162
-
163
-
164
-
165
-
166
-
167
-
168
-
169
-
170
-
171
-
172
-
173
-
174
-
175
-
176
-
177
-
178
-
179
-
180
-
181
-
182
-
183
-
184
-
185
-
186
-
187
-
188
-
189
-
190
-
191
-
192
-
193
-
194
-
195
-
196
-
197
-
198
-
199
-
200
-
201
-
202
-
203
-
204
-
205
-
206
-
207
-
208
 |
 |