HP 450c Service Manual - Page 46
Print Quality Key., Carriage Test, passes, fails - designjet test print
 |
View all HP 450c manuals
Add to My Manuals
Save this manual to your list of manuals |
Page 46 highlights
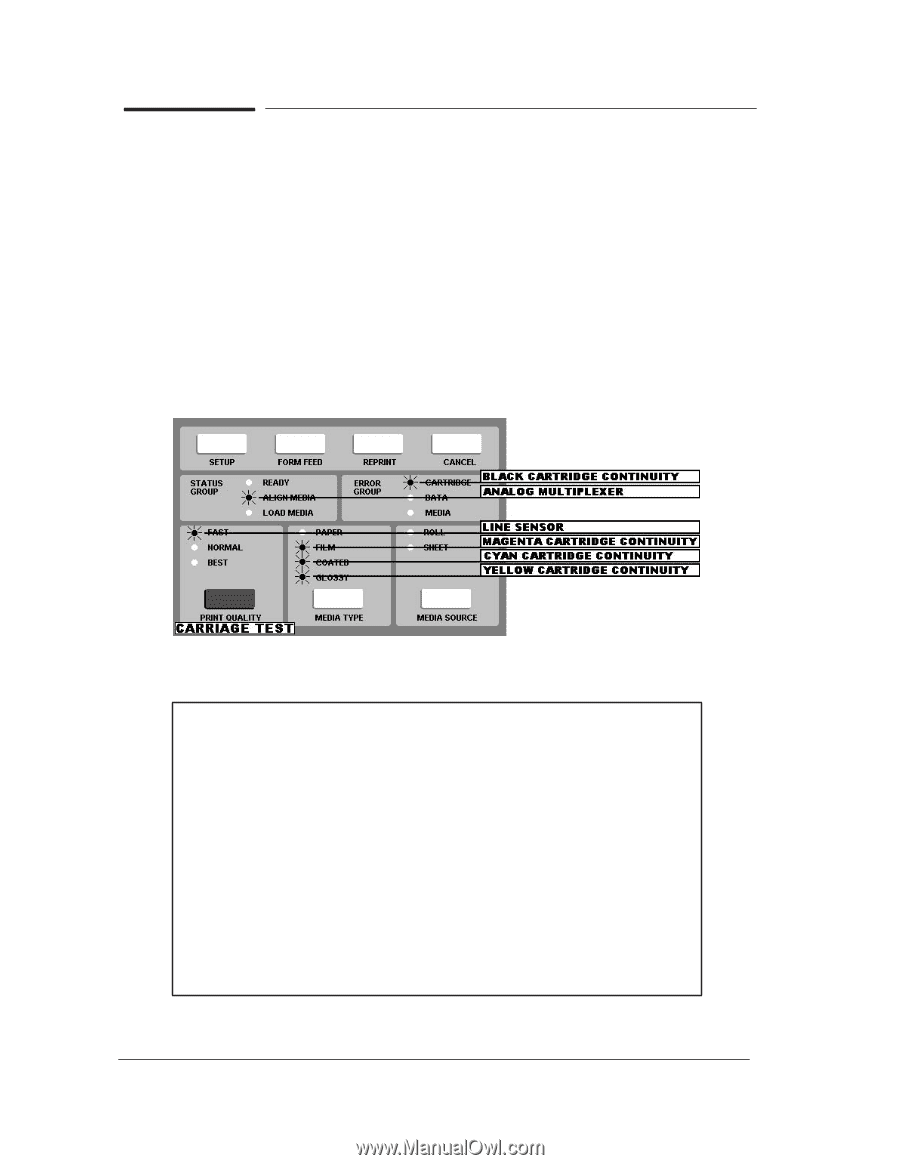
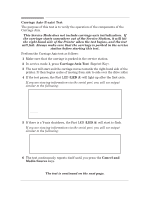
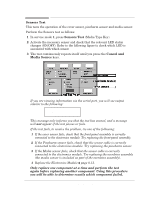
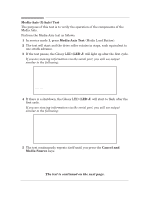
Carriage Test The purpose of this test is to verify the operation of the Carriage subsystems, like the Line Sensor and analog multiplexer. This test also checks the connection between the carriage flex circuit and the cartridges. Perform the Carriage test as follows: 1 In service mode 1, press Carriage Test (Print Quality Key). 2 The test will start and all the LEDs will turn OFF. There will be no movement in the Printer and you must wait for the FrontĆPanel to indicate if the test has passed or failed. 3 Refer to the following figure to check which LED is associated with which test. If the test passes, the following LEDs will be lit (ON). If the test fails, the following LEDs will be flashing: If you are viewing information via the serial port, you will see output similar to the following if the Test Passes: 4. - Carriage Test 0x57c7c350 (carrPCBTest): Forcing use of R10X method for Calvin: 13643 1960 0x57c7c350 (carrPCBTest): Forcing use of R10X method for Yellow: 11361 1953 0x57c7c350 (carrPCBTest): Forcing use of R10X method for Cyan: 11361 1953 0x57c7c350 (carrPCBTest): Forcing use of R10X method for Magenta: 11361 1953 Pen BLACK continuity: WORKS Pen CYAN continuity: WORKS Pen MAGENTA continuity: WORKS Pen YELLOW continuity: WORKS Pen BLACK has 1cd4 identification. Pen CYAN has 400 identification. Pen MAGENTA has 1f00 identification. Pen YELLOW has 1900 identification. Optical sensor samples: 253 255 255 254 253 252 252 250 249 248 247 246 245 244 243 241 Optical Sensor: WORKS Carriage MUX : WORKS Pen BLACK continuity: WORKS ........... The test is continued on the next page. 4-12 HP DesignJet 430, 450C and 455CA Printers Service Tests
-
 1
1 -
2
-
3
-
4
-
5
-
6
-
7
-
8
-
9
-
10
-
11
-
12
-
13
-
14
-
15
-
16
-
17
-
18
-
19
-
20
-
21
-
22
-
23
-
24
-
25
-
26
-
27
-
28
-
29
-
30
-
31
-
32
-
33
-
34
-
35
-
36
-
37
-
38
-
39
-
40
-
 41
41 -
 42
42 -
 43
43 -
 44
44 -
 45
45 -
 46
46 -
 47
47 -
 48
48 -
 49
49 -
 50
50 -
 51
51 -
52
-
53
-
54
-
55
-
56
-
57
-
58
-
59
-
60
-
61
-
62
-
63
-
64
-
65
-
66
-
67
-
68
-
69
-
70
-
71
-
72
-
73
-
74
-
75
-
76
-
77
-
78
-
79
-
80
-
81
-
82
-
83
-
84
-
85
-
86
-
87
-
88
-
89
-
90
-
91
-
92
-
93
-
94
-
95
-
96
-
97
-
98
-
99
-
100
-
101
-
102
-
103
-
104
-
105
-
106
-
107
-
108
-
109
-
110
-
111
-
112
-
113
-
114
-
115
-
116
-
117
-
118
-
119
-
120
-
121
-
122
-
123
-
124
-
125
-
126
-
127
-
128
-
129
-
130
-
131
-
132
-
133
-
134
-
135
-
136
-
137
-
138
-
139
-
140
-
141
-
142
-
143
-
144
-
145
-
146
-
147
-
148
-
149
-
150
-
151
-
152
-
153
-
154
-
155
-
156
-
157
-
158
-
159
-
160
-
161
-
162
-
163
-
164
-
165
-
166
-
167
-
168
-
169
-
170
-
171
-
172
-
173
-
174
-
175
-
176
-
177
-
178
-
179
-
180
-
181
-
182
-
183
-
184
-
185
-
186
-
187
-
188
-
189
-
190
-
191
-
192
-
193
-
194
-
195
-
196
-
197
-
198
-
199
-
200
-
201
-
202
-
203
-
204
-
205
-
206
-
207
-
208
 |
 |