HP 450c Service Manual - Page 145
Removing the Media Motor Assembly, Remove the Mounting Bracket complete with the Media Motor Assembly.
 |
View all HP 450c manuals
Add to My Manuals
Save this manual to your list of manuals |
Page 145 highlights
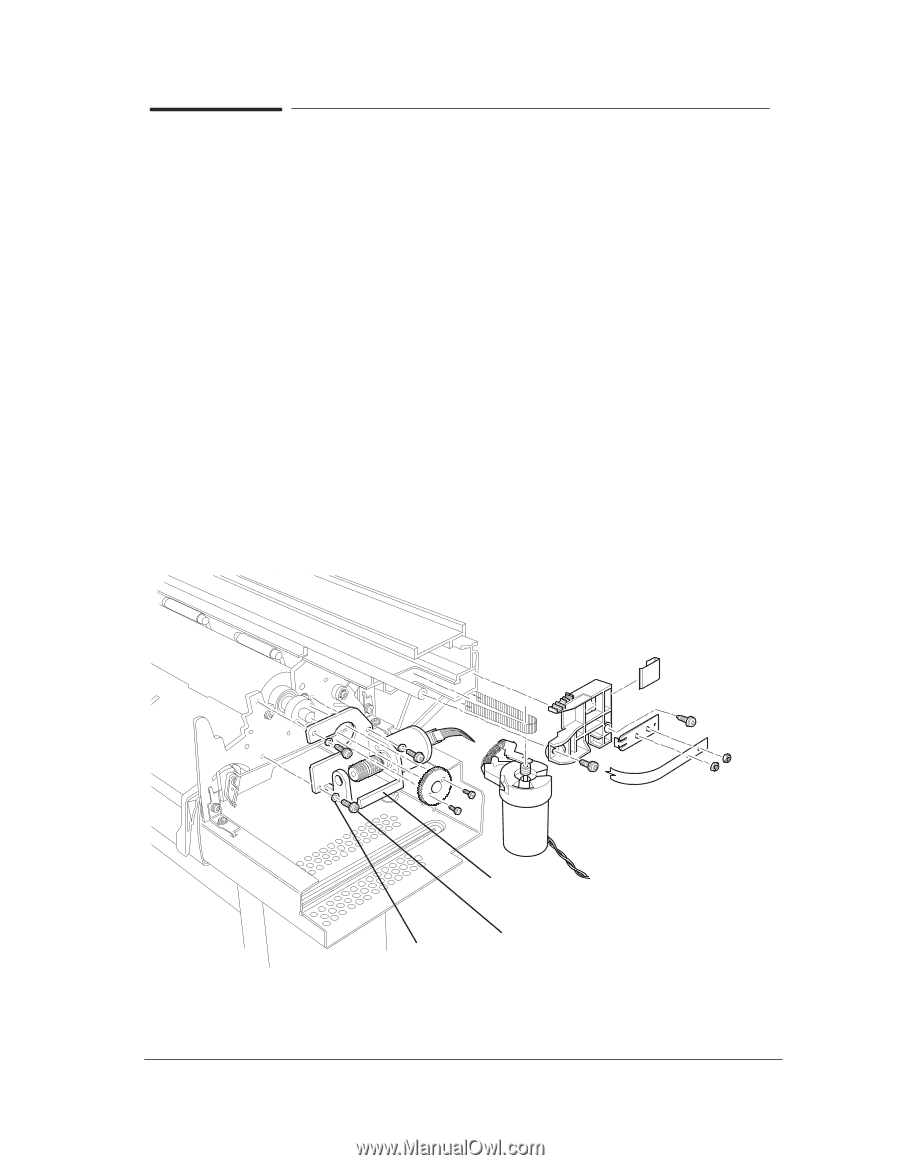
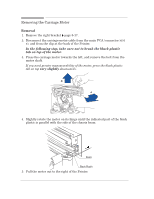
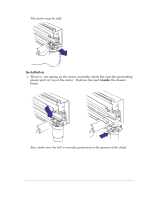
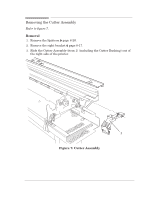
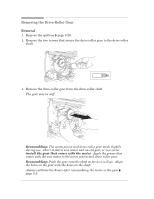
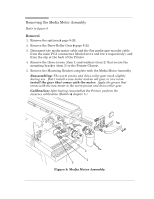
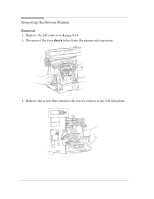
Removing the Media Motor Assembly Refer to figure 8. Removal 1. Remove the spittoon ' page 8Ć20. 2. Remove the DriveĆRoller Gear ' page 8Ć22. 3. Disconnect the mediaĆmotor cable and the flat mediaĆaxisĆencoder cable from the main PCA (connectors labeled MOT X and ENC X respectively), and from the clip at the back of the Printer. 4. Remove the three screws (item 1) and washers (item 2) that secure the mounting bracket (item 3) to the Printer Chassis. 5. Remove the Mounting Bracket complete with the Media Motor Assembly. Reassembling: The worm pinion and driveĆroller gear mesh slightly during use. Don't install a new motor and an old gear, or vice versa: install the gear that comes with the motor. Apply the grease that comes with the new motor to the worm pinion and driveĆroller gear. Calibration: After having reassembled the Printer, perform the accuracy calibration (Details ' chapter 5.) 3 1 2 Figure 8: Media Motor Assembly Removal and Installation HP DesignJet 430, 450C and 455CA Printers 8-23
-
 1
1 -
2
-
3
-
4
-
5
-
6
-
7
-
8
-
9
-
10
-
11
-
12
-
13
-
14
-
15
-
16
-
17
-
18
-
19
-
20
-
21
-
22
-
23
-
24
-
25
-
26
-
27
-
28
-
29
-
30
-
31
-
32
-
33
-
34
-
35
-
36
-
37
-
38
-
39
-
40
-
41
-
42
-
43
-
44
-
45
-
46
-
47
-
48
-
49
-
50
-
51
-
52
-
53
-
54
-
55
-
56
-
57
-
58
-
59
-
60
-
61
-
62
-
63
-
64
-
65
-
66
-
67
-
68
-
69
-
70
-
71
-
72
-
73
-
74
-
75
-
76
-
77
-
78
-
79
-
80
-
81
-
82
-
83
-
84
-
85
-
86
-
87
-
88
-
89
-
90
-
91
-
92
-
93
-
94
-
95
-
96
-
97
-
98
-
99
-
100
-
101
-
102
-
103
-
104
-
105
-
106
-
107
-
108
-
109
-
110
-
111
-
112
-
113
-
114
-
115
-
116
-
117
-
118
-
119
-
120
-
121
-
122
-
123
-
124
-
125
-
126
-
127
-
128
-
129
-
130
-
131
-
132
-
133
-
134
-
135
-
136
-
137
-
138
-
139
-
 140
140 -
 141
141 -
 142
142 -
 143
143 -
 144
144 -
 145
145 -
 146
146 -
 147
147 -
 148
148 -
 149
149 -
 150
150 -
151
-
152
-
153
-
154
-
155
-
156
-
157
-
158
-
159
-
160
-
161
-
162
-
163
-
164
-
165
-
166
-
167
-
168
-
169
-
170
-
171
-
172
-
173
-
174
-
175
-
176
-
177
-
178
-
179
-
180
-
181
-
182
-
183
-
184
-
185
-
186
-
187
-
188
-
189
-
190
-
191
-
192
-
193
-
194
-
195
-
196
-
197
-
198
-
199
-
200
-
201
-
202
-
203
-
204
-
205
-
206
-
207
-
208
 |
 |