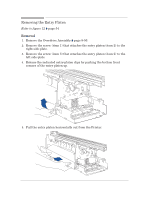
HP 450c Service Manual - Page 175
of each sideĆplate., Refasten the indicated entryĆplaten clips.
 |
View all HP 450c manuals
Add to My Manuals
Save this manual to your list of manuals |
Page 175 highlights
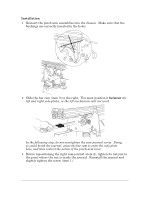
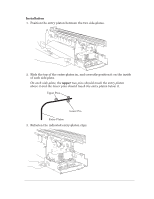
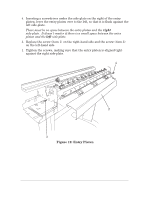
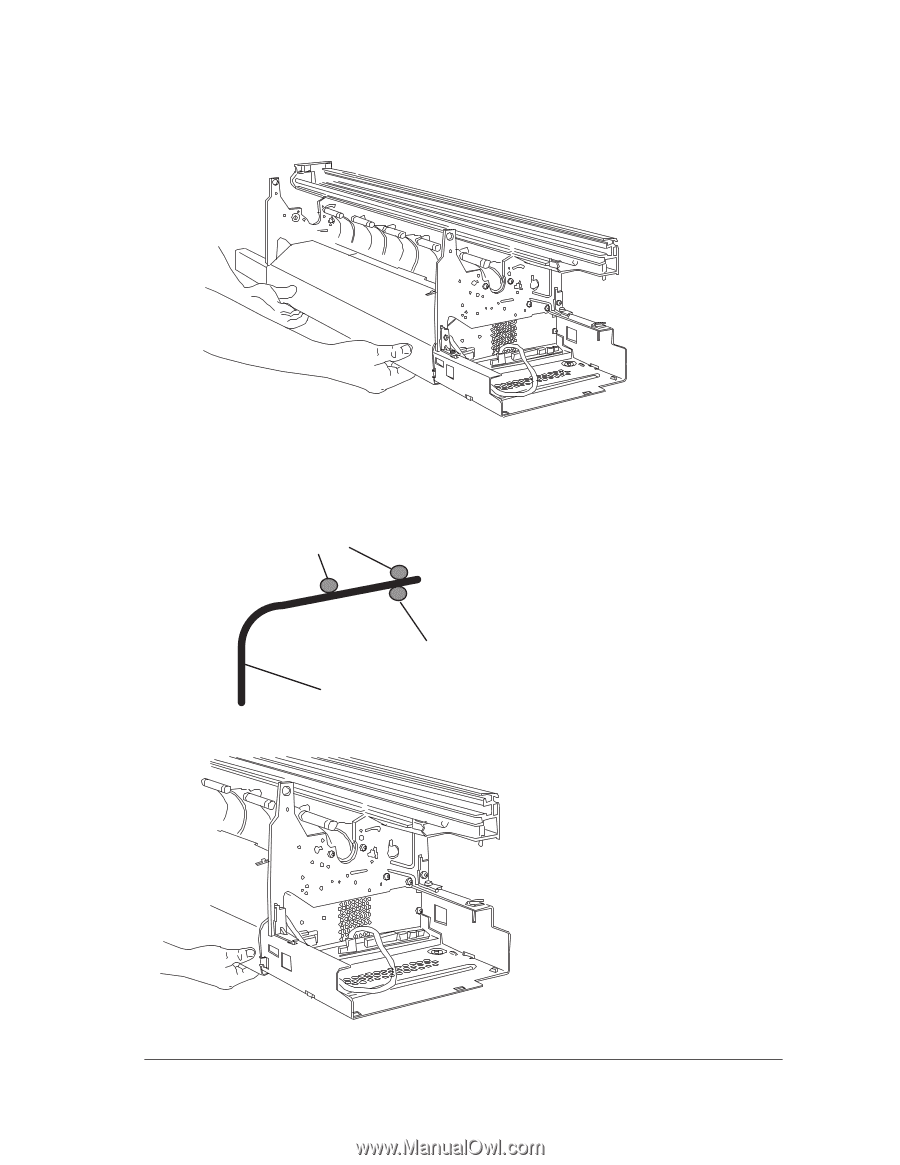
Installation 1. Position the entry platen between the two sideĆplates. 2. Slide the top of the entry platen in, and correctly position it on the inside of each sideĆplate. On each sideĆplate, the upper two pins should touch the entry platen above it and the lower pins should touch the entry platen below it. Upper Pins Lower Pin Entry Platen 3. Refasten the indicated entryĆplaten clips. Removal and Installation HP DesignJet 430, 450C and 455CA Printers 8-53
-
 1
1 -
2
-
3
-
4
-
5
-
6
-
7
-
8
-
9
-
10
-
11
-
12
-
13
-
14
-
15
-
16
-
17
-
18
-
19
-
20
-
21
-
22
-
23
-
24
-
25
-
26
-
27
-
28
-
29
-
30
-
31
-
32
-
33
-
34
-
35
-
36
-
37
-
38
-
39
-
40
-
41
-
42
-
43
-
44
-
45
-
46
-
47
-
48
-
49
-
50
-
51
-
52
-
53
-
54
-
55
-
56
-
57
-
58
-
59
-
60
-
61
-
62
-
63
-
64
-
65
-
66
-
67
-
68
-
69
-
70
-
71
-
72
-
73
-
74
-
75
-
76
-
77
-
78
-
79
-
80
-
81
-
82
-
83
-
84
-
85
-
86
-
87
-
88
-
89
-
90
-
91
-
92
-
93
-
94
-
95
-
96
-
97
-
98
-
99
-
100
-
101
-
102
-
103
-
104
-
105
-
106
-
107
-
108
-
109
-
110
-
111
-
112
-
113
-
114
-
115
-
116
-
117
-
118
-
119
-
120
-
121
-
122
-
123
-
124
-
125
-
126
-
127
-
128
-
129
-
130
-
131
-
132
-
133
-
134
-
135
-
136
-
137
-
138
-
139
-
140
-
141
-
142
-
143
-
144
-
145
-
146
-
147
-
148
-
149
-
150
-
151
-
152
-
153
-
154
-
155
-
156
-
157
-
158
-
159
-
160
-
161
-
162
-
163
-
164
-
165
-
166
-
167
-
168
-
169
-
 170
170 -
 171
171 -
 172
172 -
 173
173 -
 174
174 -
 175
175 -
 176
176 -
 177
177 -
 178
178 -
 179
179 -
 180
180 -
181
-
182
-
183
-
184
-
185
-
186
-
187
-
188
-
189
-
190
-
191
-
192
-
193
-
194
-
195
-
196
-
197
-
198
-
199
-
200
-
201
-
202
-
203
-
204
-
205
-
206
-
207
-
208
 |
 |
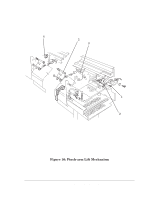
Removal and Installation
8-53
HP DesignJet 430, 450C and 455CA Printers
Installation
1.
Position the entry platen between the two sideĆplates.
2.
Slide the top of the entry platen in, and correctly position it on the inside
of each sideĆplate.
On each sideĆplate, the
upper
two pins should touch the entry platen
above it and the lower pins should touch the entry platen below it.
Lower Pin
Entry Platen
Upper Pins
3.
Refasten the indicated entryĆplaten clips.