Kyocera KM-C3232E C2525E/C3225E/C3232E/C4035E Operation Guide (Basic) - Page 100
Job Reservation, Place the Job Reservation original.
 |
View all Kyocera KM-C3232E manuals
Add to My Manuals
Save this manual to your list of manuals |
Page 100 highlights
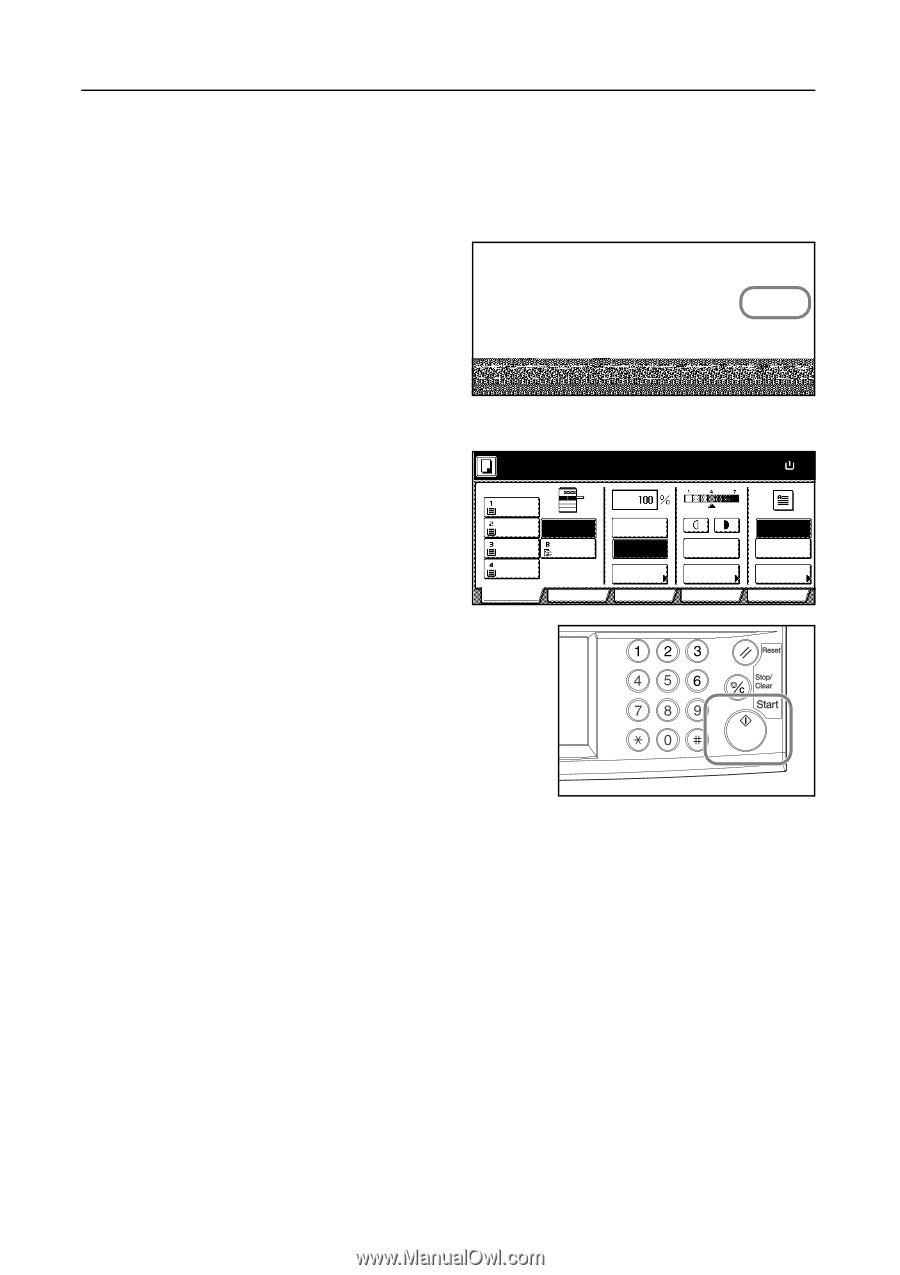
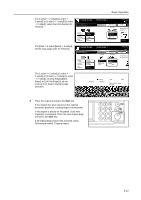
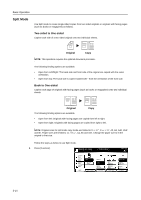
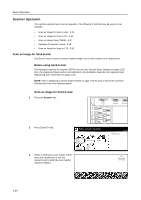
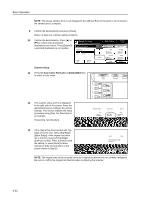
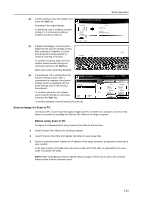
Basic Operation Job Reservation Scan an original and reserve the next job even when a copy or print job is being outputted. The reserved job will be started after the current job is completed. If the optional fax is installed, reserve jobs even when received fax data is being printed. Follow the steps as below to use Job Reservation mode. 1 Press [Reserve next copy]. Copying can be reserved will be displayed. opying. Auto % Count/Set 11×8½" Color, 1 side Plain Output Top tray Reserve next copy Pause 2 Place the Job Reservation original. 3 Specify the copy settings for the reserved job. To cancel a reserved job, press [Finish Job res.] ([Job resrv. finished]). Copying can be reserved. ( Full-Color ) Paper Size 11×8½ 100% 11×8½" Plain 11×17" Color 11×8½" Plain 11×8½" Plain Basic APS MP tray Color User choice Auto % 100% Reduce /Enlarge Function Auto Exposure Exposure Mode Color func. Staple Off Staple Left Top Staple Program 4 Press the Start key. Scanning of the original begins. After scanning all the originals, the touch panel will return to output screen. The reserved job will be started after the current job is completed. 3-18
-
 1
1 -
2
-
3
-
4
-
5
-
6
-
7
-
8
-
9
-
10
-
11
-
12
-
13
-
14
-
15
-
16
-
17
-
18
-
19
-
20
-
21
-
22
-
23
-
24
-
25
-
26
-
27
-
28
-
29
-
30
-
31
-
32
-
33
-
34
-
35
-
36
-
37
-
38
-
39
-
40
-
41
-
42
-
43
-
44
-
45
-
46
-
47
-
48
-
49
-
50
-
51
-
52
-
53
-
54
-
55
-
56
-
57
-
58
-
59
-
60
-
61
-
62
-
63
-
64
-
65
-
66
-
67
-
68
-
69
-
70
-
71
-
72
-
73
-
74
-
75
-
76
-
77
-
78
-
79
-
80
-
81
-
82
-
83
-
84
-
85
-
86
-
87
-
88
-
89
-
90
-
91
-
92
-
93
-
94
-
 95
95 -
 96
96 -
 97
97 -
 98
98 -
 99
99 -
 100
100 -
 101
101 -
 102
102 -
 103
103 -
 104
104 -
 105
105 -
106
-
107
-
108
-
109
-
110
-
111
-
112
-
113
-
114
-
115
-
116
-
117
-
118
-
119
-
120
-
121
-
122
-
123
-
124
-
125
-
126
-
127
-
128
-
129
-
130
-
131
-
132
-
133
-
134
-
135
-
136
-
137
-
138
-
139
-
140
-
141
-
142
-
143
-
144
-
145
-
146
-
147
-
148
-
149
-
150
-
151
-
152
-
153
-
154
-
155
-
156
-
157
-
158
-
159
-
160
-
161
-
162
-
163
-
164
-
165
-
166
-
167
-
168
-
169
-
170
-
171
-
172
-
173
-
174
-
175
-
176
-
177
-
178
-
179
-
180
 |
 |