Kyocera KM-C3232E C2525E/C3225E/C3232E/C4035E Operation Guide (Basic) - Page 111
Database Connection Setup, Scanner
 |
View all Kyocera KM-C3232E manuals
Add to My Manuals
Save this manual to your list of manuals |
Page 111 highlights
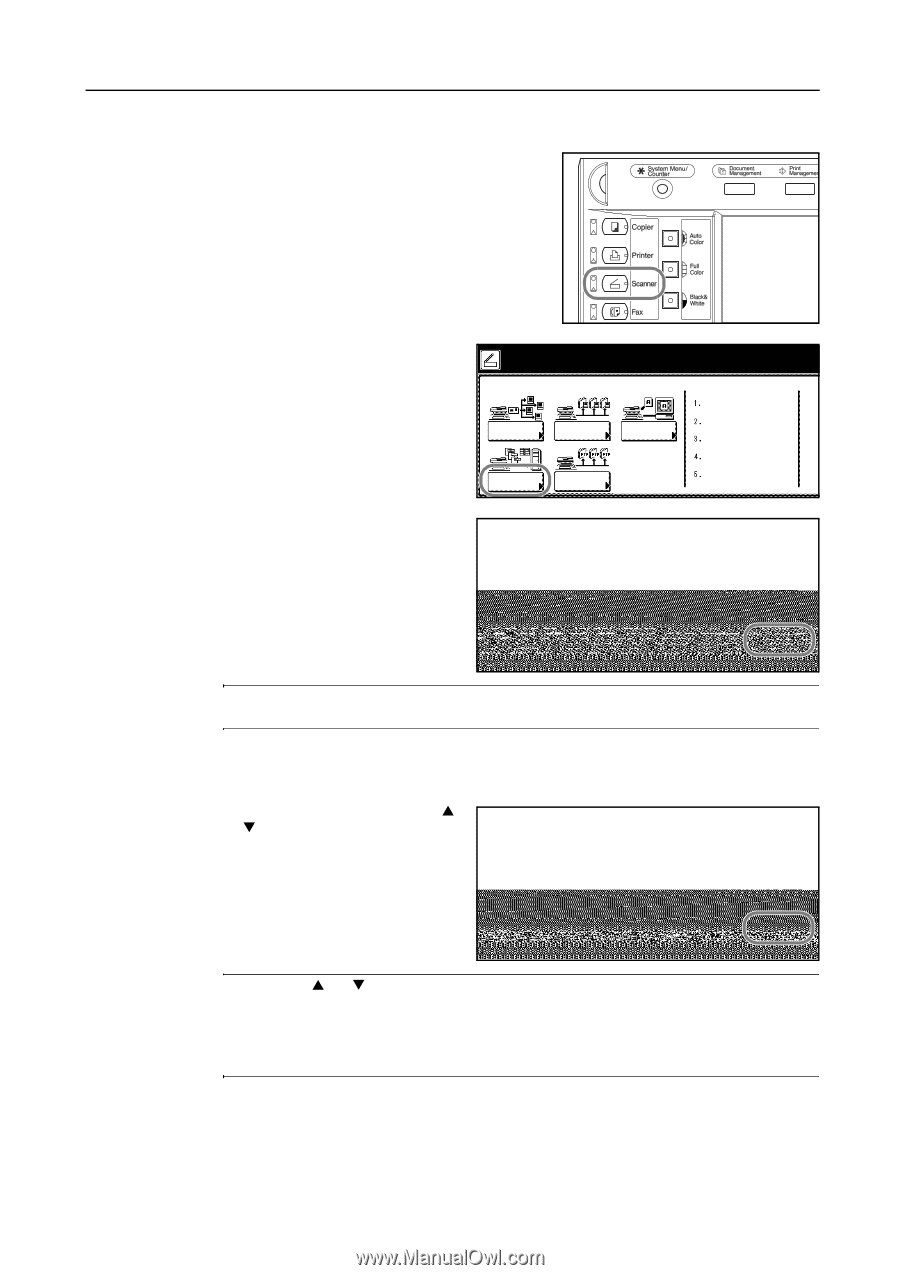
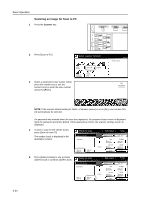
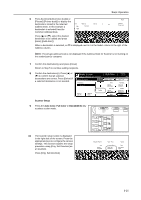
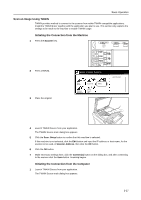
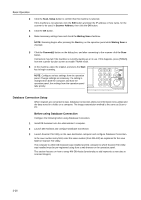
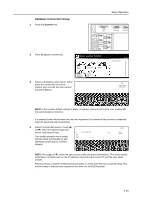
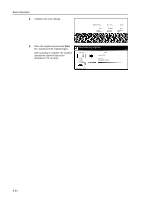
Database Connection Setup 1 Press the Scanner key. Basic Operation 2 Press [Database Connection]. Select scanner function. Send E-mail Scan to PC TWAIN Database Connection Scan to FTP 3 Select a destination (user name). Either nection press the number key or use the numeric keys to enter the user number and press [Enter]. Recall Program 08/08/'05 Stop User number (with #key) Enter me. NOTE: If the scanner default setting for Selec. of senders (users) is set to [On], user number 001 will automatically be selected. If a password was entered when the user was registered, the password input screen is displayed. Input the password and press [Enter]. 4 Select the input data source. Press [S] ection or [T], select the desired input data source, and press [Enter]. This section explains how to select KM-DB Assist (functionality to add 0-9 GHI PQR YZ Dest. of input data File A keywords as text data to scanned images). on from the list. Cancel Up Information Down Enter NOTE: Press [S] or [T], select the input source verify and press [Information]. This screen allows confirmation of details such as the IP address of the data input source PC and the save folder number. Password entry is required if DB Assist (functionality to create CSV files from scanned image files and text data) is selected and a password has been set from DB Assistant. 3-29
-
 1
1 -
2
-
3
-
4
-
5
-
6
-
7
-
8
-
9
-
10
-
11
-
12
-
13
-
14
-
15
-
16
-
17
-
18
-
19
-
20
-
21
-
22
-
23
-
24
-
25
-
26
-
27
-
28
-
29
-
30
-
31
-
32
-
33
-
34
-
35
-
36
-
37
-
38
-
39
-
40
-
41
-
42
-
43
-
44
-
45
-
46
-
47
-
48
-
49
-
50
-
51
-
52
-
53
-
54
-
55
-
56
-
57
-
58
-
59
-
60
-
61
-
62
-
63
-
64
-
65
-
66
-
67
-
68
-
69
-
70
-
71
-
72
-
73
-
74
-
75
-
76
-
77
-
78
-
79
-
80
-
81
-
82
-
83
-
84
-
85
-
86
-
87
-
88
-
89
-
90
-
91
-
92
-
93
-
94
-
95
-
96
-
97
-
98
-
99
-
100
-
101
-
102
-
103
-
104
-
105
-
 106
106 -
 107
107 -
 108
108 -
 109
109 -
 110
110 -
 111
111 -
 112
112 -
 113
113 -
 114
114 -
 115
115 -
 116
116 -
117
-
118
-
119
-
120
-
121
-
122
-
123
-
124
-
125
-
126
-
127
-
128
-
129
-
130
-
131
-
132
-
133
-
134
-
135
-
136
-
137
-
138
-
139
-
140
-
141
-
142
-
143
-
144
-
145
-
146
-
147
-
148
-
149
-
150
-
151
-
152
-
153
-
154
-
155
-
156
-
157
-
158
-
159
-
160
-
161
-
162
-
163
-
164
-
165
-
166
-
167
-
168
-
169
-
170
-
171
-
172
-
173
-
174
-
175
-
176
-
177
-
178
-
179
-
180
 |
 |