Kyocera KM-C3232E C2525E/C3225E/C3232E/C4035E Operation Guide (Basic) - Page 104
Scanner Setup, Auto Color, Black&White, Press [Orig. Set Direction].
 |
View all Kyocera KM-C3232E manuals
Add to My Manuals
Save this manual to your list of manuals |
Page 104 highlights
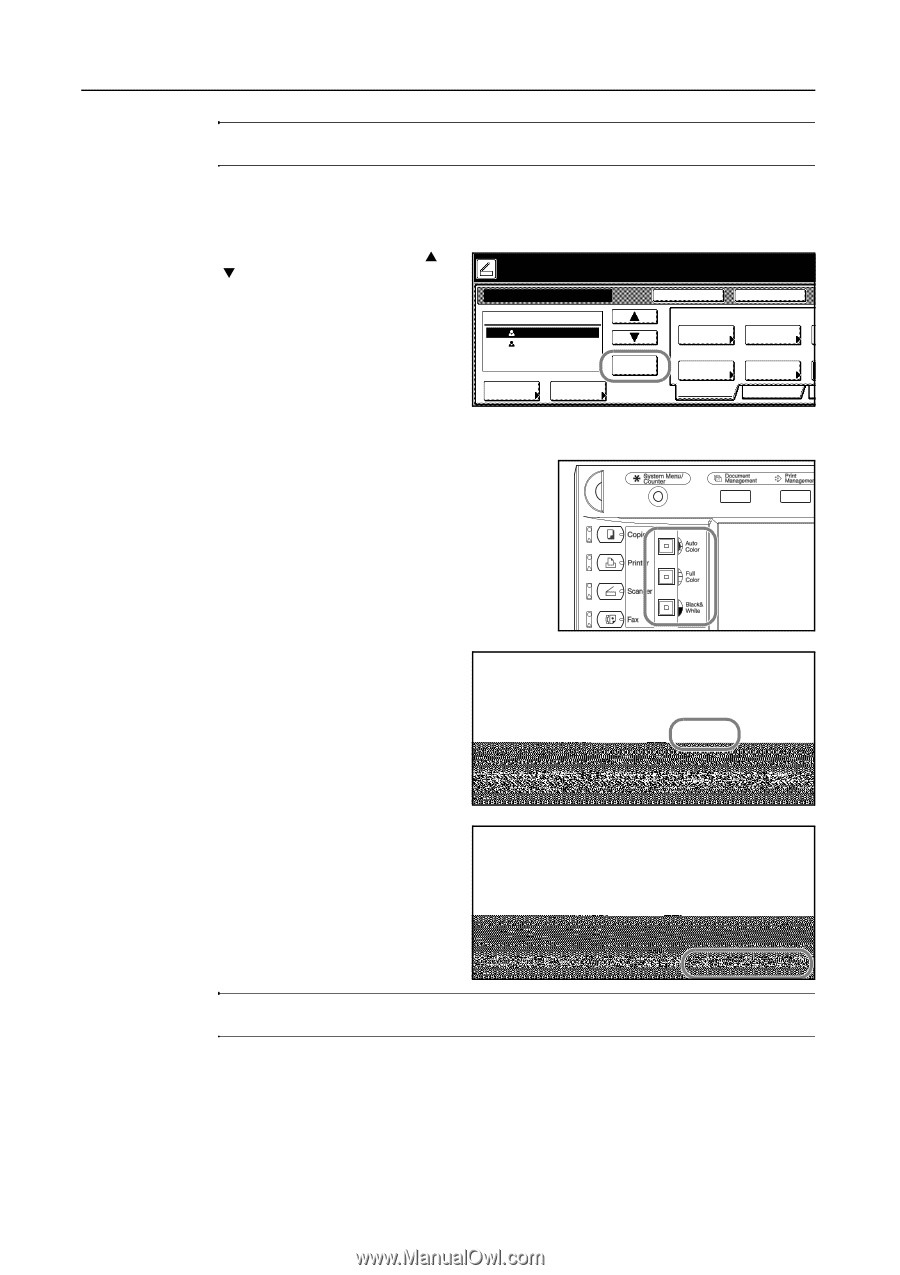
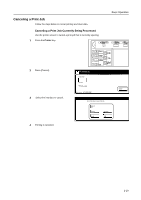
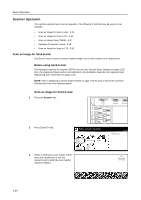
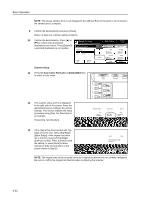
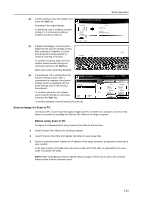
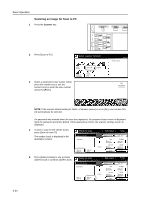
Basic Operation NOTE: The private address book is not displayed if the Address Book for Scanner is not running on the sender(user)'s computer. 9 Confirm the destination(s) and press [Close]. Return to Step 4 to continue adding recipients. 10 Confirm the destination(s). Press [S] or [T] to confirm that all selected Ready to scan. ( Full-Color ) Place the original and select destination. Original 11×8½" 08/08 destinations are correct. Press [Delete] if a selected destination is not needed. Send E-mail-Sending Destination Register Prgrm Auto Cont. TX to Top Edge To: User A To: User B Select Orig.Size Auto size Orig. Set Direction 200dpi Delete Select Send Size Scanning Resolution Enter dest. Address Book Basic Quality Scanner Setup 11 Press the Auto Color, Full Color or Black&White key to select a color mode. 12 The scanner setup screen is displayed to scan. ( Full-Color ) in the right side of the screen. Press the riginal and select destination. Original Send 11×8½" 8½×11" 08/08/'05 14:00 appropriate keys to configure the various ending Register Prgrm Cont. TX to Cancel settings. This section explains the setup procedure using [Orig. Set Direction] as A an example. B Auto Select Orig.Size Top Edge Orig. Set Direction Auto File Name Input Auto size 200dpi JPEG Press [Orig. Set Direction]. Delete Select Send Size Scanning Resolution File Type Address Book Basic Quality Edit 13 If the original has been loaded with Top to scan. ( Full-Color ) edge set at the rear, select [Top Edge] riginal and select destination. ([Back Edge]). If the original has been tion set to the left, press [Left Top Edge] ([Left top corner]). Press [Close] to save the setting, or press [Back] to leave settings as they are and return to the screen shown in Step 10. "Check direction of original" shown at right side of display. Follow the steps. If setting mode is wrong, incorrect send will result. Original Send 11×8½" 8½×11" 08/08/'05 14:00 Back Close Select Original Image Direction. Top Edge Left Top Edge NOTE: The original may not be scanned correctly if original set direction is not correctly configured. Be sure to confirm the original set direction when configuring the scanner. 3-22
-
 1
1 -
2
-
3
-
4
-
5
-
6
-
7
-
8
-
9
-
10
-
11
-
12
-
13
-
14
-
15
-
16
-
17
-
18
-
19
-
20
-
21
-
22
-
23
-
24
-
25
-
26
-
27
-
28
-
29
-
30
-
31
-
32
-
33
-
34
-
35
-
36
-
37
-
38
-
39
-
40
-
41
-
42
-
43
-
44
-
45
-
46
-
47
-
48
-
49
-
50
-
51
-
52
-
53
-
54
-
55
-
56
-
57
-
58
-
59
-
60
-
61
-
62
-
63
-
64
-
65
-
66
-
67
-
68
-
69
-
70
-
71
-
72
-
73
-
74
-
75
-
76
-
77
-
78
-
79
-
80
-
81
-
82
-
83
-
84
-
85
-
86
-
87
-
88
-
89
-
90
-
91
-
92
-
93
-
94
-
95
-
96
-
97
-
98
-
 99
99 -
 100
100 -
 101
101 -
 102
102 -
 103
103 -
 104
104 -
 105
105 -
 106
106 -
 107
107 -
 108
108 -
 109
109 -
110
-
111
-
112
-
113
-
114
-
115
-
116
-
117
-
118
-
119
-
120
-
121
-
122
-
123
-
124
-
125
-
126
-
127
-
128
-
129
-
130
-
131
-
132
-
133
-
134
-
135
-
136
-
137
-
138
-
139
-
140
-
141
-
142
-
143
-
144
-
145
-
146
-
147
-
148
-
149
-
150
-
151
-
152
-
153
-
154
-
155
-
156
-
157
-
158
-
159
-
160
-
161
-
162
-
163
-
164
-
165
-
166
-
167
-
168
-
169
-
170
-
171
-
172
-
173
-
174
-
175
-
176
-
177
-
178
-
179
-
180
 |
 |