Kyocera KM-C3232E C2525E/C3225E/C3232E/C4035E Operation Guide (Basic) - Page 103
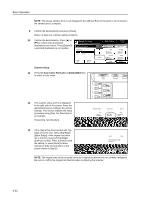
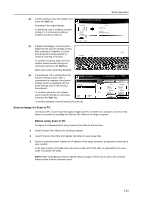
Press [Common] [Common book] or, Common Address Book.
 |
View all Kyocera KM-C3232E manuals
Add to My Manuals
Save this manual to your list of manuals |
Page 103 highlights
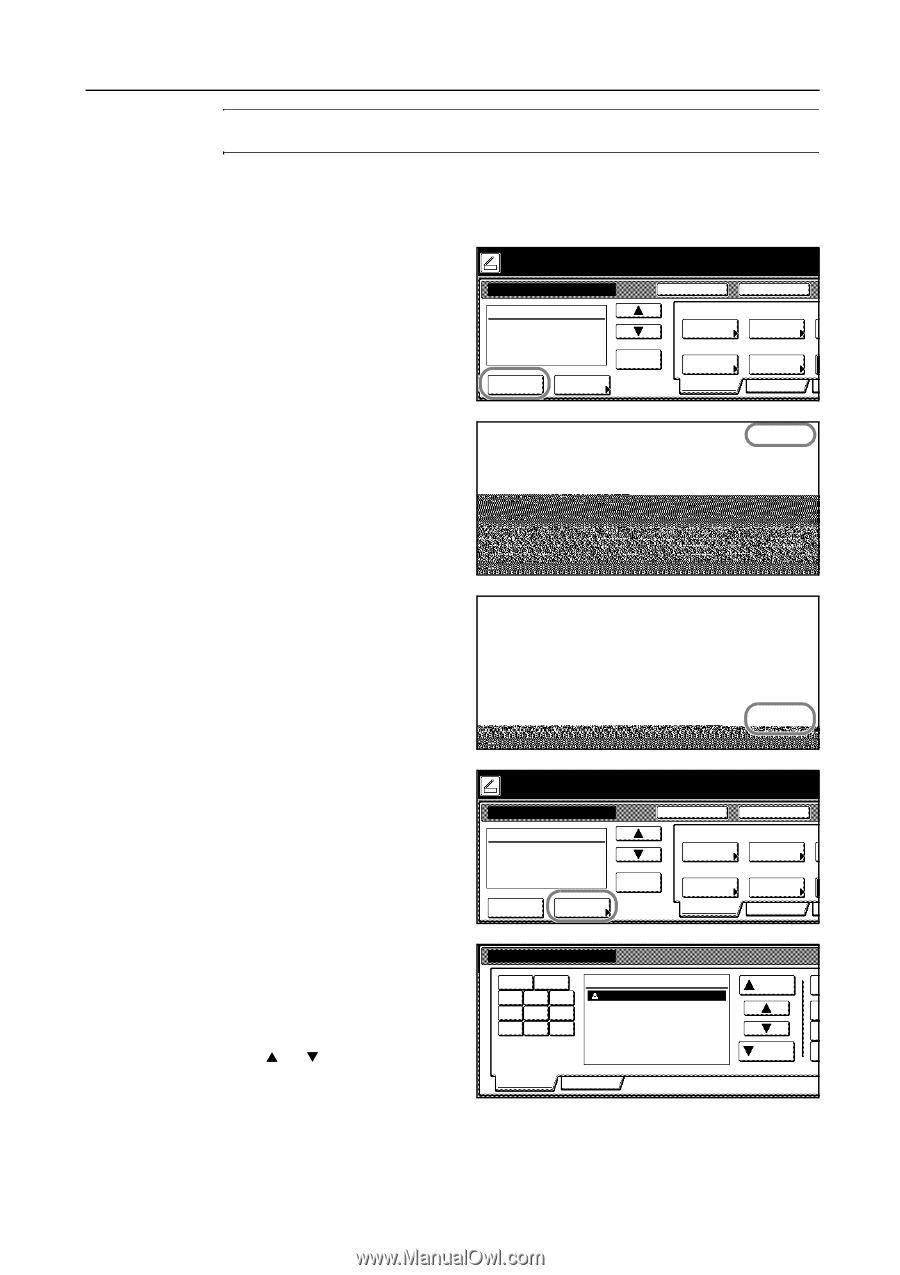
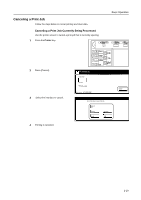
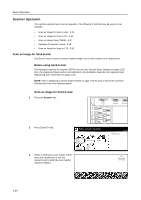
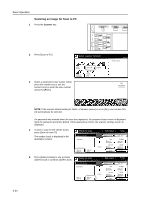
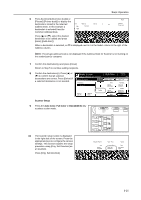
Basic Operation NOTE: If the scanner default setting for Selec. of senders (users) is set to [On], user number 001 will automatically be selected. If a password was entered when the user was registered, the password input screen is displayed. Input the password and press [Enter]. If the password is correct, the scanner settings screen is displayed. 4 To input a mail address, press [Enter dest.]. Ready to scan. Place the original and select destination. Send E-mail-Sending ( Full-Color ) Original 11×8½" 08/08 Register Prgrm Cont. TX to Destination Enter dest. Address Book Delete Auto Select Orig.Size Auto size Select Send Size Basic Top Edge Orig. Set Direction 200dpi Scanning Resolution Quality 5 Enter the e-mail address for the s destination (recipient). After inputting, press [End] to display the sending method screen. Stop Char.Limit:64 letters including # End Back Del. 6 Select whether to send as [To:], [CC:], or d of receiver. [BCC:] and press [Enter]. Space Back Stop To: CC: BCC: Enter 7 Press [Address Book] to use a private address book or common address book. Ready to scan. Place the original and select destination. Send E-mail-Sending ( Full-Color ) Original 11×8½" 08/08 Register Prgrm Cont. TX to Destination Enter dest. Address Book Delete Auto Select Orig.Size Auto size Select Send Size Basic Top Edge Orig. Set Direction 200dpi Scanning Resolution Quality 8 Press [Common] ([Common book]) or [Private] ([Private book]) to display the destinations stored in the selected address book. In this example a destination is selected from the Common Address Book. Address Book Symbol 0-9 ABC DEF GHI JKL MNO PQR STU VWX YZ Address User A Select: 1. Up Press [S] or [T] to select a destination Down and select whether to send as [To:], [CC:], or [BCC:]. Common Private When a destination is selected, an ⌧ is displayed next to it in the Select column to the right of the Address column. 3-21
-
 1
1 -
2
-
3
-
4
-
5
-
6
-
7
-
8
-
9
-
10
-
11
-
12
-
13
-
14
-
15
-
16
-
17
-
18
-
19
-
20
-
21
-
22
-
23
-
24
-
25
-
26
-
27
-
28
-
29
-
30
-
31
-
32
-
33
-
34
-
35
-
36
-
37
-
38
-
39
-
40
-
41
-
42
-
43
-
44
-
45
-
46
-
47
-
48
-
49
-
50
-
51
-
52
-
53
-
54
-
55
-
56
-
57
-
58
-
59
-
60
-
61
-
62
-
63
-
64
-
65
-
66
-
67
-
68
-
69
-
70
-
71
-
72
-
73
-
74
-
75
-
76
-
77
-
78
-
79
-
80
-
81
-
82
-
83
-
84
-
85
-
86
-
87
-
88
-
89
-
90
-
91
-
92
-
93
-
94
-
95
-
96
-
97
-
 98
98 -
 99
99 -
 100
100 -
 101
101 -
 102
102 -
 103
103 -
 104
104 -
 105
105 -
 106
106 -
 107
107 -
 108
108 -
109
-
110
-
111
-
112
-
113
-
114
-
115
-
116
-
117
-
118
-
119
-
120
-
121
-
122
-
123
-
124
-
125
-
126
-
127
-
128
-
129
-
130
-
131
-
132
-
133
-
134
-
135
-
136
-
137
-
138
-
139
-
140
-
141
-
142
-
143
-
144
-
145
-
146
-
147
-
148
-
149
-
150
-
151
-
152
-
153
-
154
-
155
-
156
-
157
-
158
-
159
-
160
-
161
-
162
-
163
-
164
-
165
-
166
-
167
-
168
-
169
-
170
-
171
-
172
-
173
-
174
-
175
-
176
-
177
-
178
-
179
-
180
 |
 |