Kyocera KM-C3232E C2525E/C3225E/C3232E/C4035E Operation Guide (Basic) - Page 57
Connecting Cables, Use shielded USB, 10Base-T and 100Base-TX cables.
 |
View all Kyocera KM-C3232E manuals
Add to My Manuals
Save this manual to your list of manuals |
Page 57 highlights
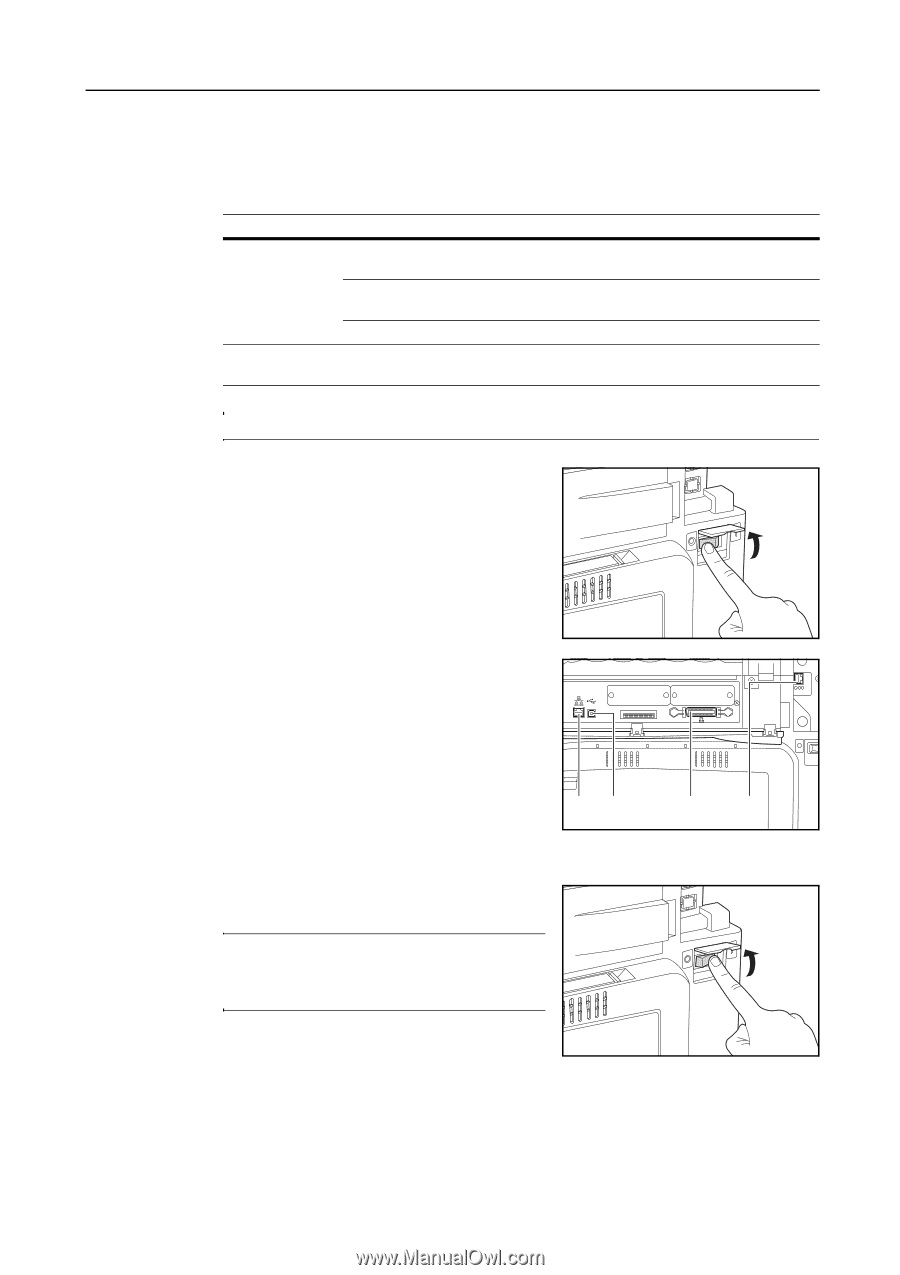
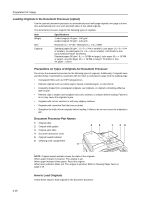
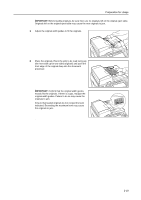
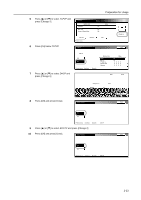
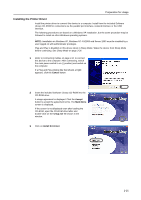
Preparation for Usage Connecting Cables Connect to a computer to use the printer and scanner features. This device has the following interfaces for connecting to computers. Use the type of cable appropriate for the interface used. Function Printing Functionality Scanning Functionality Interface Required cable Parallel port interface Parallel Port Cable (IEEE1284 specification, 1.5 m or less) USB Interface Hi-Speed USB-compatible cable (Hi-Speed USB specification, 5.0 m or less) shielded cable Network interface Network Cable (10Base-T or 100Base-TX) Network interface Network Cable (10Base-T or 100Base-TX) NOTE: Use shielded USB, 10Base-T and 100Base-TX cables. 1 Open the main power switch cover, and switch the main power switch to off ( position). Turn off the computer's power when connecting a parallel port cable. 2 Open the interface cover on the right side of the unit and connect the cable to the interface. A: Network interface (printer) B: USB interface (printer) C: Parallel port interface (printer) D: Network interface (scanner) AB C D 3 Connect the other end of the cable to the computer or a hub (network switching device). 4 Open the main power switch cover, and switch the main power switch to on ( | position). NOTE: For network cable connections, configure the network after connecting the cables. For details, refer to Network (TCP/IP) Settings on page 2-22 and Scanner Basic Settings on page 2-32. 2-21
-
 1
1 -
2
-
3
-
4
-
5
-
6
-
7
-
8
-
9
-
10
-
11
-
12
-
13
-
14
-
15
-
16
-
17
-
18
-
19
-
20
-
21
-
22
-
23
-
24
-
25
-
26
-
27
-
28
-
29
-
30
-
31
-
32
-
33
-
34
-
35
-
36
-
37
-
38
-
39
-
40
-
41
-
42
-
43
-
44
-
45
-
46
-
47
-
48
-
49
-
50
-
51
-
 52
52 -
 53
53 -
 54
54 -
 55
55 -
 56
56 -
 57
57 -
 58
58 -
 59
59 -
 60
60 -
 61
61 -
 62
62 -
63
-
64
-
65
-
66
-
67
-
68
-
69
-
70
-
71
-
72
-
73
-
74
-
75
-
76
-
77
-
78
-
79
-
80
-
81
-
82
-
83
-
84
-
85
-
86
-
87
-
88
-
89
-
90
-
91
-
92
-
93
-
94
-
95
-
96
-
97
-
98
-
99
-
100
-
101
-
102
-
103
-
104
-
105
-
106
-
107
-
108
-
109
-
110
-
111
-
112
-
113
-
114
-
115
-
116
-
117
-
118
-
119
-
120
-
121
-
122
-
123
-
124
-
125
-
126
-
127
-
128
-
129
-
130
-
131
-
132
-
133
-
134
-
135
-
136
-
137
-
138
-
139
-
140
-
141
-
142
-
143
-
144
-
145
-
146
-
147
-
148
-
149
-
150
-
151
-
152
-
153
-
154
-
155
-
156
-
157
-
158
-
159
-
160
-
161
-
162
-
163
-
164
-
165
-
166
-
167
-
168
-
169
-
170
-
171
-
172
-
173
-
174
-
175
-
176
-
177
-
178
-
179
-
180
 |
 |