Kyocera KM-C3232E C2525E/C3225E/C3232E/C4035E Operation Guide (Basic) - Page 106
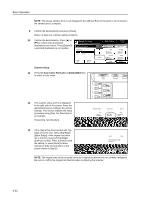
Scanning an Image for Scan to PC, press [Save at User PC].
 |
View all Kyocera KM-C3232E manuals
Add to My Manuals
Save this manual to your list of manuals |
Page 106 highlights
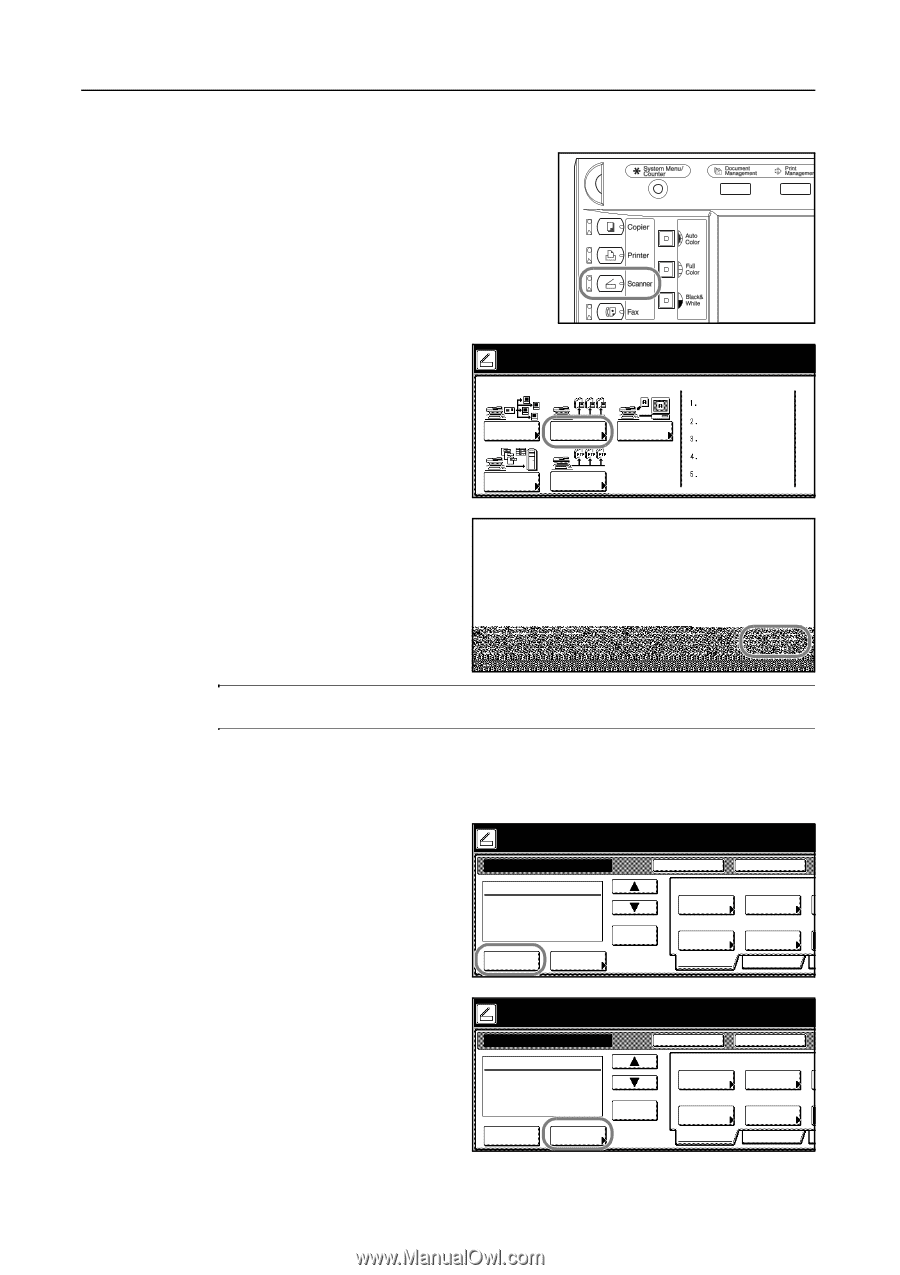
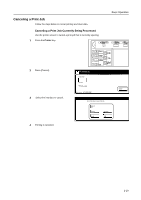
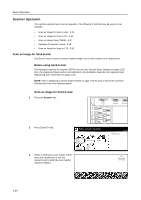
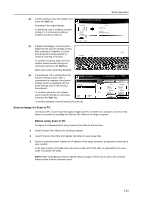
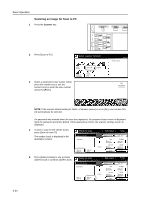
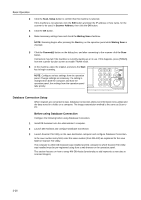
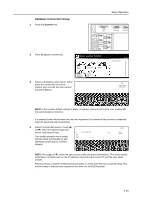
Basic Operation Scanning an Image for Scan to PC 1 Press the Scanner key. 3-24 2 Press [Scan to PC]. Select scanner function. Send E-mail Scan to PC TWAIN Database Connection Scan to FTP 3 Select a destination (user name). Either name. press the number key or use the numeric keys to enter the user number and press [Enter]. Recall Program 08/08/'05 Stop User number (with #key) Enter NOTE: If the scanner default setting for Selec. of senders (users) is set to [On], user number 001 will automatically be selected. If a password was entered when the user was registered, the password input screen is displayed. Input the password and press [Enter]. If the password is correct, the scanner settings screen is displayed. 4 To save a copy for the sender (user), press [Save at User PC]. The sender (user) is displayed in the destination column. Ready to scan. Place the original and select destination. Scan to PC-Sending ( Full-Color ) Original 11×8½" 08/08 Register Prgrm Cont. TX to Destination Save at User PC Address Book Delete Auto Select Orig.Size Auto size Select Send Size Basic Top Edge Orig. Set Direction 200dpi Scanning Resolution Quality 5 Press [Address Book] to use a private address book or common address book. Ready to scan. Place the original and select destination. Scan to PC-Sending ( Full-Color ) Original 11×8½" 08/08 Register Prgrm Cont. TX to Destination Save at User PC Address Book Delete Auto Select Orig.Size Auto size Select Send Size Basic Top Edge Orig. Set Direction 200dpi Scanning Resolution Quality
-
 1
1 -
2
-
3
-
4
-
5
-
6
-
7
-
8
-
9
-
10
-
11
-
12
-
13
-
14
-
15
-
16
-
17
-
18
-
19
-
20
-
21
-
22
-
23
-
24
-
25
-
26
-
27
-
28
-
29
-
30
-
31
-
32
-
33
-
34
-
35
-
36
-
37
-
38
-
39
-
40
-
41
-
42
-
43
-
44
-
45
-
46
-
47
-
48
-
49
-
50
-
51
-
52
-
53
-
54
-
55
-
56
-
57
-
58
-
59
-
60
-
61
-
62
-
63
-
64
-
65
-
66
-
67
-
68
-
69
-
70
-
71
-
72
-
73
-
74
-
75
-
76
-
77
-
78
-
79
-
80
-
81
-
82
-
83
-
84
-
85
-
86
-
87
-
88
-
89
-
90
-
91
-
92
-
93
-
94
-
95
-
96
-
97
-
98
-
99
-
100
-
 101
101 -
 102
102 -
 103
103 -
 104
104 -
 105
105 -
 106
106 -
 107
107 -
 108
108 -
 109
109 -
 110
110 -
 111
111 -
112
-
113
-
114
-
115
-
116
-
117
-
118
-
119
-
120
-
121
-
122
-
123
-
124
-
125
-
126
-
127
-
128
-
129
-
130
-
131
-
132
-
133
-
134
-
135
-
136
-
137
-
138
-
139
-
140
-
141
-
142
-
143
-
144
-
145
-
146
-
147
-
148
-
149
-
150
-
151
-
152
-
153
-
154
-
155
-
156
-
157
-
158
-
159
-
160
-
161
-
162
-
163
-
164
-
165
-
166
-
167
-
168
-
169
-
170
-
171
-
172
-
173
-
174
-
175
-
176
-
177
-
178
-
179
-
180
 |
 |