Ricoh Aficio SP 4310N Software Guide - Page 139
When User Authentication is Set, For details about logging in to and out of Web Image Monitor
 |
View all Ricoh Aficio SP 4310N manuals
Add to My Manuals
Save this manual to your list of manuals |
Page 139 highlights
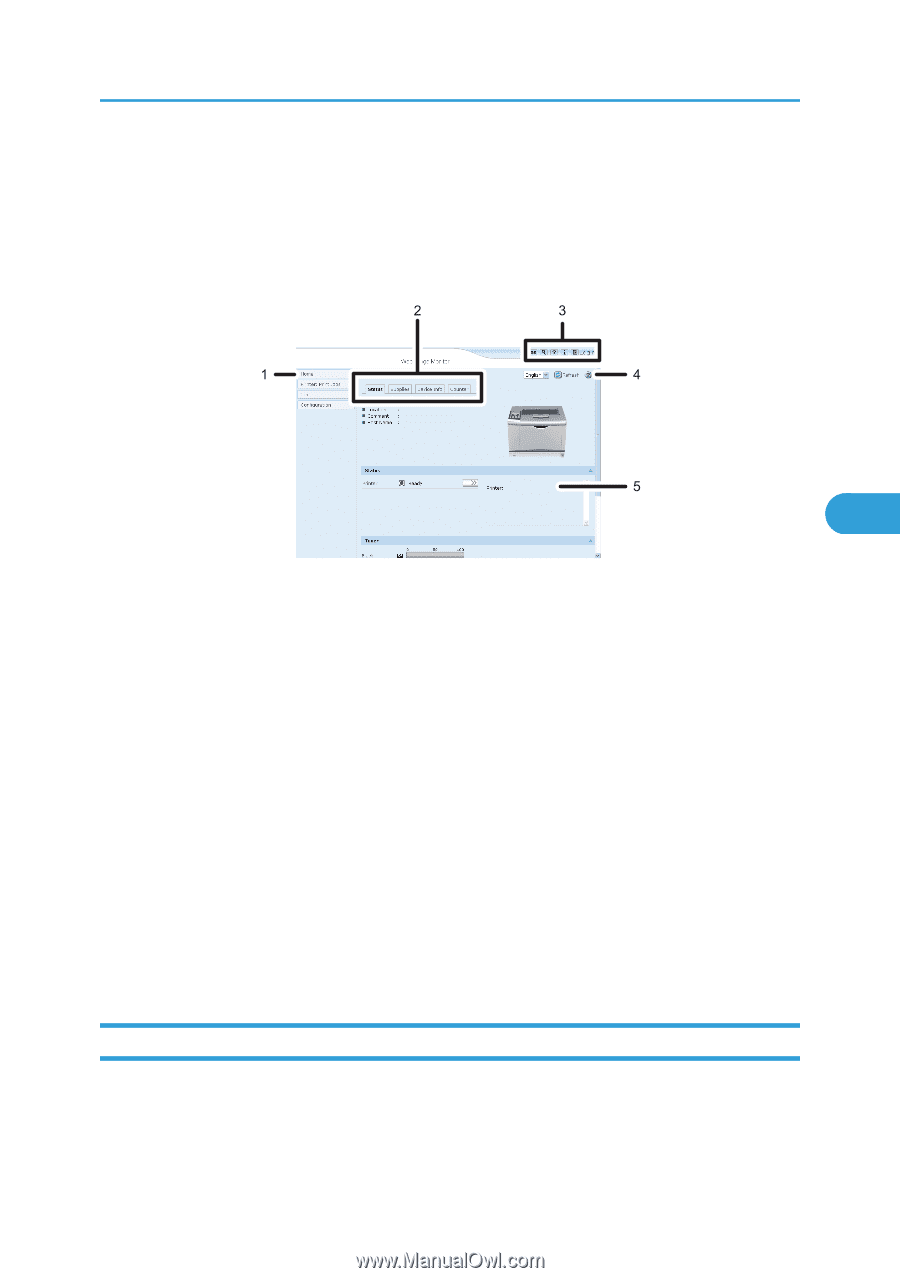
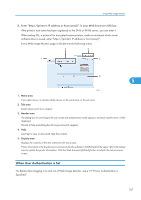
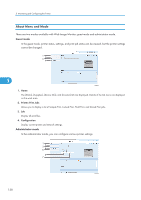
Using Web Image Monitor 2. Enter "http://(printer's IP address or host name)/" in your Web browser's URL bar. If the printer's host name has been registered on the DNS or WINS server, you can enter it. When setting SSL, a protocol for encrypted communication, under environment which server authentication is issued, enter "https://(printer's IP address or host name)/". Every Web Image Monitor page is divided into the following areas: 5 CEE504 1. Menu area If you select menu, its content will be shown on the work area, or the sub area. 2. Tab area Details about each menu appear. 3. Header area The dialog box for switching to the user mode and administrator mode appears, and each mode's menu will be displayed. The link to help and dialog box for keyword search appears. 4. Help Use Help to view or download Help file contents. 5. Display area Displays the contents of the item selected in the menu area. Printer information in the display area is not automatically updated. Click [Refresh] at the upper right in the display area to update the printer information. Click the Web browser's [Refresh] button to refresh the entire browser screen. When User Authentication is Set For details about logging in to and out of Web Image Monitor, see p.19 "If User Authentication is Specified". 137
-
 1
1 -
2
-
3
-
4
-
5
-
6
-
7
-
8
-
9
-
10
-
11
-
12
-
13
-
14
-
15
-
16
-
17
-
18
-
19
-
20
-
21
-
22
-
23
-
24
-
25
-
26
-
27
-
28
-
29
-
30
-
31
-
32
-
33
-
34
-
35
-
36
-
37
-
38
-
39
-
40
-
41
-
42
-
43
-
44
-
45
-
46
-
47
-
48
-
49
-
50
-
51
-
52
-
53
-
54
-
55
-
56
-
57
-
58
-
59
-
60
-
61
-
62
-
63
-
64
-
65
-
66
-
67
-
68
-
69
-
70
-
71
-
72
-
73
-
74
-
75
-
76
-
77
-
78
-
79
-
80
-
81
-
82
-
83
-
84
-
85
-
86
-
87
-
88
-
89
-
90
-
91
-
92
-
93
-
94
-
95
-
96
-
97
-
98
-
99
-
100
-
101
-
102
-
103
-
104
-
105
-
106
-
107
-
108
-
109
-
110
-
111
-
112
-
113
-
114
-
115
-
116
-
117
-
118
-
119
-
120
-
121
-
122
-
123
-
124
-
125
-
126
-
127
-
128
-
129
-
130
-
131
-
132
-
133
-
 134
134 -
 135
135 -
 136
136 -
 137
137 -
 138
138 -
 139
139 -
 140
140 -
 141
141 -
 142
142 -
 143
143 -
 144
144 -
145
-
146
-
147
-
148
-
149
-
150
-
151
-
152
-
153
-
154
-
155
-
156
-
157
-
158
-
159
-
160
-
161
-
162
-
163
-
164
-
165
-
166
-
167
-
168
-
169
-
170
-
171
-
172
-
173
-
174
-
175
-
176
-
177
-
178
-
179
-
180
-
181
-
182
-
183
-
184
-
185
-
186
-
187
-
188
-
189
-
190
-
191
-
192
-
193
-
194
-
195
-
196
-
197
-
198
-
199
-
200
-
201
-
202
-
203
-
204
-
205
-
206
-
207
-
208
-
209
-
210
-
211
-
212
-
213
-
214
-
215
-
216
-
217
-
218
-
219
-
220
-
221
-
222
-
223
-
224
 |
 |