Ricoh Aficio SP 4310N Software Guide - Page 62
Proceeding with Printing Using the Bypass Tray - reset
 |
View all Ricoh Aficio SP 4310N manuals
Add to My Manuals
Save this manual to your list of manuals |
Page 62 highlights
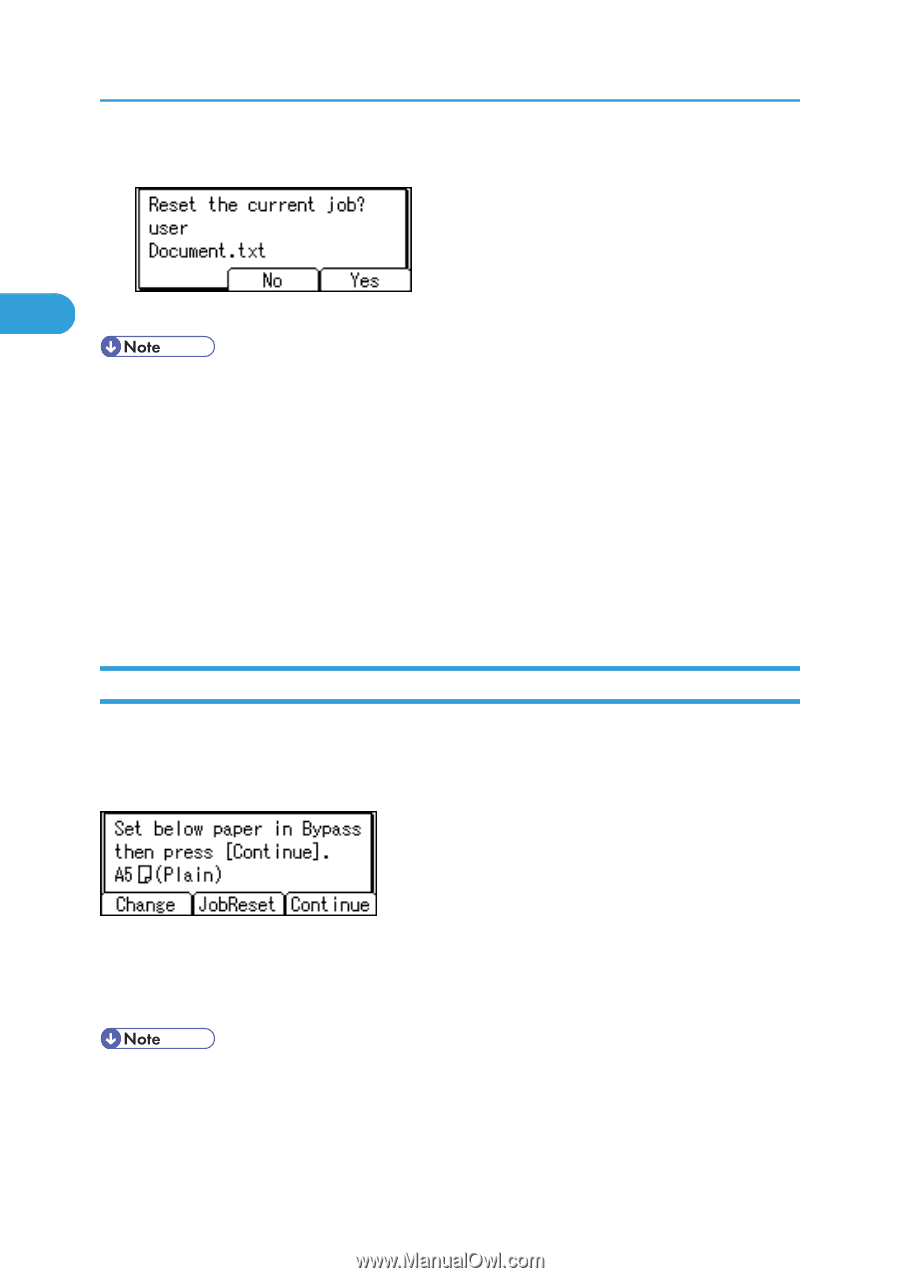
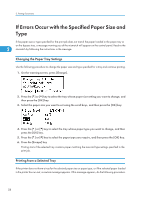
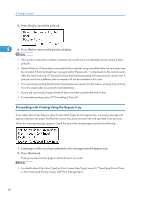
2. Printing Documents 3. Press [Yes] to cancel the print job. 2 4. Press [No] to return to the previous display. • If the printer is shared by multiple computers, be careful not to accidentally cancel someone else's print job. • Under Windows, If the printer is connected to the computer using a parallel cable, sent print jobs may be canceled if the [Job Reset] key is pressed while "Please wait..." is displayed on the control panel. After the interval set in [I/O Timeout] in [Host Interface] has passed, the next print job can be sent. A print job sent from a different client computer will not be canceled in this case. • You cannot stop printing data that has already been processed. For this reason, printing may continue for a few pages after you press the [Job Reset] key. • A print job containing a large volume of data may take considerable time to stop. • To stop data printing, see p.79 "Canceling a Print Job". Proceeding with Printing Using the Bypass Tray If you select [Any Size/Type] or [Any Custom Size/Type] for the bypass tray, a warning message will appear whenever the paper fed from the source tray does not match the size specified in the print job. When this warning message appears, check the size of the loaded paper and do the following. 1. Load paper of the size/type indicated in the message onto the bypass tray. 2. Press [Continue]. Printing resumes from the page in which the error occurred. • For details about [Any Size/Type] or [Any Custom Size/Type], see p.37 "Specifying Printer Driver or Print Command Priority" and p.108 "Print Settings Menu". 60
-
 1
1 -
2
-
3
-
4
-
5
-
6
-
7
-
8
-
9
-
10
-
11
-
12
-
13
-
14
-
15
-
16
-
17
-
18
-
19
-
20
-
21
-
22
-
23
-
24
-
25
-
26
-
27
-
28
-
29
-
30
-
31
-
32
-
33
-
34
-
35
-
36
-
37
-
38
-
39
-
40
-
41
-
42
-
43
-
44
-
45
-
46
-
47
-
48
-
49
-
50
-
51
-
52
-
53
-
54
-
55
-
56
-
 57
57 -
 58
58 -
 59
59 -
 60
60 -
 61
61 -
 62
62 -
 63
63 -
 64
64 -
 65
65 -
 66
66 -
 67
67 -
68
-
69
-
70
-
71
-
72
-
73
-
74
-
75
-
76
-
77
-
78
-
79
-
80
-
81
-
82
-
83
-
84
-
85
-
86
-
87
-
88
-
89
-
90
-
91
-
92
-
93
-
94
-
95
-
96
-
97
-
98
-
99
-
100
-
101
-
102
-
103
-
104
-
105
-
106
-
107
-
108
-
109
-
110
-
111
-
112
-
113
-
114
-
115
-
116
-
117
-
118
-
119
-
120
-
121
-
122
-
123
-
124
-
125
-
126
-
127
-
128
-
129
-
130
-
131
-
132
-
133
-
134
-
135
-
136
-
137
-
138
-
139
-
140
-
141
-
142
-
143
-
144
-
145
-
146
-
147
-
148
-
149
-
150
-
151
-
152
-
153
-
154
-
155
-
156
-
157
-
158
-
159
-
160
-
161
-
162
-
163
-
164
-
165
-
166
-
167
-
168
-
169
-
170
-
171
-
172
-
173
-
174
-
175
-
176
-
177
-
178
-
179
-
180
-
181
-
182
-
183
-
184
-
185
-
186
-
187
-
188
-
189
-
190
-
191
-
192
-
193
-
194
-
195
-
196
-
197
-
198
-
199
-
200
-
201
-
202
-
203
-
204
-
205
-
206
-
207
-
208
-
209
-
210
-
211
-
212
-
213
-
214
-
215
-
216
-
217
-
218
-
219
-
220
-
221
-
222
-
223
-
224
 |
 |