Ricoh Aficio SP 4310N Software Guide - Page 94
Maintenance Menu, Maintenance Menu Parameters, Quality Maintenance
 |
View all Ricoh Aficio SP 4310N manuals
Add to My Manuals
Save this manual to your list of manuals |
Page 94 highlights
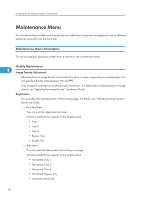
4. Making Printer Settings Using the Control Panel Maintenance Menu You can set printing conditions such as density and calibration, and printer management such as deleting temporary print jobs from the hard disk. Maintenance Menu Parameters This section explains about parameters that can be set on the maintenance menu. Quality Maintenance 4 Image Density Adjustment Adjusting the print image density can prevent faint spots or smears appearing on printed pages. You can specify a density value between 6 and 3. Only change this setting from its default value if necessary. For details about adjusting the print image density, see "Adjusting the Image Density", Hardware Guide. Registration You can adjust the starting position of the printing page. For details, see "Adjusting Printing Position", Hardware Guide. • Print Test Sheet You can print the registration test sheet. Only the installed trays appear on the display panel. • Tray 1 • Tray 2 • Tray 3 • Bypass Tray • Duplex Unit • Adjustment You can select the start position for printing on a page. Only the installed trays appear on the display panel. • Horizontal: Tray 1 • Horizontal: Tray 2 • Horizontal: Tray 3 • Horizontal: Bypass Tray • Horizontal: Back Side 92
-
 1
1 -
2
-
3
-
4
-
5
-
6
-
7
-
8
-
9
-
10
-
11
-
12
-
13
-
14
-
15
-
16
-
17
-
18
-
19
-
20
-
21
-
22
-
23
-
24
-
25
-
26
-
27
-
28
-
29
-
30
-
31
-
32
-
33
-
34
-
35
-
36
-
37
-
38
-
39
-
40
-
41
-
42
-
43
-
44
-
45
-
46
-
47
-
48
-
49
-
50
-
51
-
52
-
53
-
54
-
55
-
56
-
57
-
58
-
59
-
60
-
61
-
62
-
63
-
64
-
65
-
66
-
67
-
68
-
69
-
70
-
71
-
72
-
73
-
74
-
75
-
76
-
77
-
78
-
79
-
80
-
81
-
82
-
83
-
84
-
85
-
86
-
87
-
88
-
 89
89 -
 90
90 -
 91
91 -
 92
92 -
 93
93 -
 94
94 -
 95
95 -
 96
96 -
 97
97 -
 98
98 -
 99
99 -
100
-
101
-
102
-
103
-
104
-
105
-
106
-
107
-
108
-
109
-
110
-
111
-
112
-
113
-
114
-
115
-
116
-
117
-
118
-
119
-
120
-
121
-
122
-
123
-
124
-
125
-
126
-
127
-
128
-
129
-
130
-
131
-
132
-
133
-
134
-
135
-
136
-
137
-
138
-
139
-
140
-
141
-
142
-
143
-
144
-
145
-
146
-
147
-
148
-
149
-
150
-
151
-
152
-
153
-
154
-
155
-
156
-
157
-
158
-
159
-
160
-
161
-
162
-
163
-
164
-
165
-
166
-
167
-
168
-
169
-
170
-
171
-
172
-
173
-
174
-
175
-
176
-
177
-
178
-
179
-
180
-
181
-
182
-
183
-
184
-
185
-
186
-
187
-
188
-
189
-
190
-
191
-
192
-
193
-
194
-
195
-
196
-
197
-
198
-
199
-
200
-
201
-
202
-
203
-
204
-
205
-
206
-
207
-
208
-
209
-
210
-
211
-
212
-
213
-
214
-
215
-
216
-
217
-
218
-
219
-
220
-
221
-
222
-
223
-
224
 |
 |