Ricoh Aficio SP 4310N Software Guide - Page 34
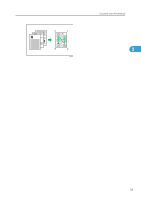
Types of combine printing, From Left to Right/Top to Bottom
 |
View all Ricoh Aficio SP 4310N manuals
Add to My Manuals
Save this manual to your list of manuals |
Page 34 highlights
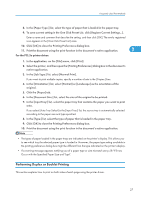
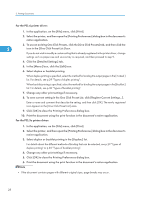
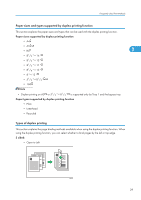
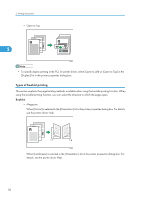
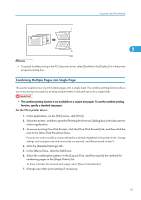
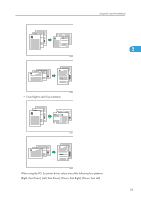
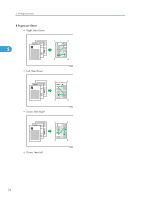
2. Printing Documents 8. To save current setting in the One Click Preset List, click [Register Current Settings...]. Enter a name and comment that describe the setting, and then click [OK]. The newly registered icon appears in the [One Click Preset List:] area. 9. Click [OK] to close the Printing Preferences dialog box. 10. Print the document using the print function in the document's native application. 2 For the PCL 5e printer driver: 1. In the application, on the [File] menu, click [Print]. 2. Select the printer, and then open the [Printing Preferences] dialog box in the document's native application. 3. Select the combination pattern in the [Layout:] list, and then specify the method for combining pages in the [Page Order:] list. To draw a border line around each page, select [Draw Frame Border]. 4. Change any other print settings if necessary. 5. Click [OK] to close the Printing Preferences dialog box. 6. Print the document using the print function in the document's native application. • If the document contains pages with different original sizes, page breaks may occur. • If the application you are using also has a combine function, disable it. If the application's combine function is also enabled when the driver's combine function enabled, incorrect printing is likely. • For details about combining pages with different orientations and other advanced functions, see the printer driver Help. Types of combine printing This section explains the different methods of combine printing that are available. Combine printing allows you to print 2, 4, 6, 9, or 16 pages at reduced size onto a single sheet and to specify a page ordering pattern for the combination. For 2 pages per sheet combine, you can select from two patterns. When combining 4 or more pages onto a single sheet of paper, four patterns are available. The following illustrations show example page ordering patterns for 2- and 4-page combinations. 2 Pages per Sheet • From Left to Right/Top to Bottom 32
-
 1
1 -
2
-
3
-
4
-
5
-
6
-
7
-
8
-
9
-
10
-
11
-
12
-
13
-
14
-
15
-
16
-
17
-
18
-
19
-
20
-
21
-
22
-
23
-
24
-
25
-
26
-
27
-
28
-
 29
29 -
 30
30 -
 31
31 -
 32
32 -
 33
33 -
 34
34 -
 35
35 -
 36
36 -
 37
37 -
 38
38 -
 39
39 -
40
-
41
-
42
-
43
-
44
-
45
-
46
-
47
-
48
-
49
-
50
-
51
-
52
-
53
-
54
-
55
-
56
-
57
-
58
-
59
-
60
-
61
-
62
-
63
-
64
-
65
-
66
-
67
-
68
-
69
-
70
-
71
-
72
-
73
-
74
-
75
-
76
-
77
-
78
-
79
-
80
-
81
-
82
-
83
-
84
-
85
-
86
-
87
-
88
-
89
-
90
-
91
-
92
-
93
-
94
-
95
-
96
-
97
-
98
-
99
-
100
-
101
-
102
-
103
-
104
-
105
-
106
-
107
-
108
-
109
-
110
-
111
-
112
-
113
-
114
-
115
-
116
-
117
-
118
-
119
-
120
-
121
-
122
-
123
-
124
-
125
-
126
-
127
-
128
-
129
-
130
-
131
-
132
-
133
-
134
-
135
-
136
-
137
-
138
-
139
-
140
-
141
-
142
-
143
-
144
-
145
-
146
-
147
-
148
-
149
-
150
-
151
-
152
-
153
-
154
-
155
-
156
-
157
-
158
-
159
-
160
-
161
-
162
-
163
-
164
-
165
-
166
-
167
-
168
-
169
-
170
-
171
-
172
-
173
-
174
-
175
-
176
-
177
-
178
-
179
-
180
-
181
-
182
-
183
-
184
-
185
-
186
-
187
-
188
-
189
-
190
-
191
-
192
-
193
-
194
-
195
-
196
-
197
-
198
-
199
-
200
-
201
-
202
-
203
-
204
-
205
-
206
-
207
-
208
-
209
-
210
-
211
-
212
-
213
-
214
-
215
-
216
-
217
-
218
-
219
-
220
-
221
-
222
-
223
-
224
 |
 |