Ricoh Aficio SP 4310N Software Guide - Page 80
Printing All Print Jobs, Press [Print].
 |
View all Ricoh Aficio SP 4310N manuals
Add to My Manuals
Save this manual to your list of manuals |
Page 80 highlights
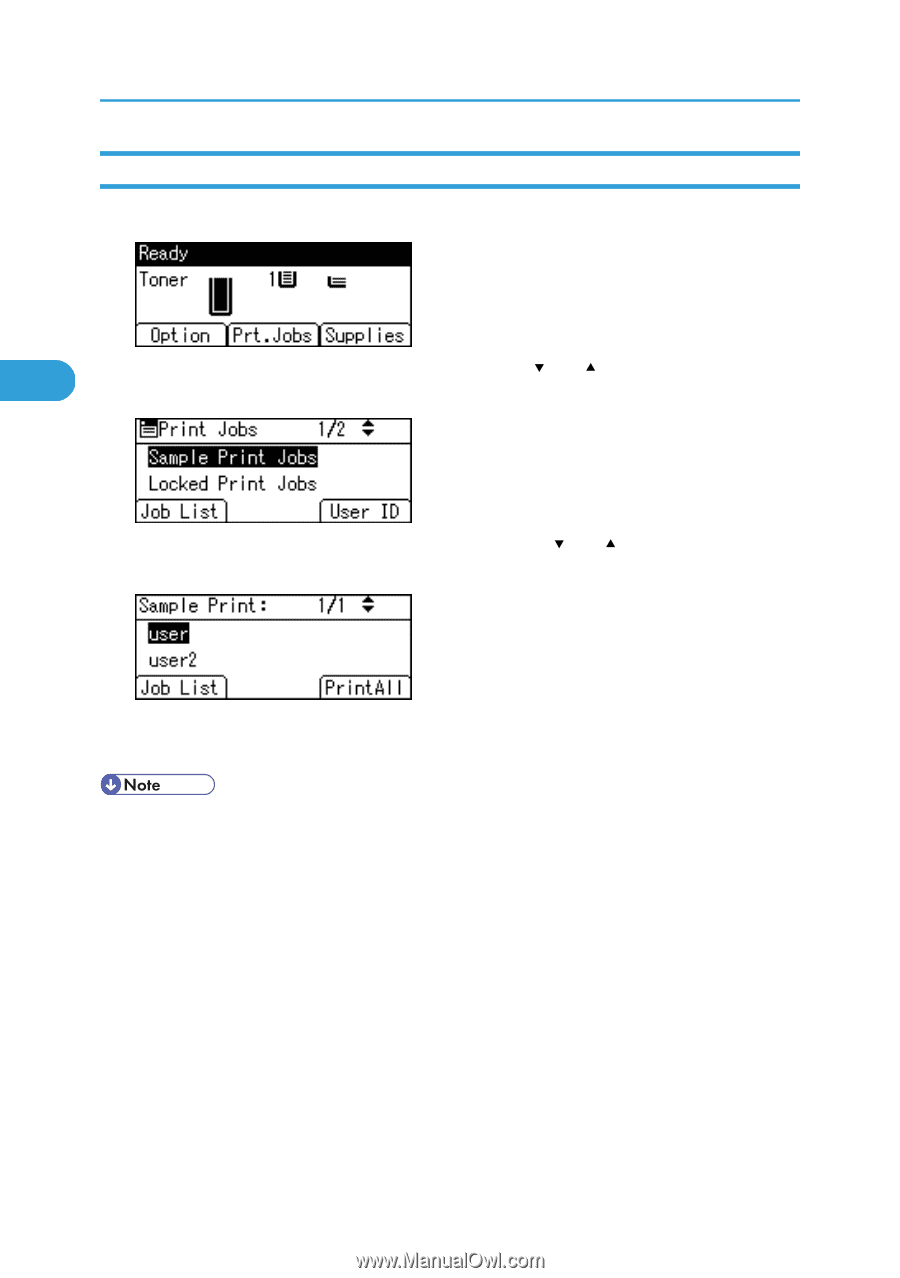
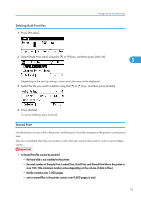
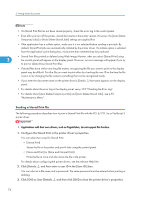
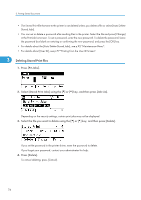
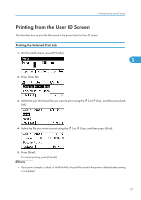
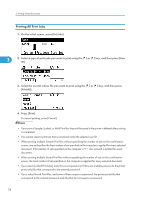
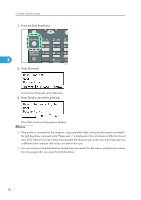
3. Printing Stored Documents Printing All Print Jobs 1. On the initial screen, press [Prt.Jobs]. 3 2. Select a type of print jobs you want to print using the [ ] or [ ] key, and then press [User ID]. 3. Select the user ID whose file you want to print using the [ ] or [ ] key, and then press [PrintAll]. 4. Press [Print]. To cancel printing, press [Cancel]. • If you print a Sample, Locked, or Hold Print file, the print file saved in the printer is deleted after printing is completed. • You cannot select a print job that is not stored under the selected user ID. • When printing multiple Sample Print files without specifying the number of sets on the confirmation screen, one set less than the least number of set specified on the computer is applied for every selected document. If the number of sets specified on the computer is "1", one set each is printed for every document. • When printing multiple Stored Print files without specifying the number of sets on the confirmation screen, the least number of set specified on the computer is applied for every selected document. • If you select [Locked Print Jobs], enter the correct password. If there are multiple passwords, the printer prints only files that correspond to the entered password. • If you select Stored Print files, and some of these require a password, the printer prints files that correspond to the entered password and files that do not require a password. 78
-
 1
1 -
2
-
3
-
4
-
5
-
6
-
7
-
8
-
9
-
10
-
11
-
12
-
13
-
14
-
15
-
16
-
17
-
18
-
19
-
20
-
21
-
22
-
23
-
24
-
25
-
26
-
27
-
28
-
29
-
30
-
31
-
32
-
33
-
34
-
35
-
36
-
37
-
38
-
39
-
40
-
41
-
42
-
43
-
44
-
45
-
46
-
47
-
48
-
49
-
50
-
51
-
52
-
53
-
54
-
55
-
56
-
57
-
58
-
59
-
60
-
61
-
62
-
63
-
64
-
65
-
66
-
67
-
68
-
69
-
70
-
71
-
72
-
73
-
74
-
 75
75 -
 76
76 -
 77
77 -
 78
78 -
 79
79 -
 80
80 -
 81
81 -
 82
82 -
 83
83 -
 84
84 -
 85
85 -
86
-
87
-
88
-
89
-
90
-
91
-
92
-
93
-
94
-
95
-
96
-
97
-
98
-
99
-
100
-
101
-
102
-
103
-
104
-
105
-
106
-
107
-
108
-
109
-
110
-
111
-
112
-
113
-
114
-
115
-
116
-
117
-
118
-
119
-
120
-
121
-
122
-
123
-
124
-
125
-
126
-
127
-
128
-
129
-
130
-
131
-
132
-
133
-
134
-
135
-
136
-
137
-
138
-
139
-
140
-
141
-
142
-
143
-
144
-
145
-
146
-
147
-
148
-
149
-
150
-
151
-
152
-
153
-
154
-
155
-
156
-
157
-
158
-
159
-
160
-
161
-
162
-
163
-
164
-
165
-
166
-
167
-
168
-
169
-
170
-
171
-
172
-
173
-
174
-
175
-
176
-
177
-
178
-
179
-
180
-
181
-
182
-
183
-
184
-
185
-
186
-
187
-
188
-
189
-
190
-
191
-
192
-
193
-
194
-
195
-
196
-
197
-
198
-
199
-
200
-
201
-
202
-
203
-
204
-
205
-
206
-
207
-
208
-
209
-
210
-
211
-
212
-
213
-
214
-
215
-
216
-
217
-
218
-
219
-
220
-
221
-
222
-
223
-
224
 |
 |