Samsung SGH-A817 User Manual (user Manual) (ver.f7) (English) - Page 108
Receiving Options, MMS profiles, Auto resize image, Creation mode, Default style, Voicemail
 |
View all Samsung SGH-A817 manuals
Add to My Manuals
Save this manual to your list of manuals |
Page 108 highlights
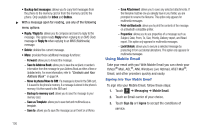
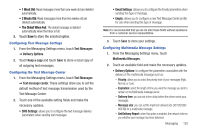
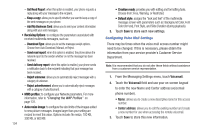
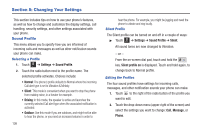
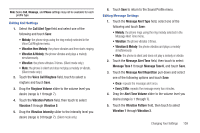
- Get Read Report: when this option is enabled, your phone requests a reply along with your message to the recipient. - Keep a copy: allows you to specify whether you want to keep a copy of the sent messages on your phone. - Add My Business Card: allows you to send your content information along with your sent messages. • Receiving Options: to configure the parameters associated with received multimedia messages, such as: - Download Type: allows you to set the message receipt options. Choose from Auto Download, Manual, or Reject. - Send read report: when this option is enabled, the phone allows the network report to the sender whether or not the message has been received. - Send delivery report: when this option is enabled, your phone sends a notification back to the recipient indicating that your message has been received. - Reject unknown: allows you to automatically reject messages with a category of unknown. - Reject advertisement: allows you to automatically reject messages with a category of advertisement. • MMS profiles: to configure your Network parameters. For more information, refer to "Changing the WAP Profiles" on page 131. • Auto resize image: to configure the size limits of the images added to new picture messages. Images larger than your setting are resized to meet this value. Options include: No resize, 100 KB, 300 KB, or 600 KB. 104 • Creation mode: provides you with editing and formatting tools. Choose from: Free, Warning, or Restricted. • Default style: assigns the "look and feel" of the multimedia message screen with parameters such as: Background Color, Font Color (for text), Font Style, and Slide Duration (during playback). 3. Touch Save to store each new settings. Configuring Voice Mail Settings There may be times when the voice mail access number might need to be changed. If this is necessary, please obtain the information from your service provider's Customer Service Department. Note: It is recommended that you do not alter these fields without assistance from a customer service representative. 1. From the Messaging Settings menu, touch Voicemail. 2. Touch the Voicemail field and use your on-screen keypad to enter the new Name and Center address (voicemail phone number). • Name: allows you to create a new descriptive name for this access number. • Center address: allows you to edit the existing number and create a new number for use when accessing the remote voicemail. 3. Touch Save to store this new information.
-
 1
1 -
2
-
3
-
4
-
5
-
6
-
7
-
8
-
9
-
10
-
11
-
12
-
13
-
14
-
15
-
16
-
17
-
18
-
19
-
20
-
21
-
22
-
23
-
24
-
25
-
26
-
27
-
28
-
29
-
30
-
31
-
32
-
33
-
34
-
35
-
36
-
37
-
38
-
39
-
40
-
41
-
42
-
43
-
44
-
45
-
46
-
47
-
48
-
49
-
50
-
51
-
52
-
53
-
54
-
55
-
56
-
57
-
58
-
59
-
60
-
61
-
62
-
63
-
64
-
65
-
66
-
67
-
68
-
69
-
70
-
71
-
72
-
73
-
74
-
75
-
76
-
77
-
78
-
79
-
80
-
81
-
82
-
83
-
84
-
85
-
86
-
87
-
88
-
89
-
90
-
91
-
92
-
93
-
94
-
95
-
96
-
97
-
98
-
99
-
100
-
101
-
102
-
 103
103 -
 104
104 -
 105
105 -
 106
106 -
 107
107 -
 108
108 -
 109
109 -
 110
110 -
 111
111 -
 112
112 -
 113
113 -
114
-
115
-
116
-
117
-
118
-
119
-
120
-
121
-
122
-
123
-
124
-
125
-
126
-
127
-
128
-
129
-
130
-
131
-
132
-
133
-
134
-
135
-
136
-
137
-
138
-
139
-
140
-
141
-
142
-
143
-
144
-
145
-
146
-
147
-
148
-
149
-
150
-
151
-
152
-
153
-
154
-
155
-
156
-
157
-
158
-
159
-
160
-
161
-
162
-
163
-
164
-
165
-
166
-
167
-
168
-
169
-
170
-
171
-
172
-
173
-
174
-
175
-
176
-
177
-
178
-
179
-
180
-
181
-
182
-
183
-
184
-
185
-
186
-
187
-
188
-
189
-
190
-
191
-
192
-
193
-
194
-
195
-
196
-
197
-
198
-
199
 |
 |