Brother International DCP1000 Service Manual - Page 11
Installing, Update, Facsimile, Machine
 |
UPC - 012502565796
View all Brother International DCP1000 manuals
Add to My Manuals
Save this manual to your list of manuals |
Page 11 highlights
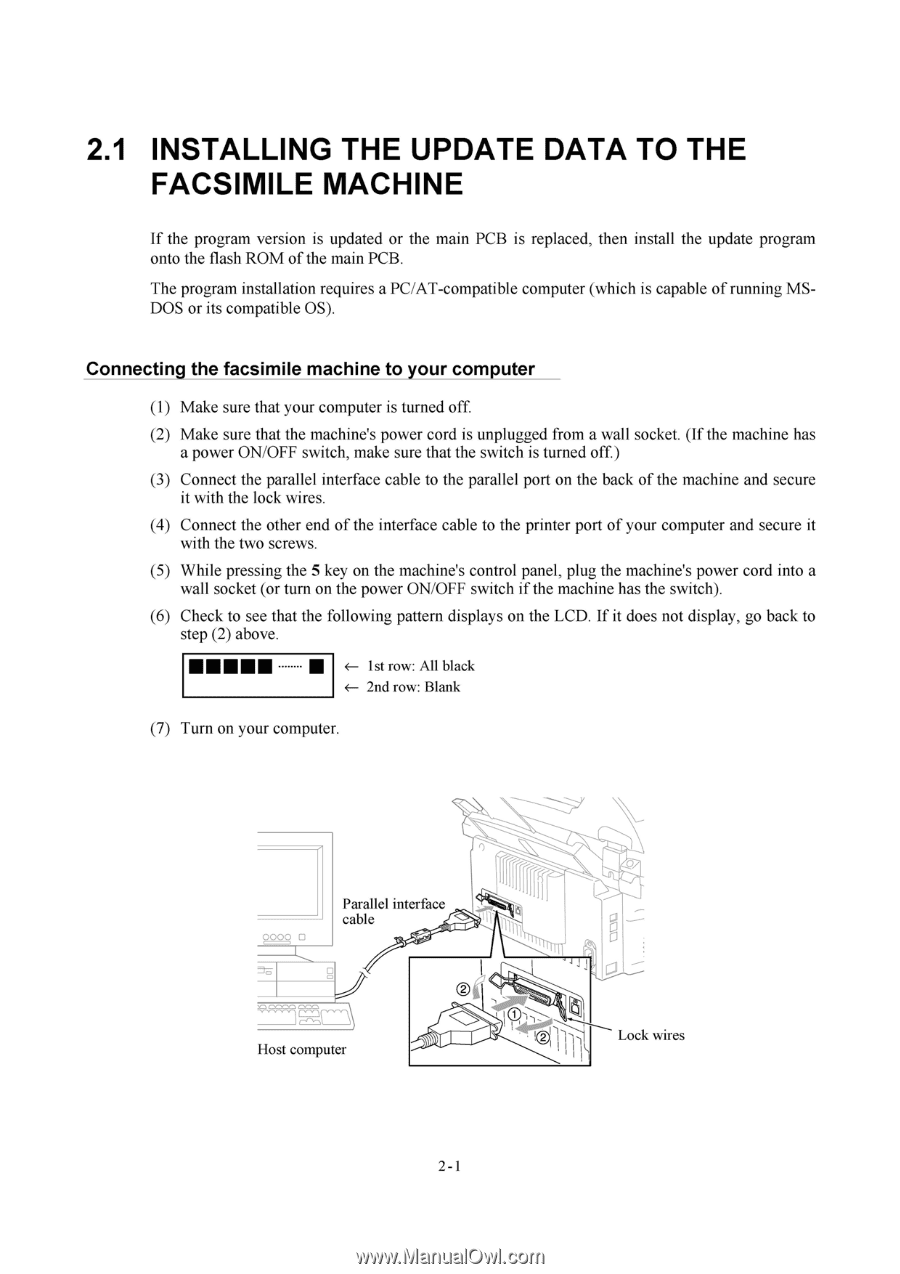
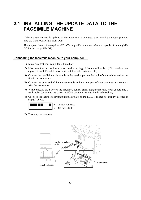
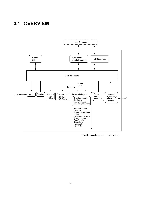
2.1 INSTALLING THE UPDATE DATA TO THE FACSIMILE MACHINE If the program version is updated or the main PCB is replaced, then install the update program onto the flash ROM of the main PCB. The program installation requires a PC/AT-compatible computer (which is capable of running MSDOS or its compatible OS). Connecting the facsimile machine to your computer (1) Make sure that your computer is turned off. (2) Make sure that the machine's power cord is unplugged from a wall socket. (If the machine has a power ON/OFF switch, make sure that the switch is turned off.) (3) Connect the parallel interface cable to the parallel port on the back of the machine and secure it with the lock wires. (4) Connect the other end of the interface cable to the printer port of your computer and secure it with the two screws. (5) While pressing the 5 key on the machine's control panel, plug the machine's power cord into a wall socket (or turn on the power ON/OFF switch if the machine has the switch). (6) Check to see that the following pattern displays on the LCD. If it does not display, go back to step (2) above. MINIMMIII •
-
 1
1 -
2
-
3
-
4
-
5
-
 6
6 -
 7
7 -
 8
8 -
 9
9 -
 10
10 -
 11
11 -
 12
12 -
 13
13 -
 14
14 -
 15
15 -
 16
16 -
17
-
18
-
19
-
20
-
21
-
22
-
23
-
24
-
25
-
26
-
27
-
28
-
29
-
30
-
31
-
32
-
33
-
34
-
35
-
36
-
37
-
38
-
39
-
40
-
41
-
42
-
43
-
44
-
45
-
46
-
47
-
48
-
49
-
50
-
51
-
52
-
53
-
54
-
55
-
56
-
57
-
58
-
59
-
60
-
61
-
62
-
63
-
64
-
65
-
66
-
67
-
68
-
69
-
70
-
71
-
72
-
73
-
74
-
75
-
76
-
77
-
78
-
79
-
80
-
81
-
82
-
83
-
84
-
85
-
86
-
87
-
88
-
89
-
90
-
91
-
92
-
93
-
94
-
95
-
96
-
97
-
98
-
99
-
100
-
101
-
102
-
103
-
104
-
105
-
106
-
107
-
108
-
109
-
110
-
111
-
112
-
113
-
114
-
115
-
116
-
117
-
118
-
119
-
120
-
121
-
122
-
123
-
124
-
125
-
126
-
127
-
128
-
129
-
130
-
131
-
132
-
133
-
134
-
135
-
136
-
137
-
138
-
139
-
140
-
141
-
142
-
143
-
144
-
145
-
146
-
147
-
148
-
149
-
150
-
151
-
152
-
153
-
154
-
155
-
156
-
157
-
158
-
159
-
160
-
161
-
162
-
163
-
164
-
165
-
166
-
167
-
168
-
169
-
170
-
171
-
172
-
173
-
174
-
175
-
176
-
177
-
178
-
179
-
180
-
181
-
182
-
183
-
184
-
185
-
186
-
187
-
188
-
189
-
190
-
191
-
192
-
193
-
194
-
195
-
196
-
197
-
198
-
199
-
200
-
201
-
202
-
203
-
204
 |
 |