Brother International DCP1000 Service Manual - Page 42
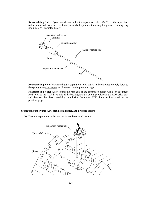
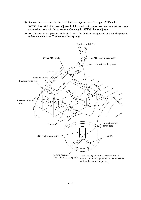
illustrated
 |
UPC - 012502565796
View all Brother International DCP1000 manuals
Add to My Manuals
Save this manual to your list of manuals |
Page 42 highlights
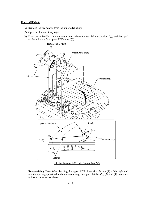
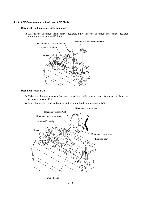
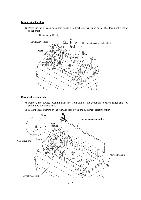
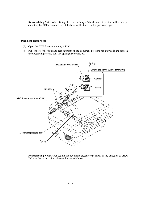
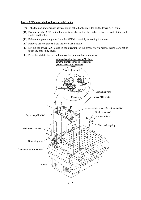
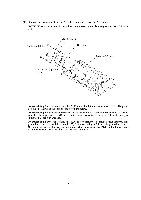
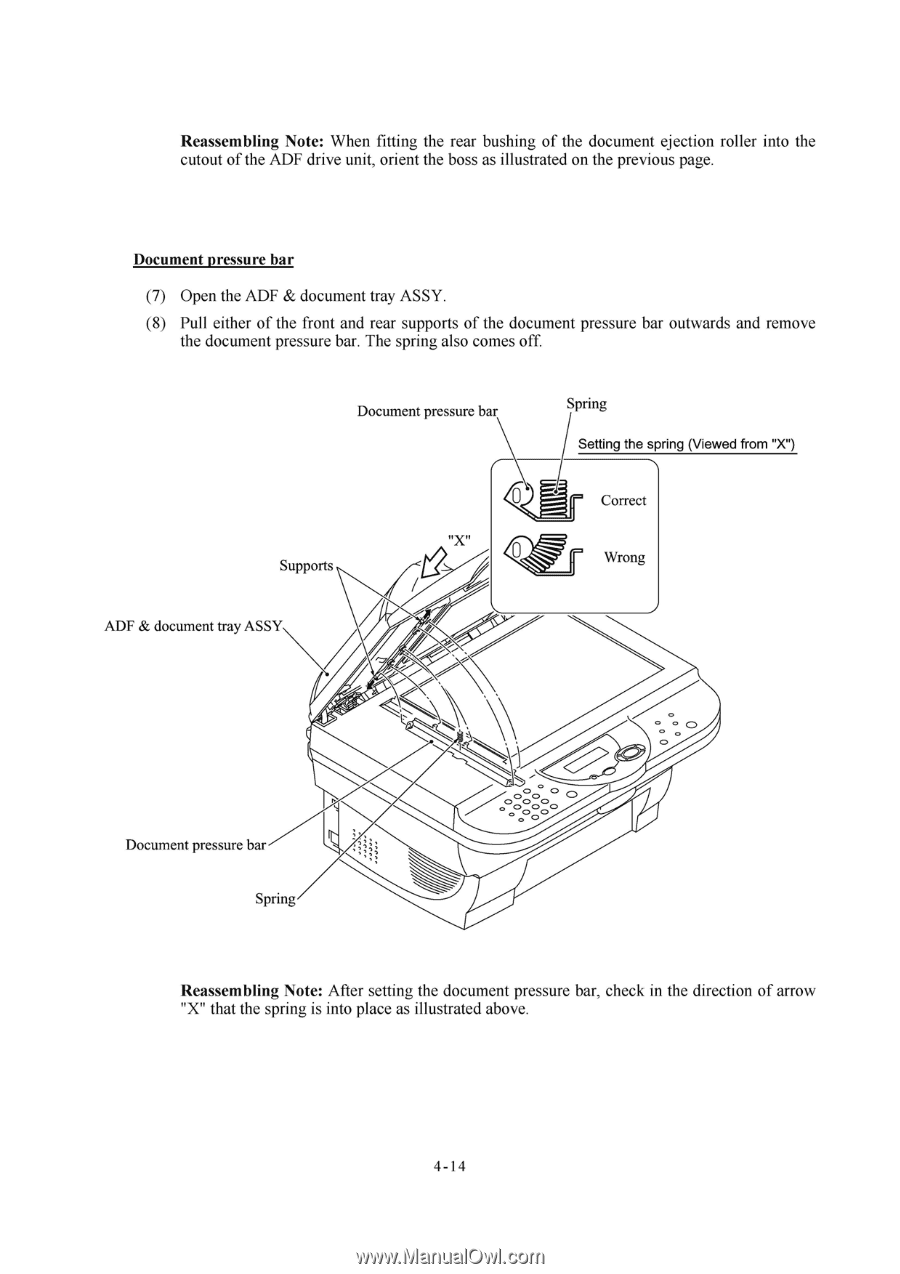
Reassembling Note: When fitting the rear bushing of the document ejection roller into the cutout of the ADF drive unit, orient the boss as illustrated on the previous page. Document pressure bar (7) Open the ADF & document tray ASSY. (8) Pull either of the front and rear supports of the document pressure bar outwards and remove the document pressure bar. The spring also comes off. Document pressure bar Spring Setting the spring (Viewed from "X") Supports Correct 0 Wrong ADF & document tray ASSY • 0 0 0 O Document pressure bar Spring Reassembling Note: After setting the document pressure bar, check in the direction of arrow "X" that the spring is into place as illustrated above. 4-14
-
 1
1 -
2
-
3
-
4
-
5
-
6
-
7
-
8
-
9
-
10
-
11
-
12
-
13
-
14
-
15
-
16
-
17
-
18
-
19
-
20
-
21
-
22
-
23
-
24
-
25
-
26
-
27
-
28
-
29
-
30
-
31
-
32
-
33
-
34
-
35
-
36
-
 37
37 -
 38
38 -
 39
39 -
 40
40 -
 41
41 -
 42
42 -
 43
43 -
 44
44 -
 45
45 -
 46
46 -
 47
47 -
48
-
49
-
50
-
51
-
52
-
53
-
54
-
55
-
56
-
57
-
58
-
59
-
60
-
61
-
62
-
63
-
64
-
65
-
66
-
67
-
68
-
69
-
70
-
71
-
72
-
73
-
74
-
75
-
76
-
77
-
78
-
79
-
80
-
81
-
82
-
83
-
84
-
85
-
86
-
87
-
88
-
89
-
90
-
91
-
92
-
93
-
94
-
95
-
96
-
97
-
98
-
99
-
100
-
101
-
102
-
103
-
104
-
105
-
106
-
107
-
108
-
109
-
110
-
111
-
112
-
113
-
114
-
115
-
116
-
117
-
118
-
119
-
120
-
121
-
122
-
123
-
124
-
125
-
126
-
127
-
128
-
129
-
130
-
131
-
132
-
133
-
134
-
135
-
136
-
137
-
138
-
139
-
140
-
141
-
142
-
143
-
144
-
145
-
146
-
147
-
148
-
149
-
150
-
151
-
152
-
153
-
154
-
155
-
156
-
157
-
158
-
159
-
160
-
161
-
162
-
163
-
164
-
165
-
166
-
167
-
168
-
169
-
170
-
171
-
172
-
173
-
174
-
175
-
176
-
177
-
178
-
179
-
180
-
181
-
182
-
183
-
184
-
185
-
186
-
187
-
188
-
189
-
190
-
191
-
192
-
193
-
194
-
195
-
196
-
197
-
198
-
199
-
200
-
201
-
202
-
203
-
204
 |
 |
Reassembling
Note:
When
fitting
the
rear
bushing
of
the
document
ejection
roller
into
the
cutout
of
the
ADF
drive
unit,
orient
the
boss
as
illustrated
on
the
previous
page.
Document
pressure
bar
(7)
Open
the
ADF
&
document
tray
ASSY.
(8)
Pull
either
of
the
front
and
rear
supports
of
the
document
pressure
bar
outwards
and
remove
the
document
pressure
bar.
The
spring
also
comes
off.
Document
pressure
bar
Supports
ADF
&
document
tray
ASSY
•
Document
pressure
bar
Spring
Spring
Setting
the
spring
(Viewed
from
"X")
0
Correct
Wrong
O
0
0
0
Reassembling
Note:
After
setting
the
document
pressure
bar,
check
in
the
direction
of
arrow
"X"
that
the
spring
is
into
place
as
illustrated
above.
4-14