Dell PowerEdge C6300 Dell PowerEdge C6320 Owners Manual - Page 55
adapter assembly, mach screw 3, hard-drive carrier
 |
View all Dell PowerEdge C6300 manuals
Add to My Manuals
Save this manual to your list of manuals |
Page 55 highlights
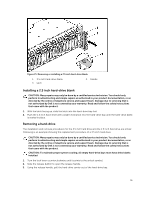
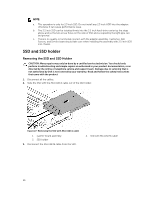
Figure 25. Removing and installing a adapter assembly from the hard-drive carrier 1. adapter assembly 3. hard-drive carrier 2. mach screw (3) 5. Do not install screws in the two screw holes on the side of SSD, which are occupied by the light pipe. Figure 26. Screw holes on the side of SSD and occupied by the light pipe 55
-
 1
1 -
2
-
3
-
4
-
5
-
6
-
7
-
8
-
9
-
10
-
11
-
12
-
13
-
14
-
15
-
16
-
17
-
18
-
19
-
20
-
21
-
22
-
23
-
24
-
25
-
26
-
27
-
28
-
29
-
30
-
31
-
32
-
33
-
34
-
35
-
36
-
37
-
38
-
39
-
40
-
41
-
42
-
43
-
44
-
45
-
46
-
47
-
48
-
49
-
 50
50 -
 51
51 -
 52
52 -
 53
53 -
 54
54 -
 55
55 -
 56
56 -
 57
57 -
 58
58 -
 59
59 -
 60
60 -
61
-
62
-
63
-
64
-
65
-
66
-
67
-
68
-
69
-
70
-
71
-
72
-
73
-
74
-
75
-
76
-
77
-
78
-
79
-
80
-
81
-
82
-
83
-
84
-
85
-
86
-
87
-
88
-
89
-
90
-
91
-
92
-
93
-
94
-
95
-
96
-
97
-
98
-
99
-
100
-
101
-
102
-
103
-
104
-
105
-
106
-
107
-
108
-
109
-
110
-
111
-
112
-
113
-
114
-
115
-
116
-
117
-
118
-
119
-
120
-
121
-
122
-
123
-
124
-
125
-
126
-
127
-
128
-
129
-
130
-
131
-
132
-
133
-
134
-
135
-
136
-
137
-
138
-
139
-
140
-
141
-
142
-
143
-
144
-
145
-
146
-
147
-
148
 |
 |
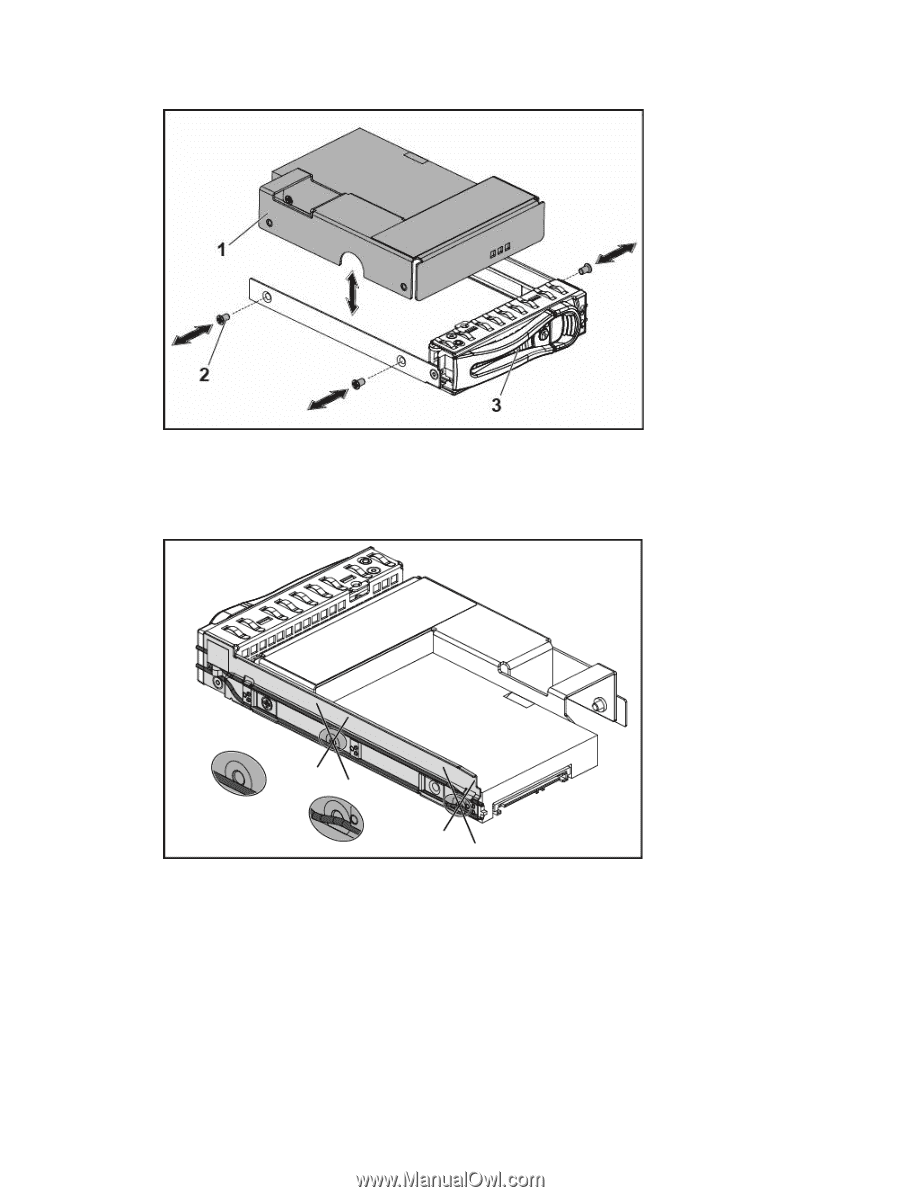
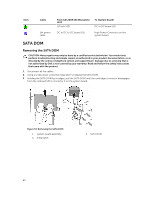
Figure 25. Removing and installing a adapter assembly from the hard-drive carrier
1.
adapter assembly
2.
mach screw (3)
3.
hard-drive carrier
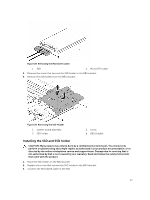
5.
Do not install screws in the two screw holes on the side of SSD, which are occupied by the light pipe.
Figure 26. Screw holes on the side of SSD and occupied by the light pipe
55