Dell PowerEdge C6300 Dell PowerEdge C6320 Owners Manual - Page 90
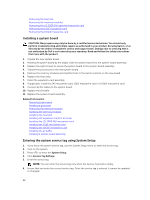
Exit the System Setup program., while installing or removing a battery.
 |
View all Dell PowerEdge C6300 manuals
Add to My Manuals
Save this manual to your list of manuals |
Page 90 highlights
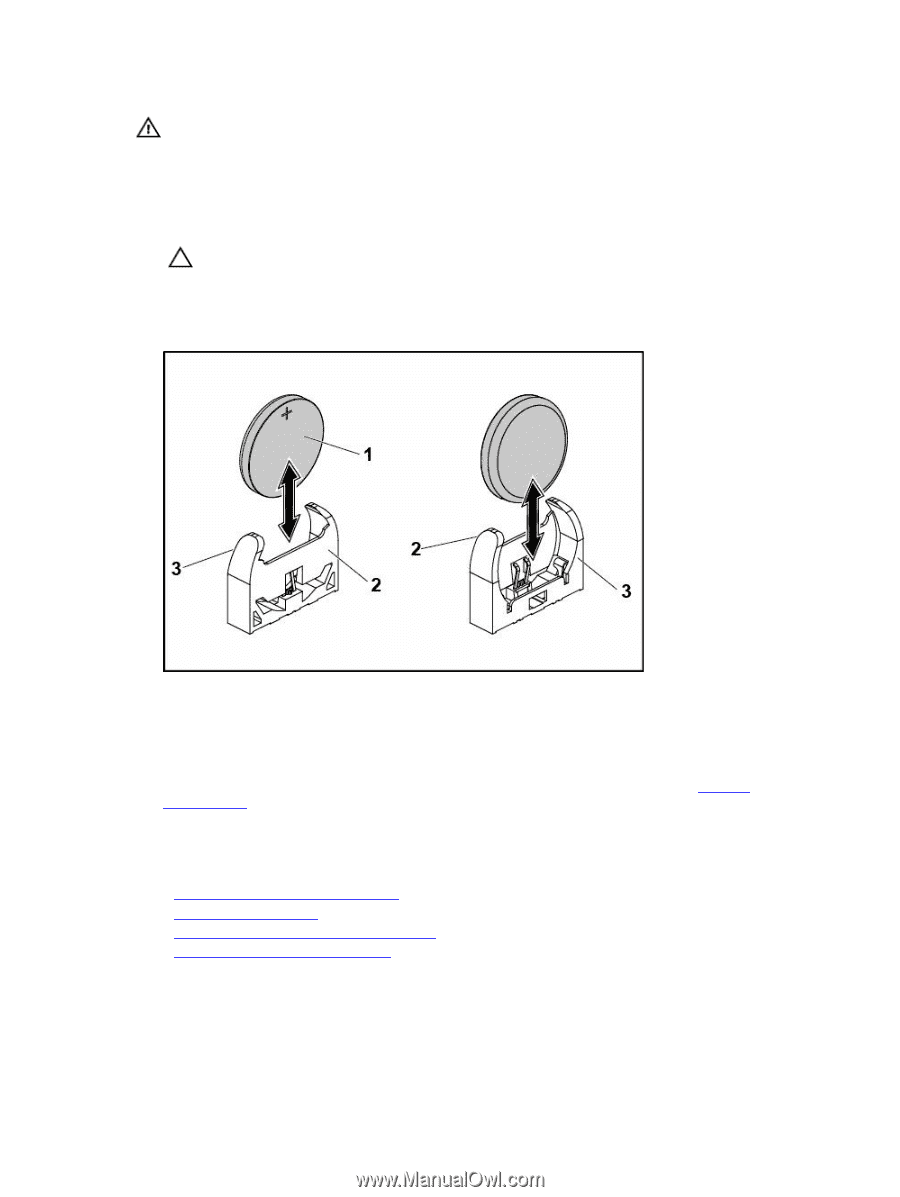
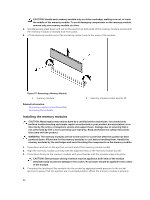
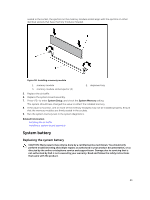
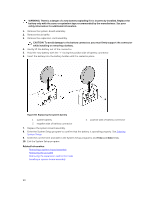
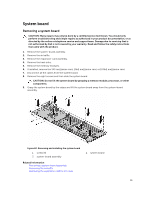
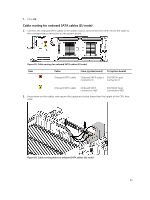
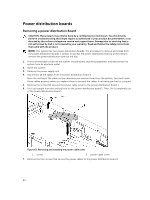
WARNING: There is a danger of a new battery exploding if it is incorrectly installed. Replace the battery only with the same or equivalent type recommended by the manufacturer. See your safety information for additional information. 1. Remove the system-board assembly. 2. Remove the air baffle. 3. Remove the expansion-card assembly. CAUTION: To avoid damage to the battery connector, you must firmly support the connector while installing or removing a battery. 4. Gently lift the battery out of the connector. 5. Hold the new battery with the "+" facing the positive side of battery connector. 6. Insert the battery into the battery holder until it is seated in place. Figure 59. Replacing the system battery 1. system battery 3. negative side of battery connector 2. positive side of battery connector 7. Replace the system-board assembly. 8. Enter the System Setup program to confirm that the battery is operating properly. See Entering System Setup. 9. Enter the correct time and date in the System Setup program's and Time and Date fields. 10. Exit the System Setup program. Related Information Removing a system-board assembly Removing the air baffle Removing the expansion card for 1U node Installing a system-board assembly 90
-
 1
1 -
2
-
3
-
4
-
5
-
6
-
7
-
8
-
9
-
10
-
11
-
12
-
13
-
14
-
15
-
16
-
17
-
18
-
19
-
20
-
21
-
22
-
23
-
24
-
25
-
26
-
27
-
28
-
29
-
30
-
31
-
32
-
33
-
34
-
35
-
36
-
37
-
38
-
39
-
40
-
41
-
42
-
43
-
44
-
45
-
46
-
47
-
48
-
49
-
50
-
51
-
52
-
53
-
54
-
55
-
56
-
57
-
58
-
59
-
60
-
61
-
62
-
63
-
64
-
65
-
66
-
67
-
68
-
69
-
70
-
71
-
72
-
73
-
74
-
75
-
76
-
77
-
78
-
79
-
80
-
81
-
82
-
83
-
84
-
 85
85 -
 86
86 -
 87
87 -
 88
88 -
 89
89 -
 90
90 -
 91
91 -
 92
92 -
 93
93 -
 94
94 -
 95
95 -
96
-
97
-
98
-
99
-
100
-
101
-
102
-
103
-
104
-
105
-
106
-
107
-
108
-
109
-
110
-
111
-
112
-
113
-
114
-
115
-
116
-
117
-
118
-
119
-
120
-
121
-
122
-
123
-
124
-
125
-
126
-
127
-
128
-
129
-
130
-
131
-
132
-
133
-
134
-
135
-
136
-
137
-
138
-
139
-
140
-
141
-
142
-
143
-
144
-
145
-
146
-
147
-
148
 |
 |